I created a showcase or portfolio page on Wordpress to feature several pieces since I had enough to show that was drawn in different styles, techniques and tools. I even included a render that was made in Infini-D to show what I could make with an old 3D program, but I didn't have anything that was ready that I made in Blender.
Aside from incomplete experiments, all I had were backgrounds that I modeled for a couple of scenes. I didn't have any pieces that could be featured. For a completed piece I could add, I decided to model the Shooting Star Vega weapon! Of the magical weapons that have appeared in Magical Renegades, it's design was fairly straightforward while it'd still provide a challenge to model.
There's a practical bonus. This was the perfect opportunity to start modeling references for the magical weapons so they could be easily drawn at different angles!
The original version of part 1 of this WIP was posted last summer before it was adapted here. I learned a lot more about modeling in Blender since then! While I worked on part 1, Vega got a redesign that would be back ported to the webtoon! On with the WIPs!

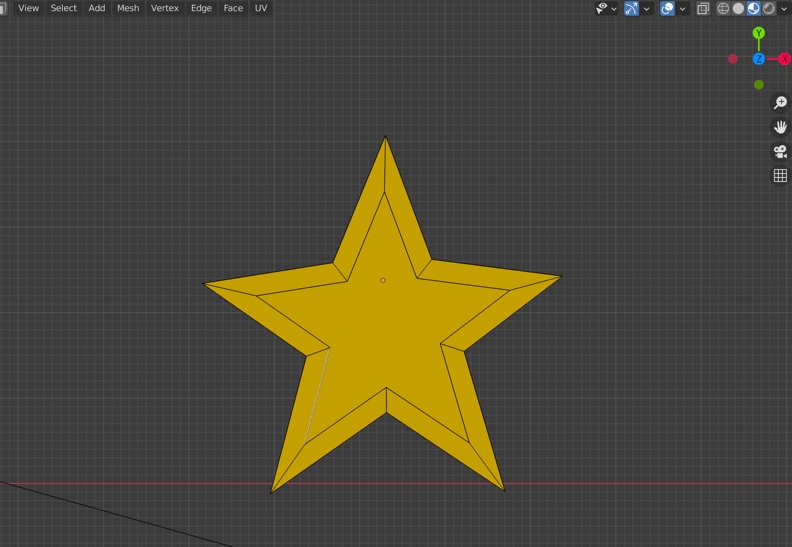
The star shape that most of the magical weapons have was created using Add >> Mesh >> Single Vert. The camera was set to a top-down view, and I extruded (cmd + "E") the vertex to make each edge. I moved and extruded the vertices only along the X or Y axes ("g" + "x" and "g" + "y") only to keep any of them from being placed above or below each other on the Z-axis to keep them even.
Later addition: I later found out that the star shape could be created automatically. It's one of the extra objects in the Add Mesh: Extra Objects add-on! Knowing this would've saved me some time! ^^;
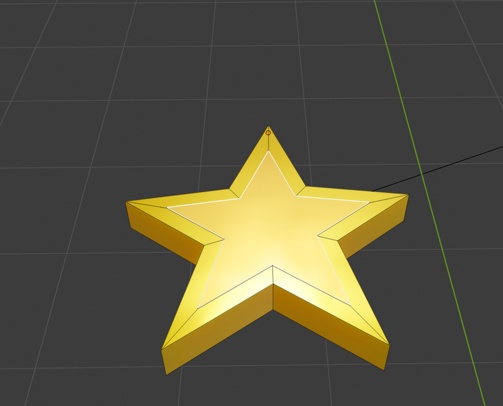
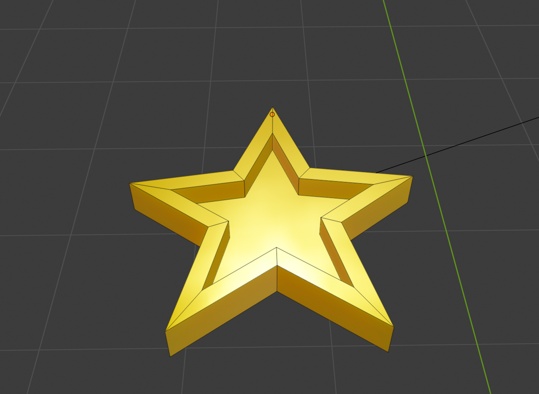
I inset a face in the middle, and extruded it downwards along the Z-axis.
Vega had a flame decal on the blade before I decided to replace it with a few lines to subtly give a visual reference to shooting stars. This was easier to consistently draw and model, but before this redesign, I created the flame decals with the same techniques to extrude from a single vertex along the X and Y axes.
It didn’t need to start precise. I extruded the vertices roughly into the shape, selected them all (in Edit mode) filled in the vertices ("f" in Edit mode) and subdivided it to create several more vertices along the edges and used proportional editing to move some of them to smooth out the entire shape.
Using the Solidify modifier added an oh so slight bit of thickness to it. It was set along the blade so it didn’t stick out very far, but the slight thickness let me round and polish it with sculpting tools.

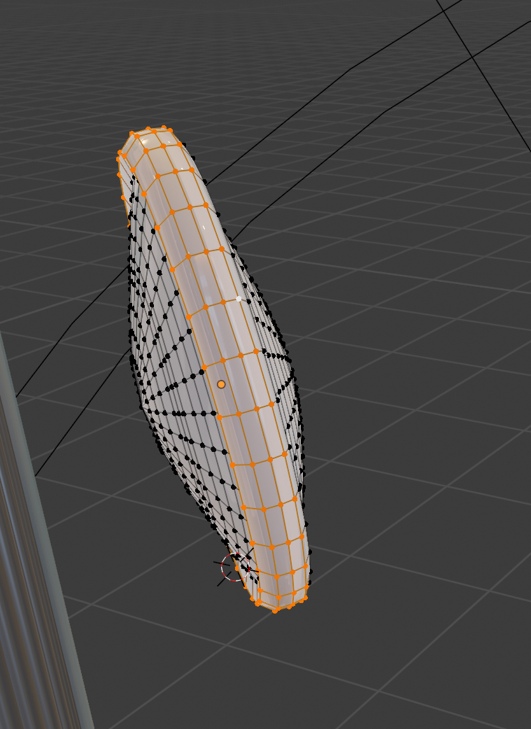
The redesign used a similar technique. Creating several subdivisions of the lines, and moving the middle vertices of their edges closer to the blade in proportional editing mode (circled) rounded them.
Molding the power lights and the borders around them was another of the most difficult parts. T__T They were created from one cube mesh scaled down to a narrow rectangular shape, a face was inset in the middle and extruded inwards to fit the lights. To make them fit the weapon shaft, I had to use the Spin tool on the vertices of each end just enough to slightly wrap around.
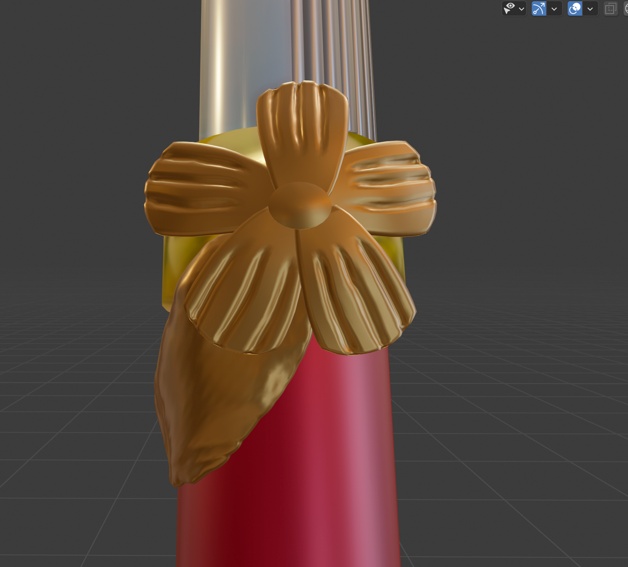
This required extensive use of the sculpting tool to keep adjusting the width of the borders, and smoothing them out, but the leaf decals on the handle took even more time to smooth out to a satisfying degree! The ridges didn’t turn out well when I tried to draw them after trying to get it right for hours. ;__;
I started part 1 of this WIP last summer, and started this draft soon after I published part 1 to Record Compendium, but I wasn't sure how to continue it that it was put on hold. I had so many ideas but I couldn't decide what to include beyond showing Vega as the center focus, that the piece I wanted to render would show off tools that I learned, and that it'd feature metallic, patterned, reflective and glowing effects.
The ideas were inspired by CGI demo images from the 80's and 90's that incorporated a lot of reflections, metals and patterns to show off the hardware's and software's ray tracing capabilities. I was stuck, but found a way forward and see how I can finish this!
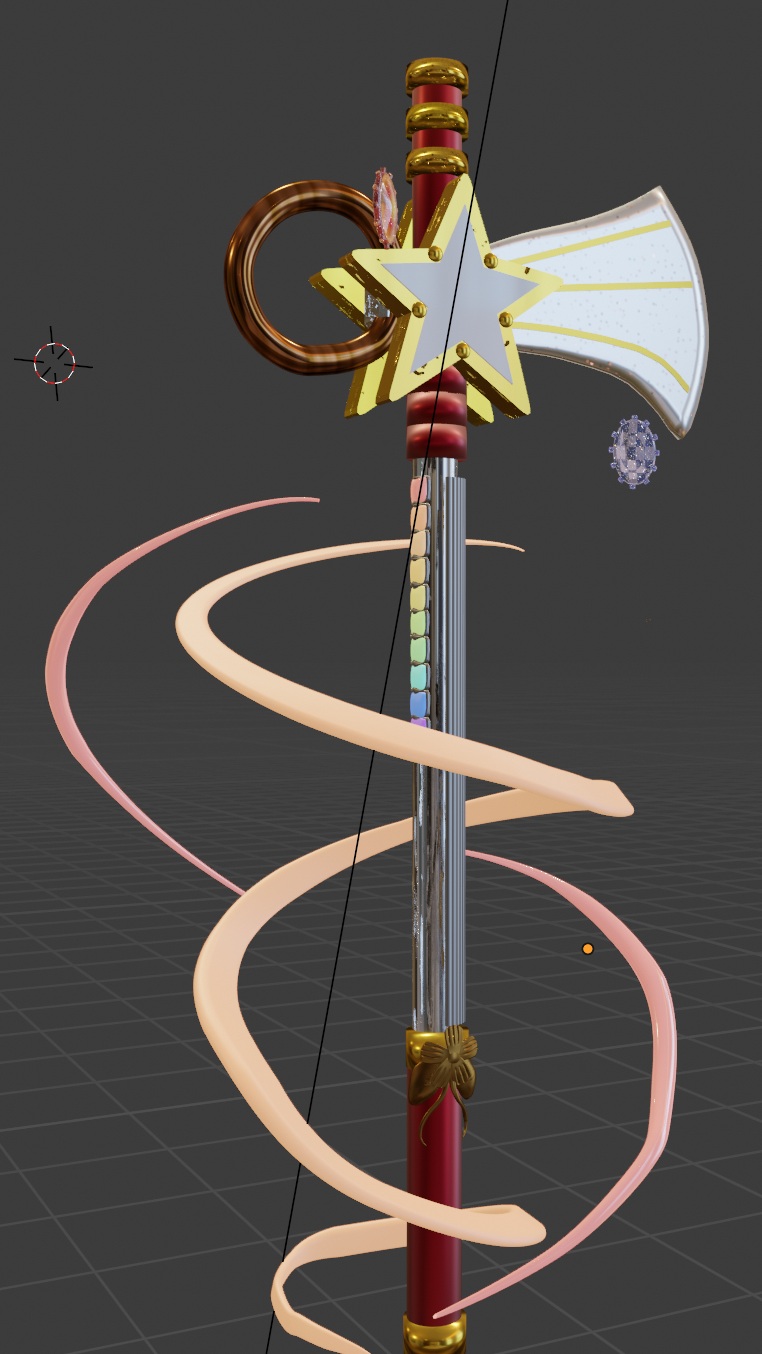
Material preview version; shows the detailed textures more clearly.
Vega surrounded by magic superconductor crystals and streams of glowing magical energy! The magical energy streams were made from Bézier curves and it was my first experiment using them in Blender!
These are from this WIP before it was put on hold so I've had some practice with Bézier curves since then. The textures are a new addition after I resumed it. The textures use nodes in the Shading tab. They can get complicated, but I learned of these from great video tutorials that explain everything step by step. There are many pre-made textures that are available, and getting some could save a lot of time, but I've also wanted to follow along with video tutorials that explain how the various nodes are used and how they affect each other so that I can understand them.
The shaft of Vega is brushed metal that has scratches; it's sometimes been used as a melee weapon! The round pipe is a brushed brass. I couldn't decide whether the blade should be made of the same scratched brushed metal texture as the shaft, or if it a magic crystal-infused alloy, which could further enhance the magical capabilities of the weapons. This WIP shows the latter, which I'm leaning towards, and I think it's a nice contrast with the grittier look of the shaft.
If I model others, they'll have at least one part with that alloy. That could help balance sparkliness and grittiness! Steampunk and magical girl aesthetics are easy to combine when designing outfits, but not quite as easy when designing weaponry! Many magical girl series have shiny and sparkly aesthetics while steampunk is grittier.
They were easy to model, but these steps are a reconstruction of the process I used because I didn't take any screenshots before I started writing about this WIP, so I needed to retrace some of my steps, and take some new screenshots when I resumed writing this post. I avoided this mistake with the coloring tutorial by preparing the screenshots and writing down the steps as I continued coloring!
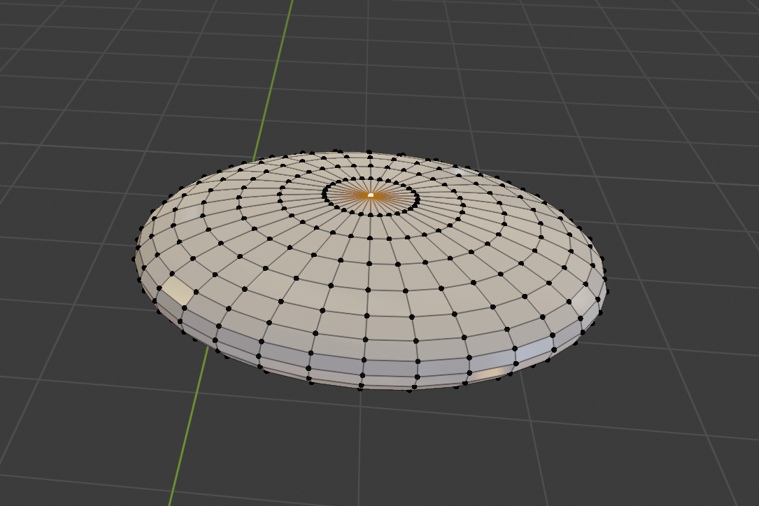
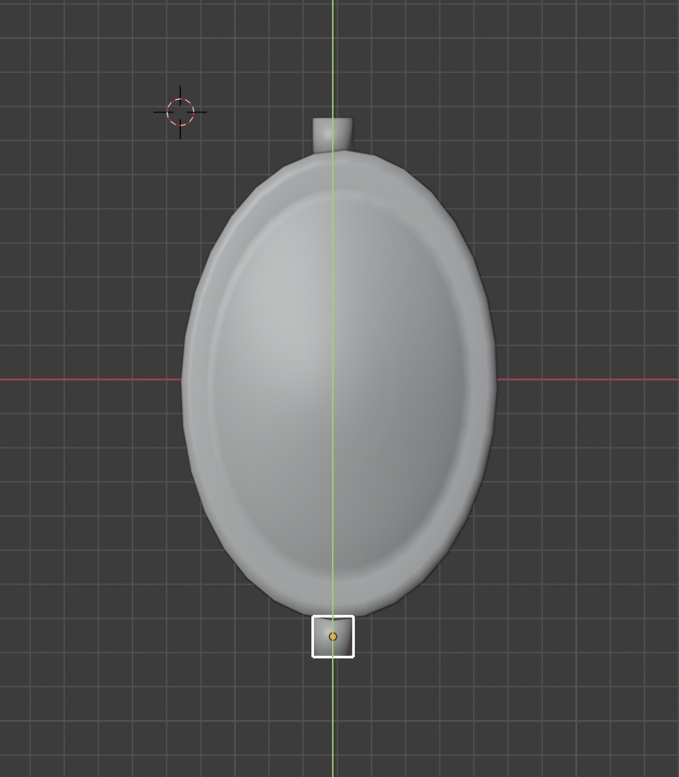
The base part of the crystal is a sphere mesh. Scale the sphere along one of the axes by pressing x, y or z to flatten it. I flattened it along the Z-axis. In proportional editing mode, select the vertex in the flattened middle, move it out, but adjust the falloff radius so the surrounding faces closest to it would be affected without affecting the faces furthest away. This will round out the middle, and keep a flat groove along the outside. Repeat this for the other side.
Later addition: This may also be doable by having only one half of the mesh, and automatically generating the other half with the Mirror Modifier. This would ensure that any changes to one half will evenly apply to the other.
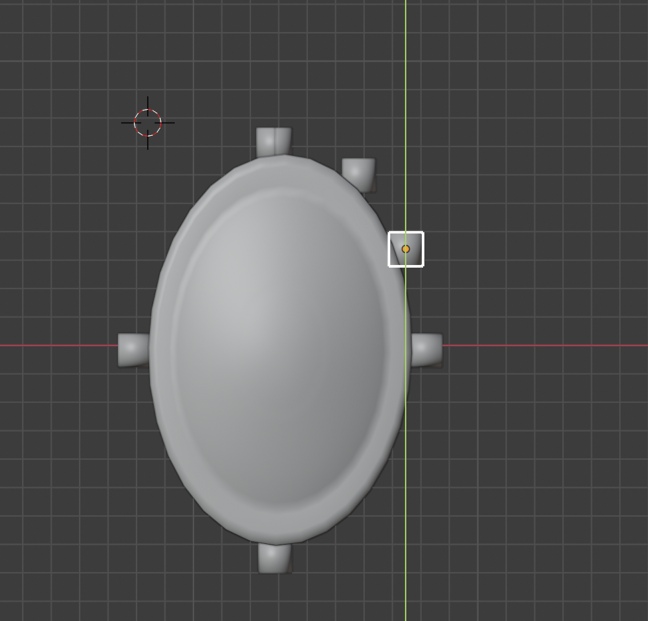
Select the inner edges of the rim and scale them down to same size as the outer edges to flatten the rim. The spokes are just small cylinder meshes that were scaled down to fit along it.

The easiest way to place them is by aligning the base crystal along the X and Y axes while the camera is in the top or bottom orthographic views (Click the Z-axis on the camera controller or press 7, or press 9). Either would work. I used the top orthographic view, and this example places the crystal along uses the X axis as a dividing line. The first spoke can be placed along the top of the crystal, and duplicated. The duplicate can be moved along the Y-axis until the top of it meets the bottom of the crystal.
The spokes can be duplicated again, rotated 90 degrees along the Z-axis (r + z + 90) and moved closer to the ridge of the crystal along the X-axis to create the next two. They'd be put in place by rotating them along the Z-axis until their bases align with the ridge.
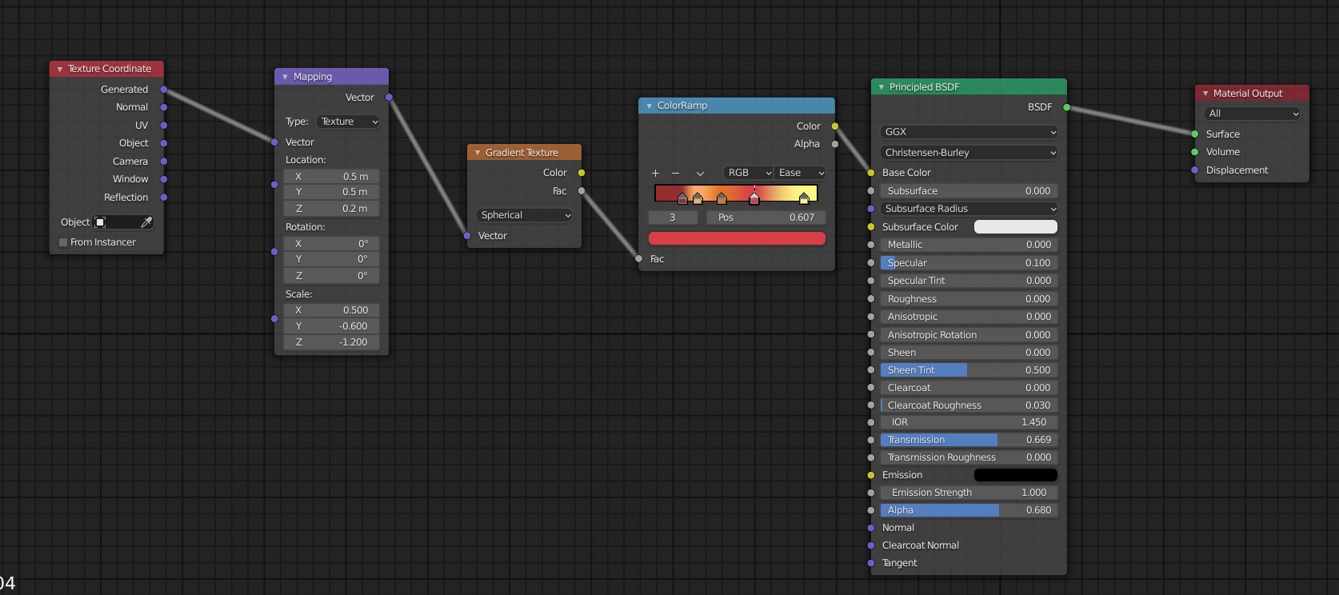
These are the nodes I used to make the base gradients. The Spherical setting in the Gradient Texture node set the shape of the gradient, which plugs into ColorRamp to set the colors! Texture Coordinate plugs into Mapping, which plugs into Gradient Texture. These two nodes before Gradient Texture adjust the size and position of the gradient on the crystal from the default since the default didn't neatly fit all of the colors on it. Roughness set to 0 in Principled BSDF makes it the maximum shininess and reflectiveness.
The glitter effects were added in later, and started as a Voronoi Texture ran through nodes to adjust its size, color and glossiness. Mix Shaders combine outputs from different nodes. It wasn't needed when I made the base gradient since the output of Principled BSDF could just plug into the Material Output and that was everything. When I needed to combine them, Principled BSDF and the output of the glitter effects were plugged into the slots on the Mix Shader, and the Mix Shader was plugged into the Material Output.
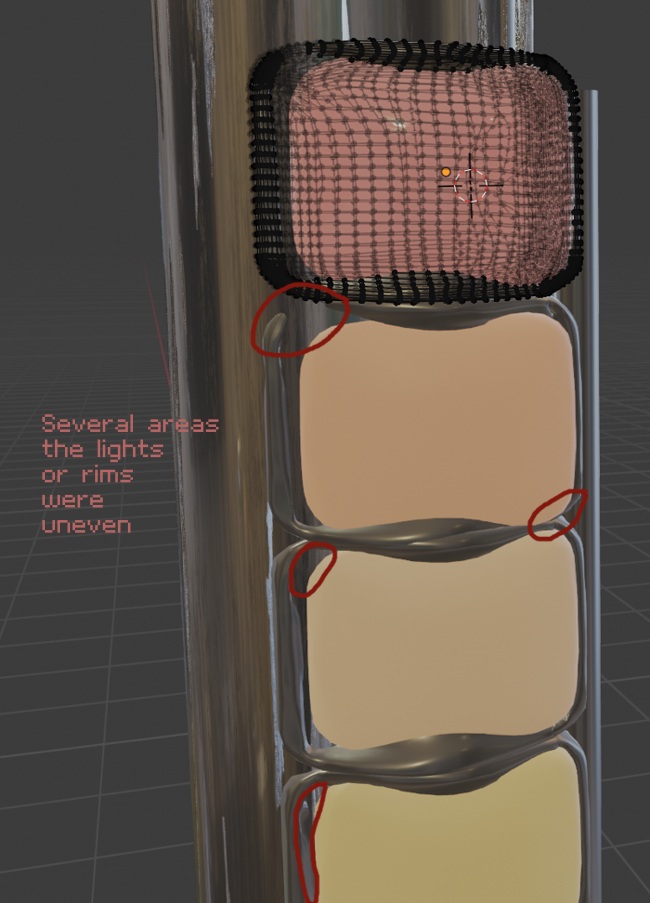
Adding the scratched metal to the shaft exacerbated a problem: The rims around the lights became more uneven and the corners of some of the rims partially sunk in. Moving them forward nor rotating them a little bit didn't work to even them out. Moving a few sunken vertices out to even the rims is out of the question because each of the rims are meshes that are too complex for this! I'll have to start over.
These'll need to be replaced. I created them during the earlier WIP from last summer. The method I used was clunky, but it worked when they were applied to a completely smooth surface. They were rectangular but needed to be curved along the shaft. I curved them with the spin tool, and smoothed them out with sculpting tools, and both of these tools required the mesh to have a high polygon count to be effective! I spent at least an hour trying to fix it with the sculpting tools, and accepted a "good enough" result so I could move on to the next steps.
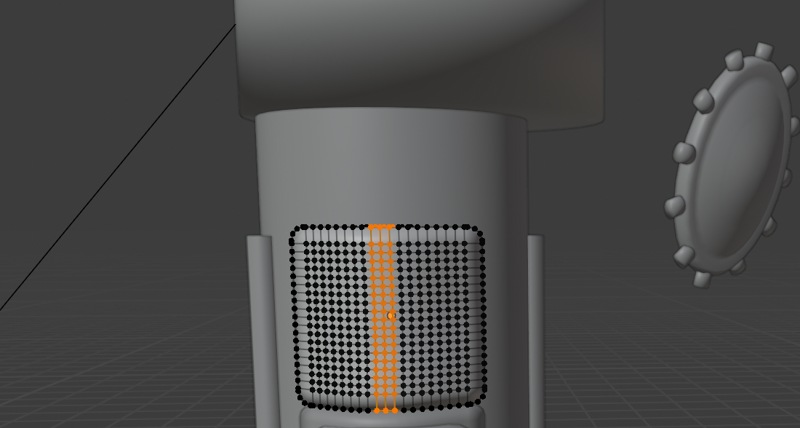
A redo with a much simpler mesh. I started with a plane that was subdivided 10 times, and beveled the corners.
I selected all of the faces to merge into one to inset it and extrude it inwards so the lights would fit into them more smoothly. Rounding the inner corners seemed like it'd be smoother, but that didn't work so well. There were creases around where the inner corners were beveled that I couldn't even out, so I started over modeling the rims, repeated the process, but didn't bevel the inner corners of it The redone mesh also had more subdivisions to make moving it with proportional editing smoother!
With proportional editing on, I selected the middle vertical edges and moved them ahead with enough falloff to make the surrounding edges move a little bit too. There may be a more efficient way to wrap these around a curved surface, but I was able to after some gradual adjustments.
It took another hour to fix these, but they're more even!
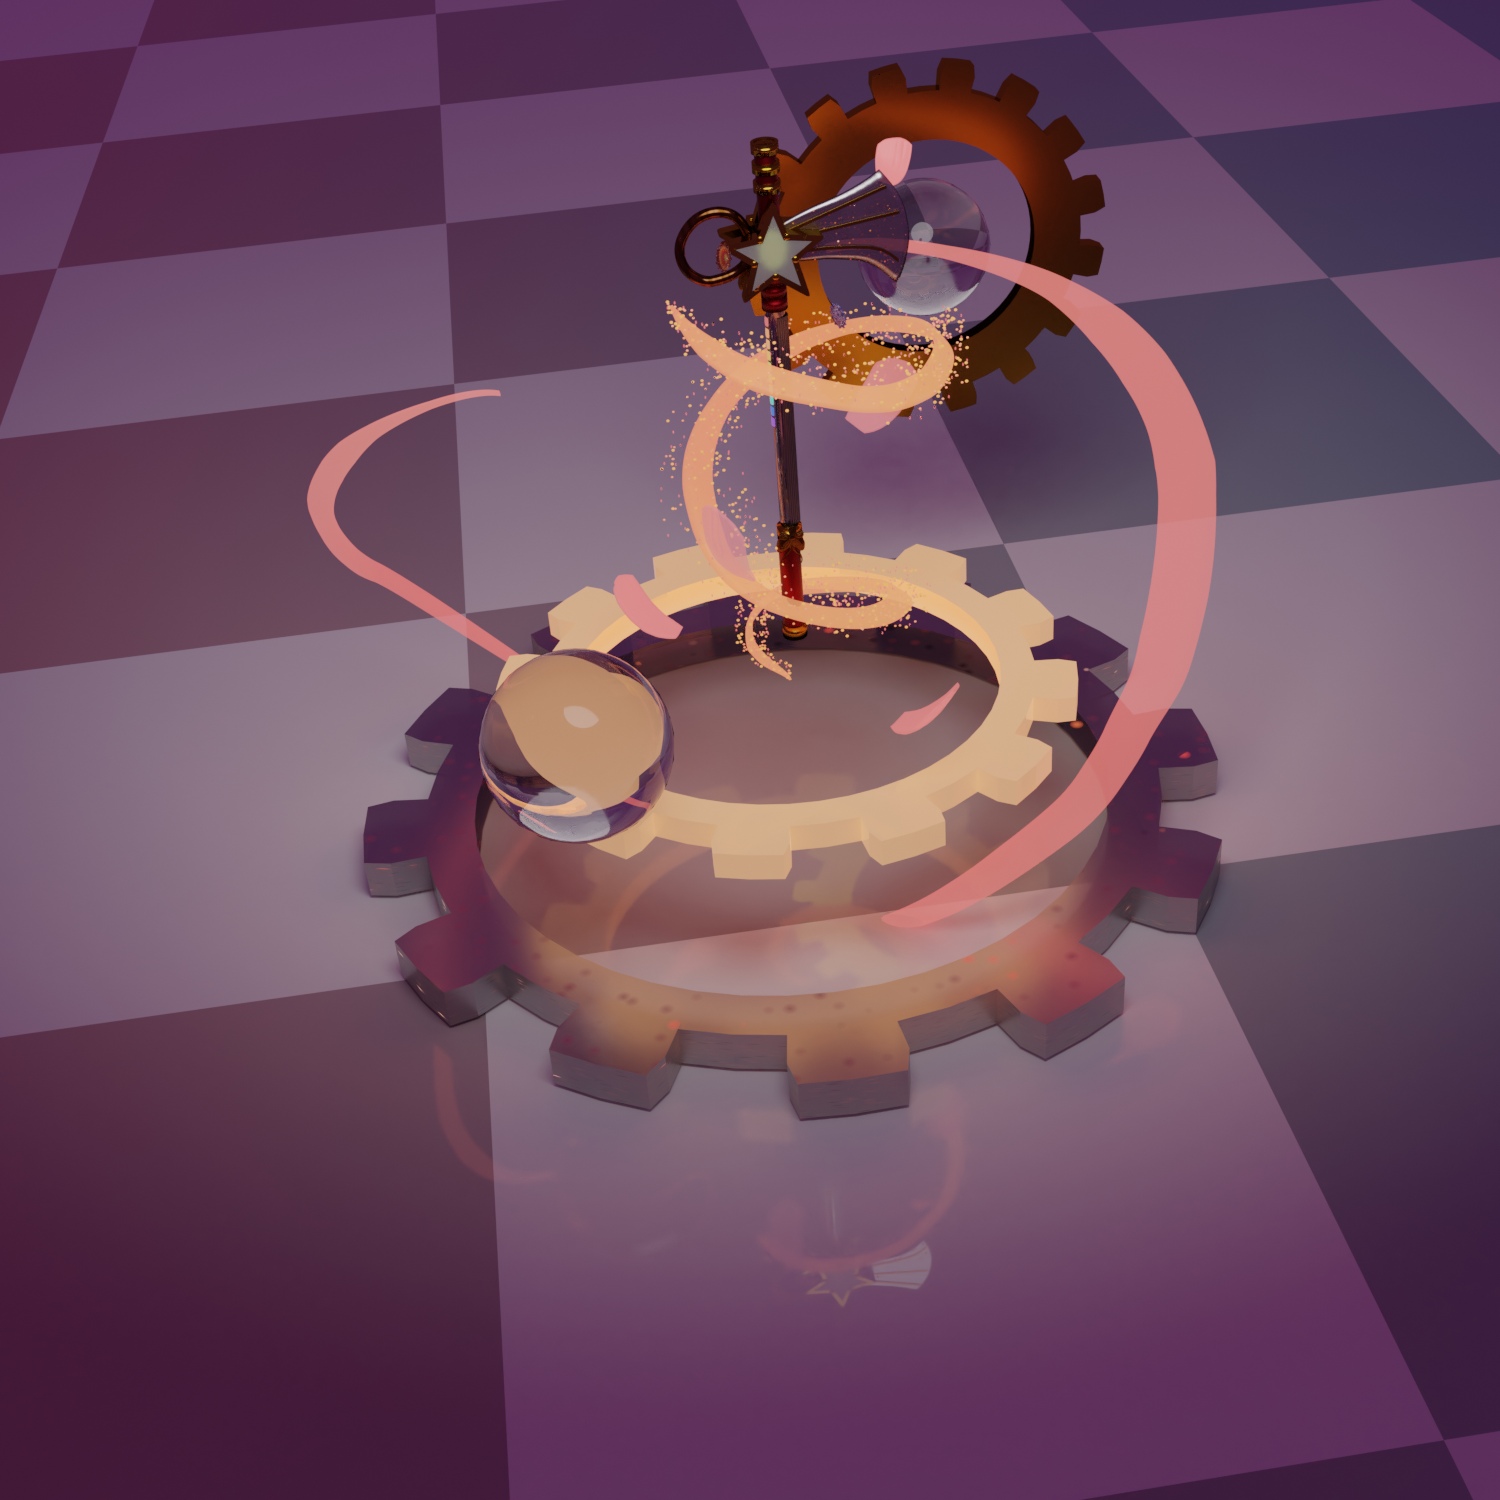
A few more things were added. And glowing gear and metallic gears, flower petals, a reflective checkerboard floor, a couple of glass spheres, and a stream of particles that surround one of the glowing streams. These were arranged to show metal reflecting light, glass and a reflective floor reflecting everything!
The particle system uses an animation to run each of the particles along a curve, and I looked for an ideal frame to stop the animation and render that. A small plane object was placed along the top of the curve to serve as the emitter for the particle system, and the curve had Force Field physics enabled, and the type was selected to Curve Guide so the particles would follow the curve of the stream.
Adjusting the size of the emitter object adjusted how wide and precise the particles would follow the curve. I kept it small enough to be close, but large enough that they could stray a bit to be visible against the stream. The emitter object can be hidden by unmarking Show Emitter in the Render section of the Particle Properties tab.
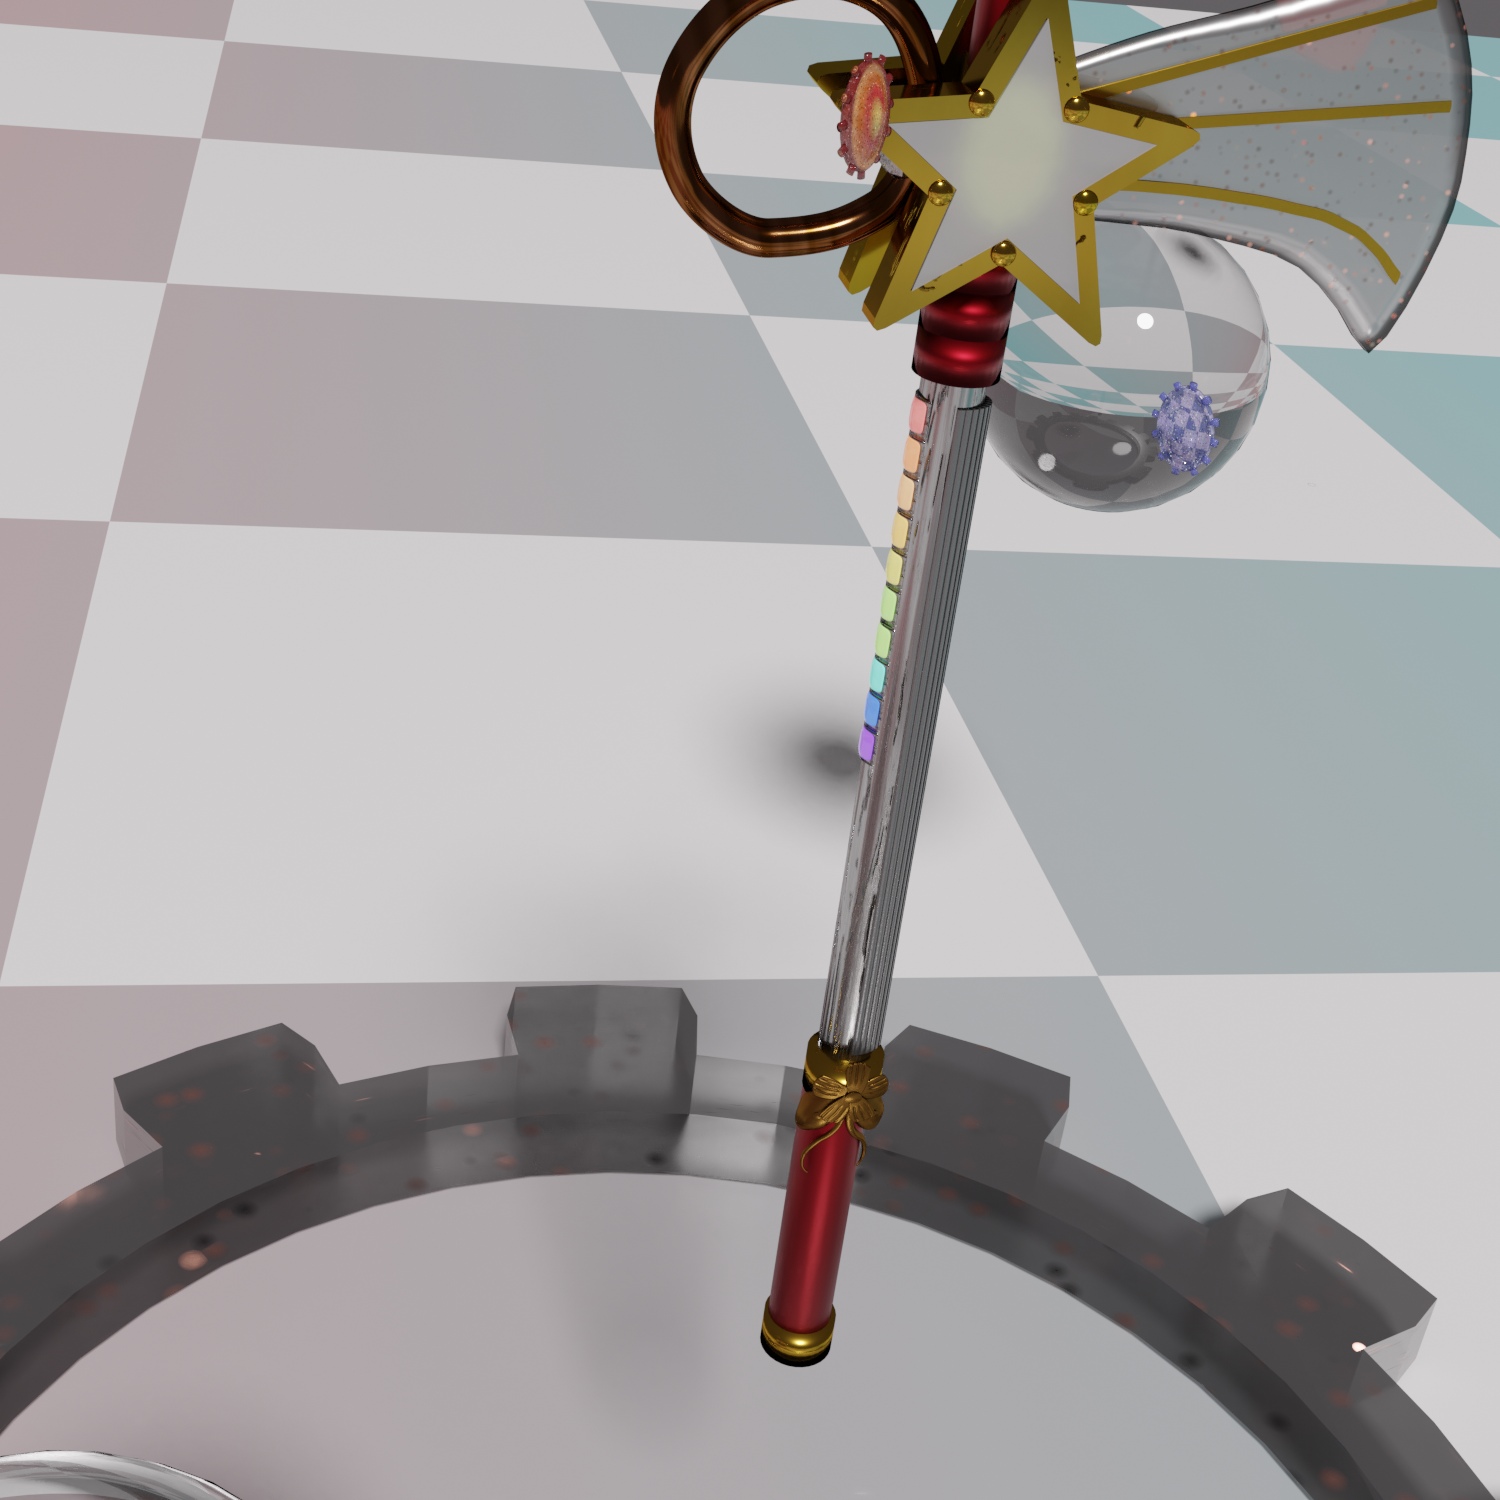
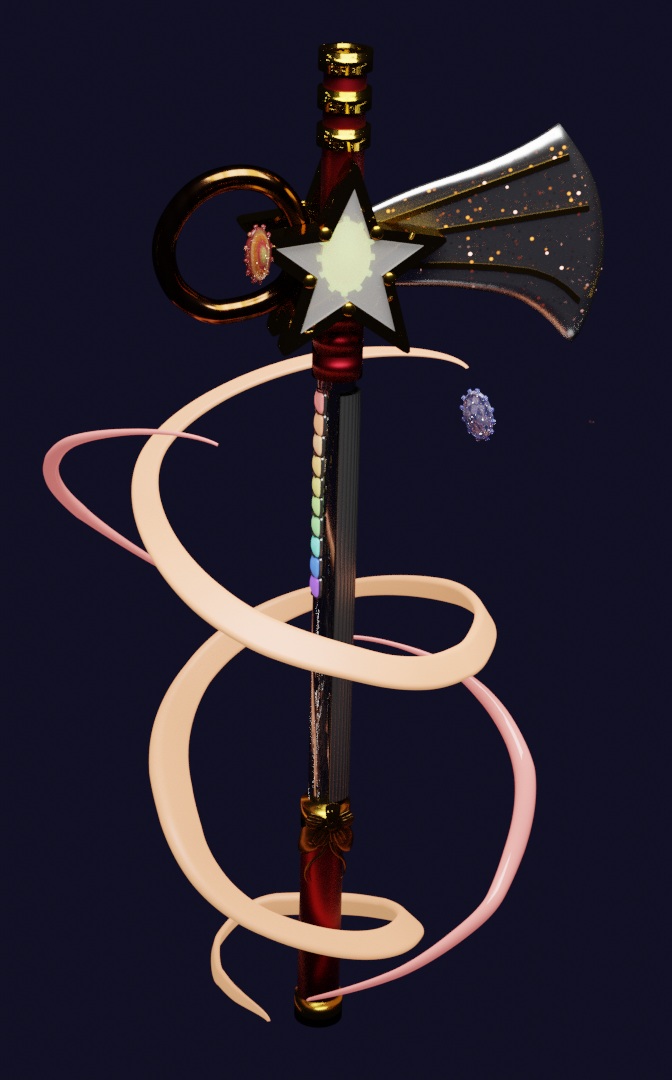
Another render with brighter lighting and fewer objects to more clearly show the textures.
There were a couple more objects I wanted to add to this render, but they couldn't make the final cut. :(
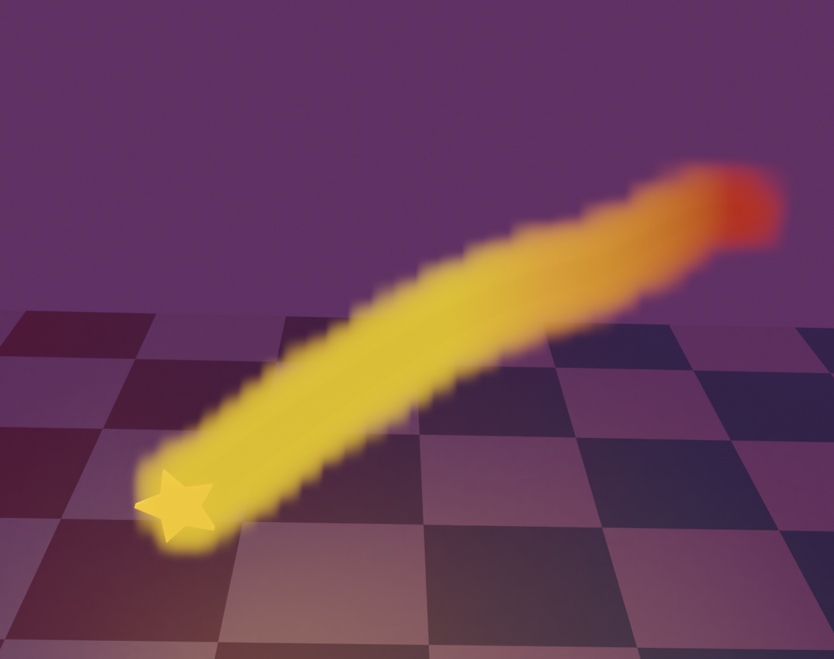
I also modeled a shooting star with a glowing fiery smoke trail in the background, but they had to be left out of the render because the smoke animation would stop before the particle animation finished moving along the stream! This is what it looked like but it could've been polished a bit more by adjusting the resolution: