
"Let's keep moving them..."
The behind the scenes area has grown! The News Stand archive was getting pretty big with all of the recent WIPs that it was more organized to split off the WIPs and other posts about the production into this page!
Since episode 24 of Anathema to Commonsense, the update schedule slowed down because of increased production time, but updates haven't slowed here! Episode 24 was all new aside from a panel or two. 25 and 26 feature extensive use of 3D modeling. These WIPs include steps of the production process, and techniques that were tried in that episode.
I learned a lot as I went when producing these, so expect ramblings about trial and error!
Episode 40 production notes
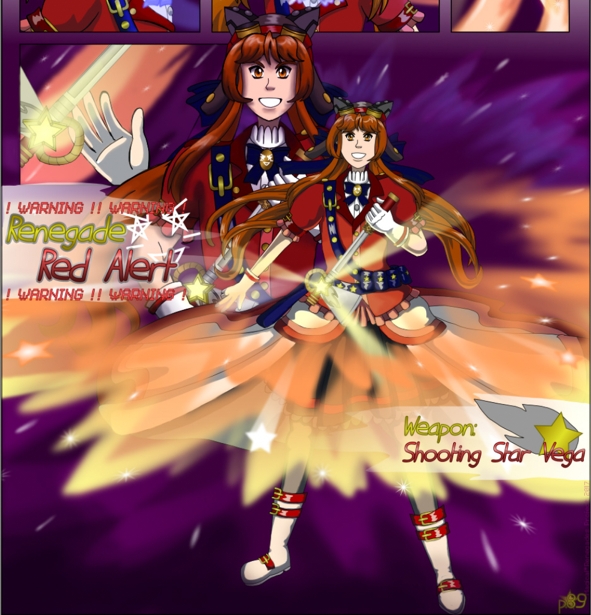
This is another large expansion as with the past few episodes since Renegade Knockout Tango is added to these scenes when she wasn't originally in the previous comic version, but there's more! I extensively used 3D modeling for the outdoor scenes, redesigned Legionnaire Princess' outfit for when she appeared and tweaked some dialogue.
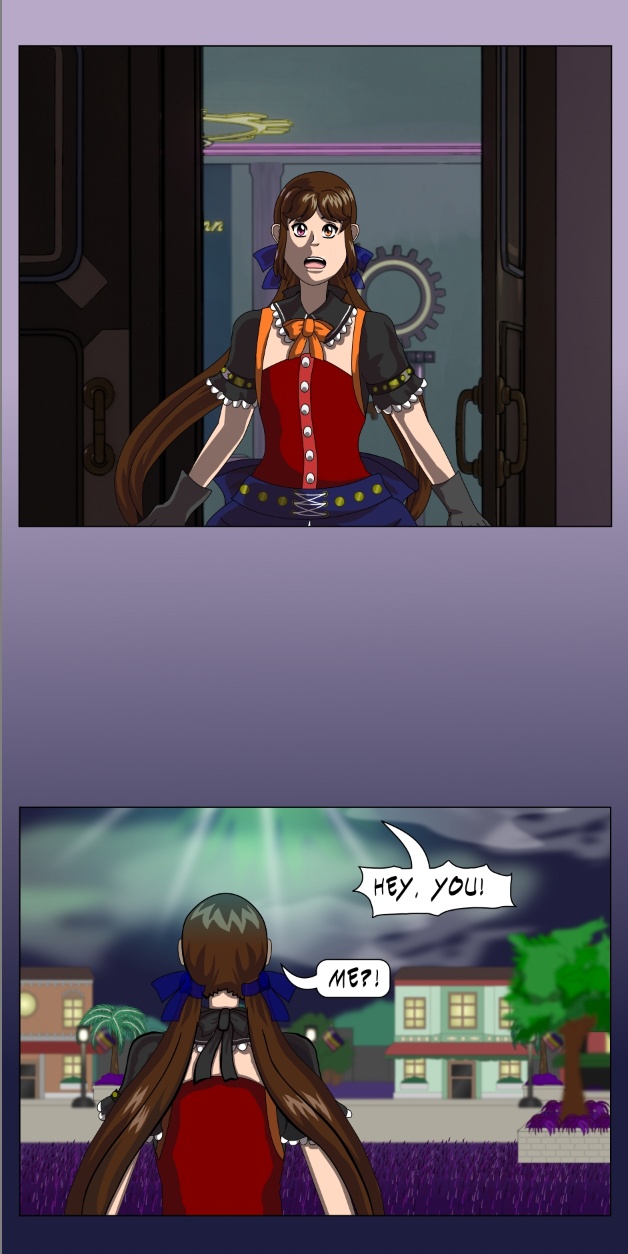
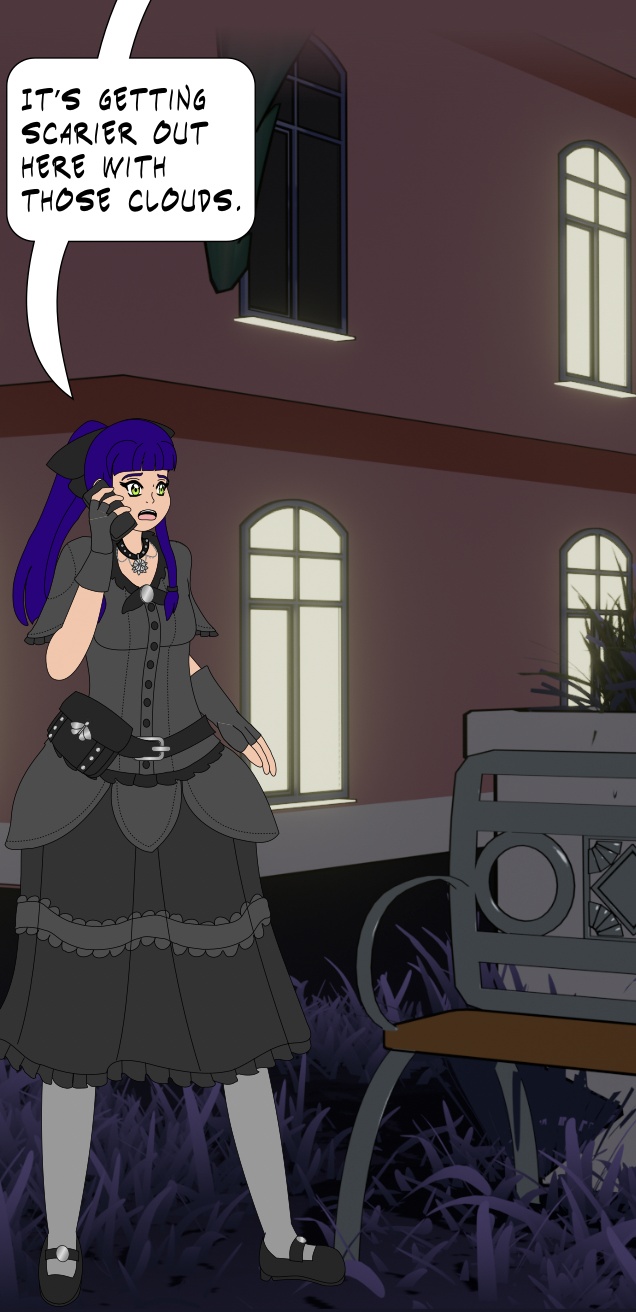
To show that a significant amount of time passed since Katt left the hotel in episode 32, I added a new scene that shows Melody, Alicia and Camelia being outside and trying to find her. This also brings focus back to these characters who haven't appeared in several episodes and even up to a year of real world time!
This'd also be consistent with Ella's character; as a teacher she's responsible for her students' whereabouts and off-screen she could've had a hand in trying to form a search party and be prepared to file a missing person report if needed.
For these outside scenes I remade the exterior of the Stranded Inn Time hotel and modeled one of the buildings and a few trees that were in the background from episode 32:
The second WIP introduced this remake with previews of panels that feature it.
This remake is in a separate file from the one I used for the interior since it's only for the exterior and avoids the issue of having to hide every interior object and ensure they don't appear in the renders. Some of the exterior details were modeled in the first file so I could render the shots that needed to show the windows and the shot of Katt standing in the doorway before she left the building, but I didn't model them very efficiently.
The techniques I used for it:
These techniques made hiding and un-hiding large sections of the hotel easy. There are so many objects in the interior that grouping them together by area or floor is essential. However through more experience with I realize I could've been more efficient with this. 😩 My first hotel model doesn't need the exterior to be complete, but it looked uneven because I didn't perfectly line up the front and side walls with each other.
I use the Archimesh add-on to create walls but I should’ve kept the front walls of each floor in the same object to ensure they'd be lined up and consistent. The windows along the walls could stay their own object collections, but the walls may not have needed to be part of it. Archimesh also makes it easy to configure each of the walls for a room as a single object and the technique I used was much less efficient.
When I need to hide just part of a complete set of walls for a room, I can just select the part I need to hide with the hide command and un-hide it later.
Refinements for the remodeled exterior and this scene:
The Array Modifier is such a useful and time-saving modifier, and even more now that I'm adding line art to the objects with a manual process! I used it for the windows on both buildings, the planters along the hotel and for the street lights.
When using the Solidify modifier to create an outline for an object, it's far more efficient to add it then the Array modifier so all of the objects in the array will have the outline applied to them.
The most fun parts of modeling the hotel exterior were building onto it with the trees, planters and benches outside. These additions were inspired by fancier hotels and I thought the outside area looked too plain before. It was also satisfying seeing most of the Blender experiments I did a few months ago carry over into this scene, but the most tedious part was manually adjusting all of the colors for cel-shaded materials for this night-time scene since they don't respond to changes in lighting with the technique I'm using.
I wonder if there's any post-processing in Blender that could handle changes in lighting for all materials. Compositing in Blender is something I'm still not familiar with aside from knowing of the Kuwahara node to give renders a painterly effect.
In this episode the colors are a bit different and darker because the characters and objects have a dark blue or dark purple layer over them in Soft Light mode to fit them in with the night scenery. I manually added this in Krita after I started my finishing touches for the episode and it could get tedious because I wanted to apply this color layer to objects in the background, but not the skies in them and many of the backgrounds were 3D rendered.
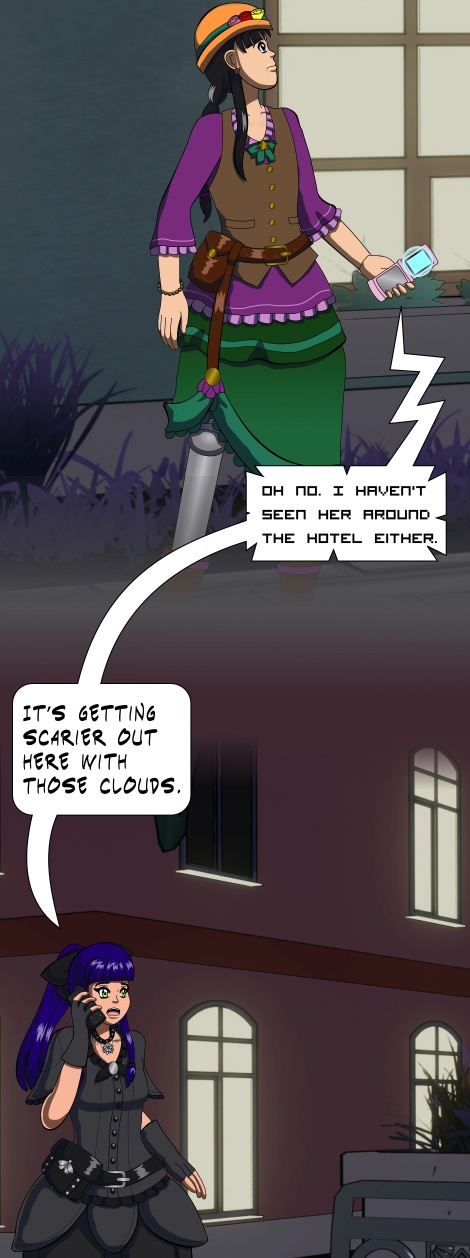
I was excited for them to re-appear with new outfits! Melody's and Alicia's follow the general pattern of being based off of late 19th century fashions with steampunk elements, but less restrictive in that wearing short sleeves or wearing skirts as high as knee-length are socially acceptable. In real life there were attempts at dress reforms in the late 19th century to make women's fashions far more practical.
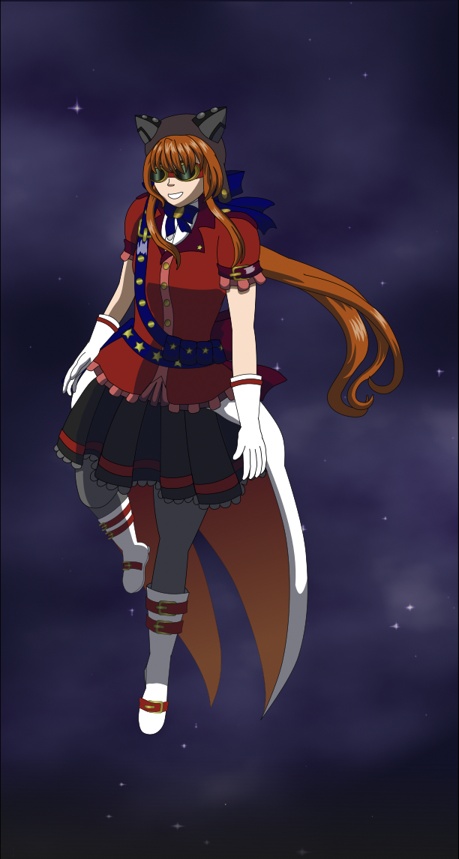
Melody's outfit is in browns, greens and purples though she also wears her orange hat. This reflects her skills with gathering or growing herbs and making potions from them.
The panels with her show that she's using an old school Motorola RAZR as her phone, like Kayla has. I thought over whether that'd be more fitting for Melody or whether she might find a smartphone to be more useful because there are apps for nearly everything, and that includes apps for identifying plants. Between the two, the retro option won out 😆
Alicia's outfit is based on moth fashion goth fashion with moth design elements to it, because butterflies are cool but moths are underrated. For a long time I didn't know that they came in a lot of different patterns and colors 😭
Camelia's outfit is based on the color scheme of her usual outfit and also based on 1920's fashion but the long jackets that were fashionable at the time give her a detective look, which is very fitting for this scene.
Her outfit and hairstyle were redesigned to remain fancy but be easier to consistently draw. She had a large hat with a daffodil emblem on it which showed her ties to the Mallory Family (spoiler: She's Chelsea), which have a daffodil and belladonna as their emblems.
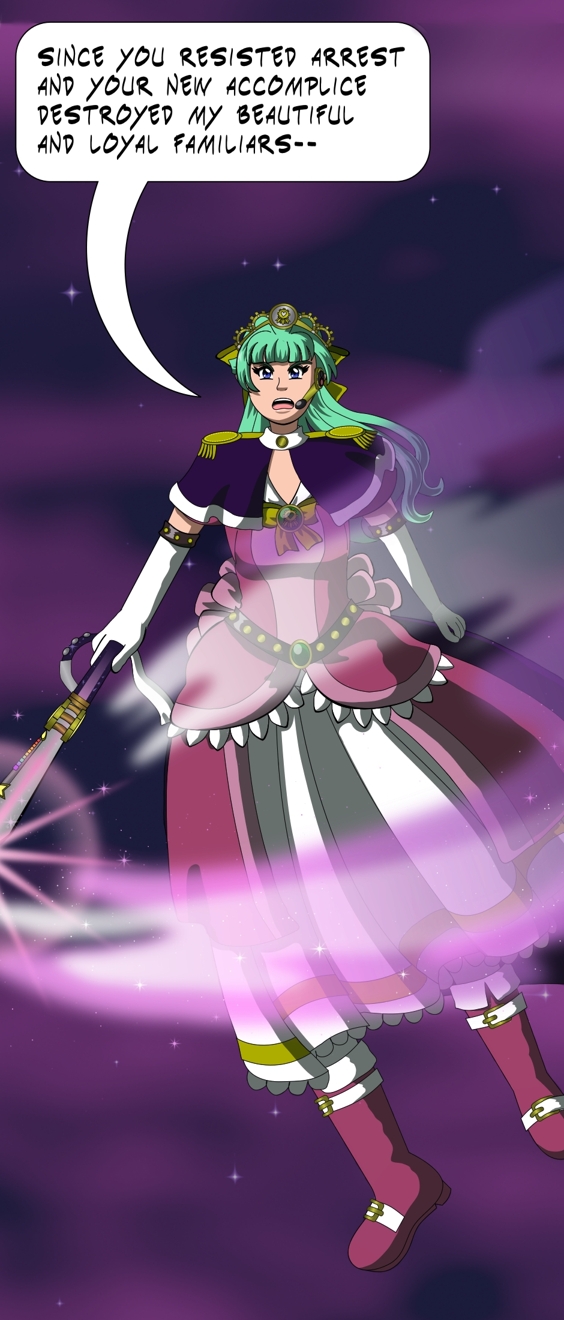
My first choice was for her to wear a tiara but that would’ve been too much of a pain to draw at different angles, but I also removed the hat with the daffodil emblem on it from her redesign because I thought it was too unwieldy and so she doesn’t make it immediately obvious that she’s Chelsea. However, two of the Renegades she's confronting might still recognize her, or crossed paths with her without knowing it...
I replaced her hat with a steampunk tiara because it's fitting for her being a princess and looks cool! It might still be a pain to adjust at different angles but the design is so fitting for her.
Her dress looks more militaristic which is a design element that the League officers mage outfits will have along with their pink/mauve, gold, white and purple color schemes. Her updated outfit still follows the same general rules as the other League members' mage outfits: Predominantly pink or mauve with gold and purple, has the League insignia on a brooch.
Their mage outfits have some steampunk elements but not as much as the Magical Renegades, and they lean towards more rococo-style fashion which is similar to yet contrasts with the Mallory Family's baroque fashions.
As mentioned in the 4th WIP for this episode, I had to remake several panels from the previous comic version because I didn't have the .SVG files for the original page on my daily driver 😩
This goes for everyone to frequently save and have backups. When you get a new computer during the production of your work, make sure every file is copied over to the new one.
The dialogue was also tweaked in this episode to include extra snark!
Princess' remarks about how Red Alert will also get arrested after her first battle are directed more at her than Midnight.
In the previous version, Red Alert got thrown off by Princess' remarks:
Red Alert: [boasting] Your familiars were easy opponents. I didn't struggle at all!
Princess: [annoyed, flatly] Yes you did.
Red Alert: [startled, annoyed] What?!
Midnight: [to Princess] Hey! That was her first battle!
Princess: [to Midnight] It’ll be her last and yours.
Since Red Alert appears more confident in the new version, Midnight interjecting isn’t so needed anymore, but one of Red Alert's remarks in this scene is inspired by something Midnight told her earlier:
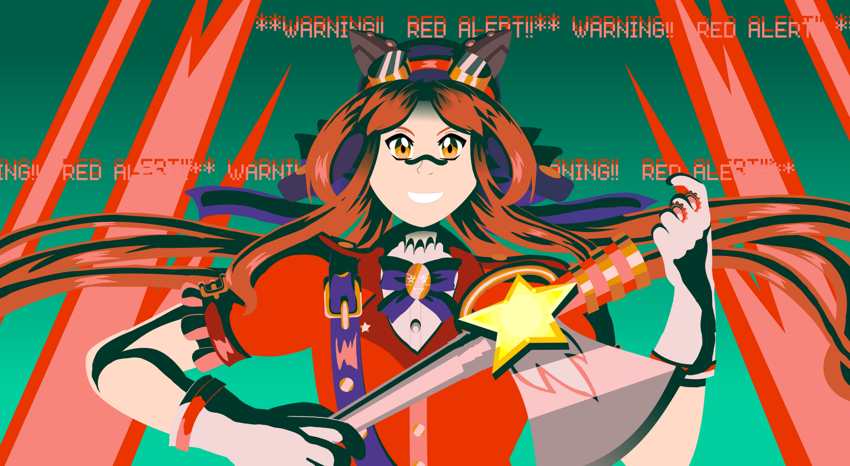
Red Alert: [boasting, in a dramatic pose] The name's Renegade Threat Level Red Alert!
Red Alert: [boasting] Your familiars were easy opponents and I’m a brand new Magical Renegade! I didn't struggle at all when it was down to me.
Princess: [unamused] Yes you did. I saw. It was only through pulling something out of your—
Red Alert: Ingenuity and willingness to take risks! Is that what you meant to say?
Princess: I meant something I wouldn't say in polite company but that means I could say it around you!
Red Alert: [still boasting] If you're saying we're bad company, then I take that as a compliment!
Episode 40 WIP 4
On Wednesday I posted a WIP of a new panel for the next scene:
Renegade Knockout Tango is planning something to someone!
She's scheming something to her new teammate!
This update also gets into a revamp of panels from the previous comic version:
Renegade Midnight Conductor dramatically posing and boasting! I like how this turned out, but I’m frustrated because of the technical issues; this is based on a panel from the previous comic version, but instead of being a revamp, it’s a complete remake because I don’t have the .SVG file of the original page.
I don’t mind adding new panels to expand on scene from the previous version, which I’ve already done several times. Extra panels give space for more interactions or help convey the atmosphere, or slow down the pacing from being too fast.
Every time Knockout appears is part of a new panel that didn’t exist in the previous version, but I’m frustrated remaking pre-existing panels entirely because it’s doing double work.
The entire scene with dramatic posing is one that I lost the .SVG files for and have to recreate from scratch 😫 I dreaded trying to recreate the poses at first, but this first one went smoothly so it wasn’t all frustrating.
I thought I copied all of them for the previous comic version pages over to my current daily driver, but I didn’t and I didn’t realize that until I was almost ready to start this episode. I transferred nearly all of them but missed a few. They’re all on my previous daily driver, which barely works at all.
Just before I started recreating any panels, I tried to boot my old daily driver to copy the missing files over but to no success so I had to get started remaking them.
So this can be a reminder; to save time and avoid starting over, if you work with vectors and get a newer computer, make sure you moved over all your .SVG files and check that they’re transferred to your newer computer in case you’ll need that file!
Episode 40 WIP 3
This is a smaller update than last time but still another step forward. I vectored the lineart and base colors for the panels of the first new scene! During the past few days I started shading them and here's a preview:
Just going back to the hotel after a first battle? Naaaaaah that’s too easy isn't it?
The previous WIP featured another new scene that comes after this one. This WIP previews the first new scene and the previous one previewed the second. I showed the second one before this to show progress with the new 3D scenery I modeled during this episode while I went back to the start of the episode to begin shading.
After these will be a revamp of a scene from the previous comic version with the usual tweaks of fixing up proportions and updating character designs. There'll also be more refinements to the dialogue ahead.
Episode 40 WIP 2
On the 10th I posted a preview for this week’s WIP on Mastodon:

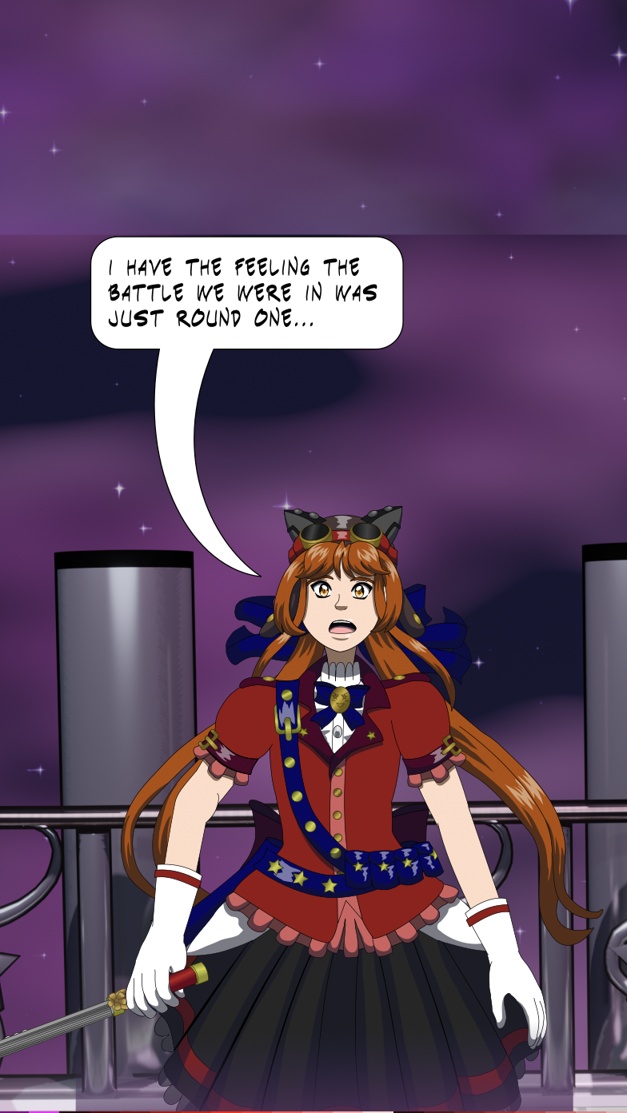
This is part of a new set of scenes and the main thing I’ve been working on during this episode. Enough time passed since Katt left the hotel in episode 32 that her friends are worried and trying to find her. In comic time it’s been about an hour but episode 32, just 8 episodes back, was published around a year ago 🥲
Alicia and Melody get some more focus and new casual outfits!
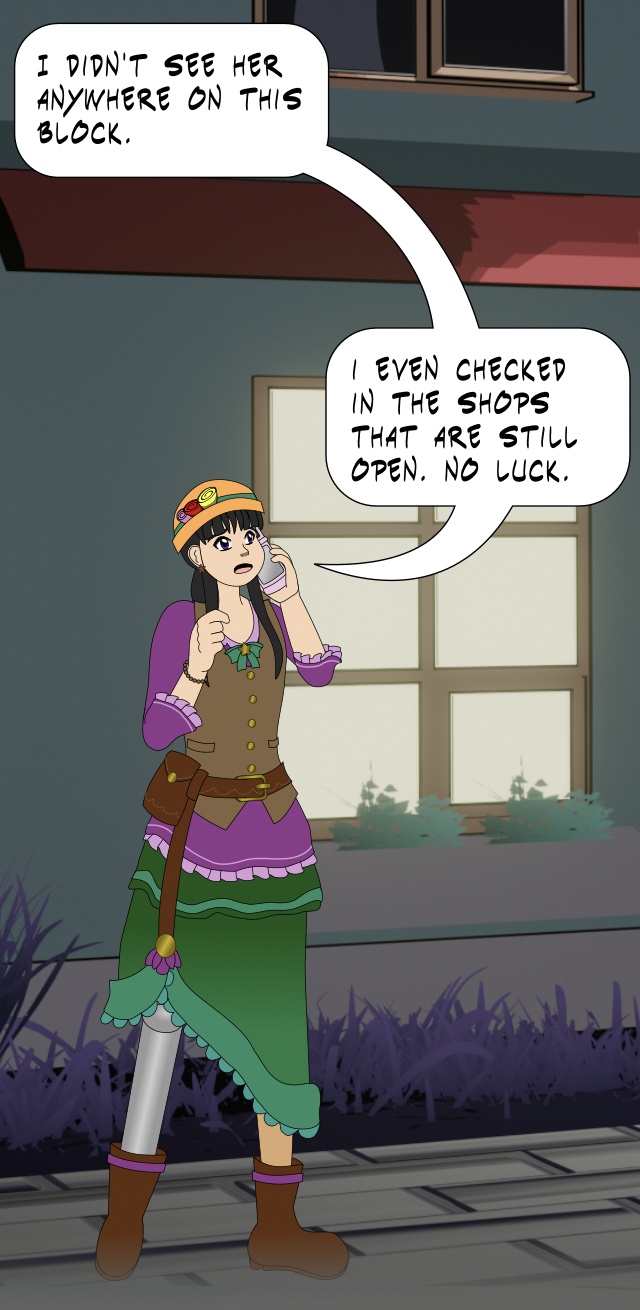
Melody’s has wave motifs and a color scheme inspired by earth and flowers to reflect how she makes potions.
Alicia wears moth goth fashion, but it has a moth motif to contrast with other time travelers; butterfly motifs.
For these scenes, I modeled the rest of front of the hotel and one of the nearby buildings! There’ll be even more to say about this in the production notes.
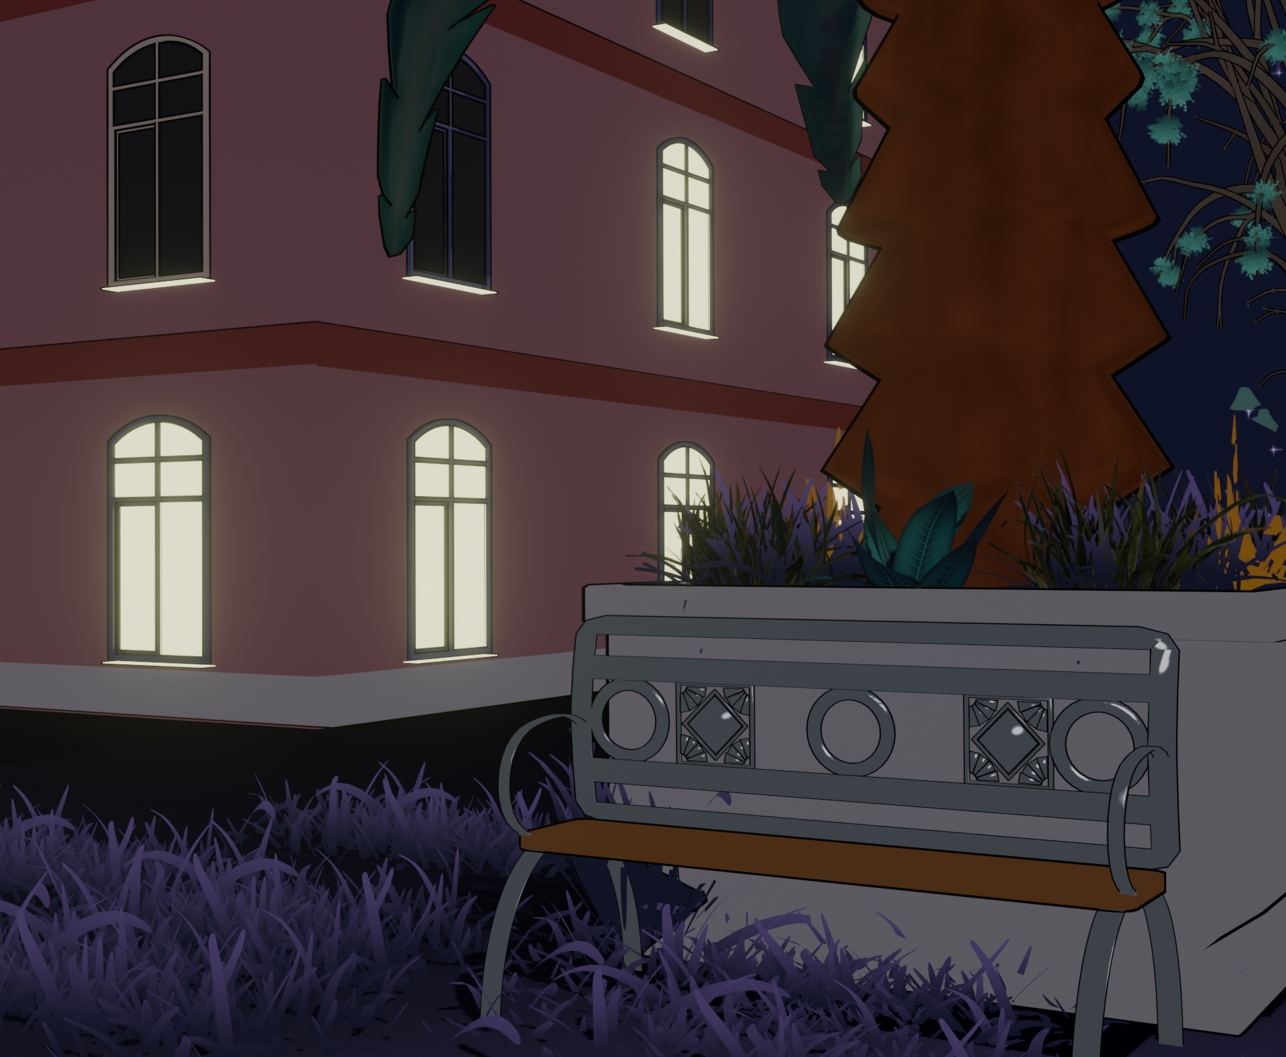
The model closely follows the design of the hotel as it was introduced in episode 27 with small changes. Larger changes were made to the surrounding area to make it look more upscale; the yard in front and to the sides of the hotel are larger, there are trees in large planters with benches by them.
I modeled the benches from scratch. They’re made in an Art Deco style to match the exterior of the hotel. However, the diamond-shaped pattern on the bench comes from the Deco Borders NF font. As the full background shows, not much of it makes it into a panel because the background is much wider, but I model a lot so there can be shots at different angles that will show what should be visible.
Knowing when and how to reuse 3D assets is another key to becoming more efficient at modeling backgrounds; the palm tree is one I made while I was designing the interior of the hotel, and the other trees are based on the ones from this experiment from November 2023:
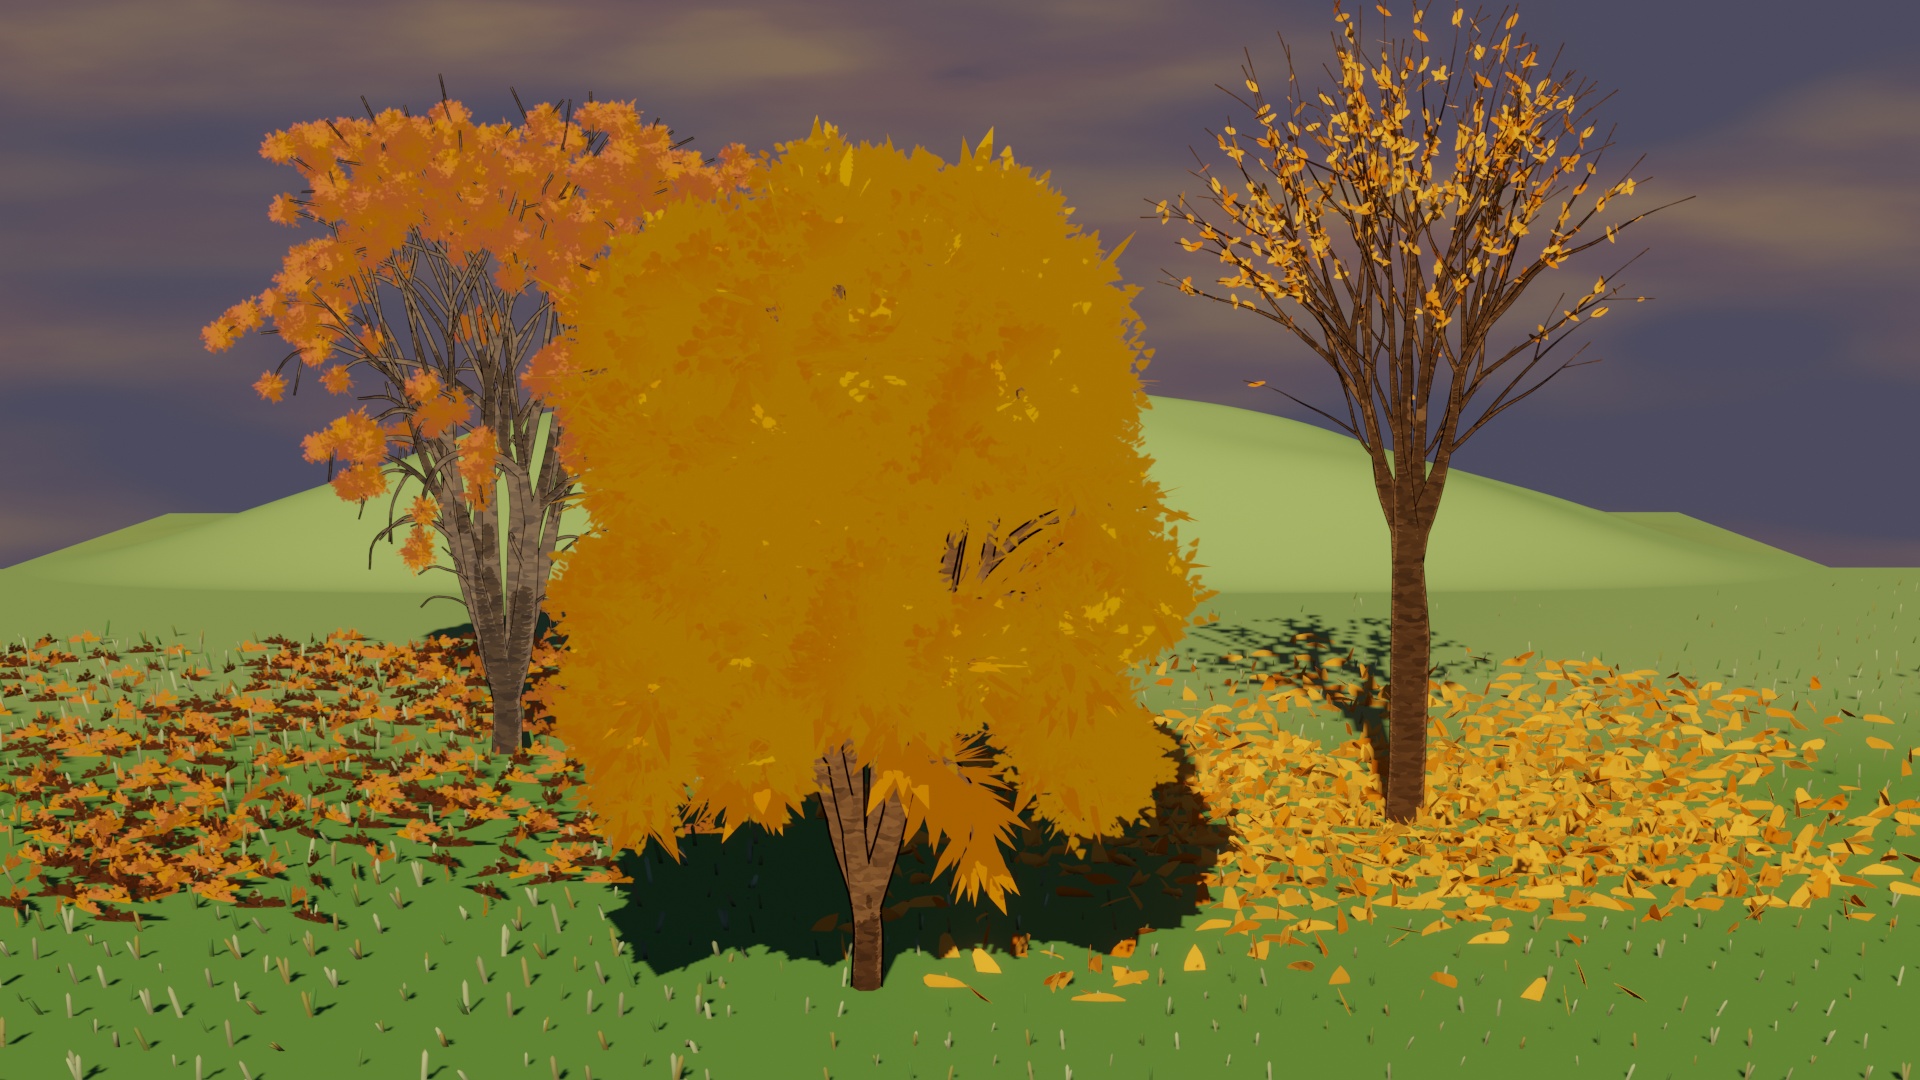
This piece was practice for outdoor scenes so I'd be more prepared for them! Free assets also help a lot for the things that are tedious to model and when I need to save on time. The grass comes from free assets that are public domain or available under a CC0 license. They were modified with materials that fit the art style more closely.
This render is unedited from how it rendered in Blender. Generally this turned out well and fits the art style without needing to make a lot of touch-ups, but this was made with the quickest technique I know, which has some limitations. One of them is that it only generates line art for the outermost edges, and another is that the faces need to be oriented outwards.
If I didn’t need to make a custom design for the benches to be a specific style, I could’ve used assets too. I think there’s a trade-off. Using pre-made assets saves on time, especially for the most tedious things to model, but I also enjoy designing custom assets too.
Episode 40 WIP 1
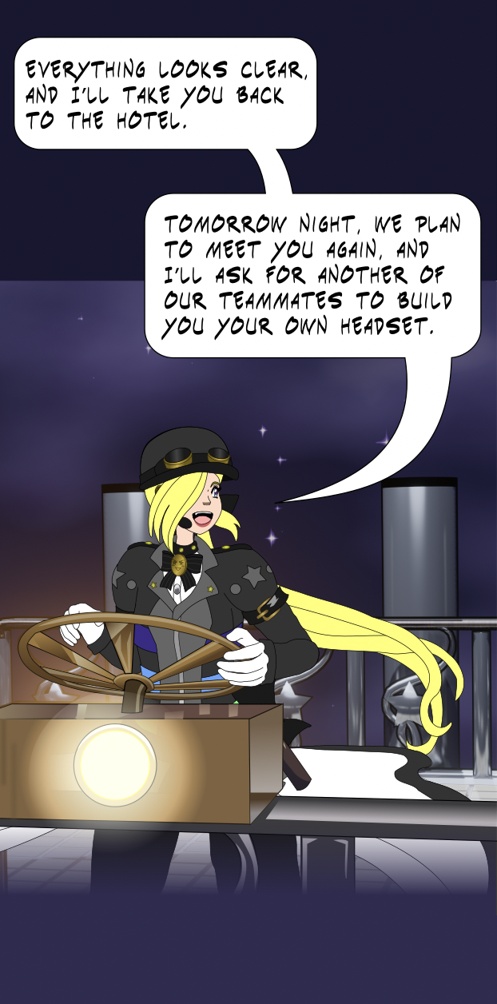
Renegade Midnight Conductor steering into the night sky aboard a floating platform. This is the first panel and it shows the challenge of drawing characters in 2D in panels that use 3D rendered backgrounds and props.
When characters interact with props in a 3D-rendered background it can be a pain to splice them together. I did for the last 2 panels of episode 39 where I:
That technique didn't work out for this panel in episode 40 since part of Midnight's hands needed to be in front of the steering wheel.
In Inkscape, I vectored over the steering wheel components and the part of the rail in the foreground. This method gets tedious but I use it when a prop or part of a 3D modeled scene are in the foreground and a character is interacting with them to blend the art style together. I tried to replicate the reflections in the render as closely as I could.
The steering wheel, box and light in front were scaled down from their original proportions since when I rendered the reference that showed where a character model would stand in perspective, the wheel was waaaay too big for the model to hold in a practical position. When I started vectoring Renegade Midnight Conductor for this panel and fit her to the reference, that just confirmed it.
I vectored several new panels after this one. The next WIP will feature some of them!
Episode 39 production notes
One more episode completed for 2023 and there's a lot to write about with this one! It's an adaptation of pages 98 and 99 of the previous comic version with a large expansion. This episode has a new scene at the start with several new panels!
This new scene is a montage that slows down the the pace compared to the comic version but slowing it down gave me more room to write out characters’ thoughts and expand on their interactions. In some ways the previous version was too fast, and too slow in others.
I didn't show many character interactions in the previous comic version because of the page size limits and set chapter lengths. There are comics with page formats that can cover a lot of plot and about the characters within a limited page size and chapter length, but this just wasn't one of them. 😔 I was trying to be pragmatic with what I showed, but something felt missing when I didn’t focus much on the characters’ interactions beyond the major plot points.
So far, Renegade Threat Level Red Alert tries to be confident. She’s definitely eager to fight for the Magical Renegades and live up to their principles, but that she was already a Mage Plus and wasn’t a regular human makes her worry about whether she’s worthy of being a Magical Renegade.
The less confident side to her adds some character depth; as a civilian she and her main group of friends are into acting and trying to get a career as an acting and performing troupe. Her role in their troupe is as the main stunt performer, which is a thrilling role, but she's wanted more. The battles she experienced as a Magical Renegade go beyond this in thrill and danger!
When Avogadro wrote of his experiments that created the initiation devices, he intended for the devices to be for people who had the values he was looking for, but likely would’ve been rejected from being initiated as Classical Mages.
Red Alert, as a Mage Plus is something else. As a magical super soldier, her being initiated may go against the spirit of what he intended... Or would that? The Mage Plus project got discontinued and she lost most of her powers so would she have been the type that Avogadro would’ve thought didn’t need to become a Magical Renegade?
Whether Renegade Midnight Conductor knows this or not, she and Avogadro have some disagreements and is confident enough in Red Alert's ingenuity to try to vouch for her if Avogadro won't approve. That'd still be risky though since Red Alert fought in only one battle so far...
Renegade Knockout Tango is a new addition to the past several episodes so each of these episodes will also be expansions to include her. She also works as an instructor due to her centuries of experience but she can still keep a silly side in this role inspired by her performance style as a civilian.
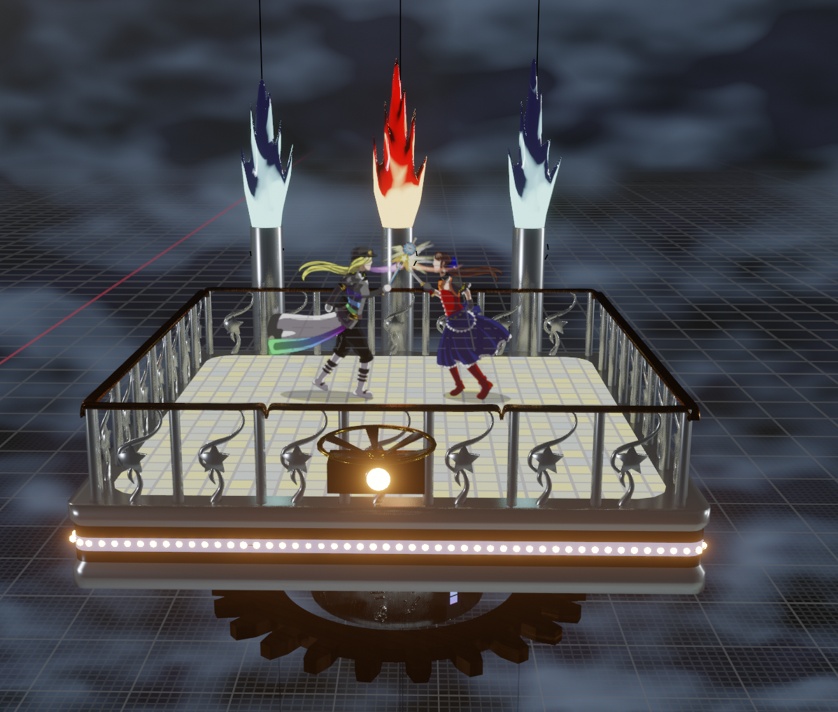
Modeling the flying platform that the Renegades have been on has definitely paid off; in this episode there were several renders made showing it at different camera angles. Creating new models takes more time upfront but pays off when they can be posed or rendered at different angles.
I created many renders for this episode but some of them were only for reference. I've been using this technique throughout the past several episodes: In the panels that have a 3D-modeled background, I made another render that was identical but had character reference models in them that were used as a reference for the perspective and scale.
The background and reference were imported into Inkscape and scaled to the same sizes. It's more practical to compress the renders in another program before importing them though to keep the file sizes down 😅 I placed the references with the character models over the render that was just the background, drew the character over the reference and deleted the reference.
This is a missed opportunity I only thought about just before the episode was finished and going back could've interfered with completing this episode before the end of 2023; the platform could've had grit and scrapes to it because of how it got hit with a blast in episode 37 😩
That would've been easy to do since I learned how to make procedural metal materials that have scrapes and bumps in them, but it would've been tedious with needing to re-do every render.
The floor took a direct hit in episode 37, but I didn't know how to show that any part of it took damage since the tiles are also a procedural material.
Magical Renegades ended up on hiatus for 3 months; episode 38 was published in September. I focused on art challenges throughout October and November, and into part of December. The art challenges were fun, but I think I shouldn't do them two months in a row to keep the update schedule from getting *too* slow. Once a month is what I've been able to keep up at most and I'd rather it not slip any further.
When I resumed working on this episode, I hoped to complete it before the end of the year, but there were still other difficulties. I wasn't feeling well for much of December and there were many times I needed to rest and could spend much of a day sleeping. I'd much rather be working on things every day, but around this time of the year, days of exhaustion that I tried to power through caught up with me.
When I had the time and was feeling well enough, I focused on this episode and made a bit of progress most days.
Progress for episode 40 started before the new year, but the progress on it has been steady. This episode and the next few adapt pages from the previous comic version, but will expand on them with new scenes and tweak the dialogue.
Episode 39 WIP 2
Anathema to Commonsense went on hiatus during most of October and November for art challenges. The complexity of the challenge I tried for October was too much for me to focus on ATC. I posted the first WIP in November when the drawings and renders I was making for the November art challenges were simple enough, but the later pieces I made in November were more complex experiments.
After putting Huevember aside, other than one drawing that still needs to be finished and its story posted to The Scattered Archives, I resumed development of episode 39.
Several panels are shaded now including the first and a montage:

When I was writing the script for this episode I got frustrated when I spotted a continuity error. In ep.32, the magic pocketwatches were referred to as "startup devices" but later episodes referred to them as "initiation devices" because I forgot I used a different term 😩. Don’t you love when you don’t keep your own terms consistent in a story because you forgot what you used before?
However as far as continuity errors go this is a minor one that might not even count because "startup device" and "initiation device" could be interchangeable. It was still frustrating and slipped through my attention despite that I look back at earlier episodes when I write for the next episodes to help keep consistency.
Renegade Knockout Tango is also excited about something!...:

Episode 39 WIP 1
Development of episode 39 is in-progress and most of the progress was made this month. The art challenge in October took a higher priority and was very ambitious but juggling two simpler art challenges with webtoon development is a lot more doable even though I'm currently behind schedule on the art challenges again. I'm still thinking up ideas so they're not over for the month.
Renegade Threat Level Red Alert looks triumphantly at something. This is one of several new panels for this episode and one of them that I used a 3D model as a reference for the pose.
The 3D model I made to use as a reference is one that I made around a year ago. The first WIP for episode 32 details a lot about the model, how it was rigged and some of the trial and error I learned when trying to pose models with pieces of clothing added to them.
I also used this model in some Huevember drawings from last year such as the drawings for day 13:
And for day 19:

The model also helped me with the scale of the rooms starting with episode 28.
However, this model really started showing its limitations during the production of this episode. I posed the model to show Renegade Knockout Tango flying down from the sky and back to the floating platform she was on for this panel, but I’m not entirely confident about the perspective despite having gone through all of the work shading it all:
I think it was my mistake to not add her skirt and ribbons to the reference model, but the geometry on this model is also limited. I’ve worked around those limits and used this model as more of a guideline for so long, but I have a better understanding of topology and when to use Subdivision Surface modifiers when character modeling than I did when I created this model.
Back when I made this one, I added loop cuts to add smoother geometry and didn't catch on to how it's more advised to use the minimum base geometry the model needs and use the Subdivision Surface modifier. The Subdivision Surface modifier subdivides the existing geometry in a non-destructive way and gives a lot more to work with for smoother deformations of the mesh when posing the rig.
By the time I got to that step when I was learning character modeling, this model it was stuck with too much base geometry to work well with that modifier but not enough for the mesh to smoothly deform when it was being posed and not enough geometry to be precise 😩 After how long it took to make that model and figure out rigging, I was reluctant to start over, but this might be a good time for it and with the knowledge that I learned since then.
I made that model from a subdivided cube, which is one of the methods to start a character model: Subdivide a cube, apply the modifier, shape it into the head, select the bottom part behind the chin, extrude that downwards to start making the rest of the body.
Recently I looked into the techniques to sculpt characters again and considered trying that approach: The head, joints and limbs are created separately, the modifier is used on each of them, each object is sculpted towards the desired shapes. They’re joined into one piece to be rigged.
Chapters 13, 13.5 and 14 production notes
Updates for the Anathema to Commonsense webnovel adaptation continue!
In the webtoon version, episode 12 ended with a gag when Fiorina asked if the arguments could keep going because they were the most fun she saw in a courtroom procedure, and episode 13 immediately started with a montage and Camelia's explanation about how her group arrived in the past. This worked for the webtoon format that the resolution to the Magic Gatekeepers' arguments happened off-screen and could be left to the readers' imaginations because extra dialogue often involves extra panels. Some things can be left off-panel and left to the imagination for pragmatic reasons.
I added an extra scene between them so the scene at the start of chapter 13 is new. The montage that Camelia shows the Magic Gatekeepers is also expanded on to mention there was something unusual in the sky during the bus trip but that no one was sure what it was.
This chapter, 11 and 12 justified some of the splash panels and montages that are meant for readers are also in-universe uses of Camelia's and the Magic Gatekeepers' powers. As with several of the chapters so far, this adaptation has more snarky narration!
Chapter 13.5 was a short chapter adapting a short episode. It was tempting though to have Fiorina continue arguing about why couldn't the Magic Gatekeepers just stop the rogue time traveler non-lethally! She would've argued it's better to just get results than to worry about whether there'd be a story for the studio audience to follow, but only if she had that power over the fourth wall!
Legionnaire Imperatrix's dialogue with Chelsea and Claudia was tweaked in chapter 14 to fit in better with chapter 7 of Extra! Chronicles which shows Chelsea and Claudia arriving at the palace when Monica met them and introduced them to Imperatrix. That chapter filled in some gaps of what happened with their arrival at the palace.
Some other lines were refined a bit to help expand on what the characters are feeling. This is a difference that comes from more writing experience; episode 14 was published about 2 and a half years prior!
When Claudia said "I'll do my best to stand on my own, and as part of the League!" In the webtoon, mentioning the League by name might be a continuity error I just noticed. The League hadn't been mentioned by name yet in the episode or in chapter 7 of Extra! Chronicles. It could've been mentioned to her immediately after what the chapter covered, but it's more consistent for Claudia to say "...And as part of this faction" instead of "...And as part of the League".
Episode 14 was also before "magical devices" were officially called Initiation Devices or Startup Devices.
Episode 38 production notes (and what would've been the second WIP)
The episode adapts pages 94 - 97 of the previous comic version. Adapting these pages was straightforward but there are extra panels with more glitchy effects and tweaks to the pacing.
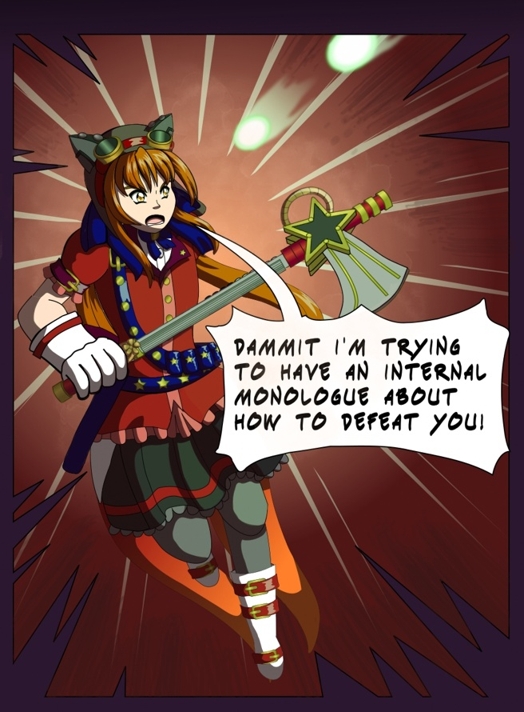
The dialogue was slightly changed in the final version. ^^; Renegade Threat Level Red Alert had a lot to think about when she was troubleshooting why she couldn't immediately have the connection she needed to wield her weapon, but she's also having to dodge the blasts from the enemies flying above!
It wouldn't be realistic for those enemies to stop firing while she monologued, so this panel was added to show her dodging, and her thoughts being interrupted. It could've also been funny to point out too, if the enemies actually stopped and gave her the time to monologue. Instead I added a scene of Knockout using her weapon to ward off the enemies to buy some time.
Only the last panel of page 95 was kept because the other panels weren't needed. Page 95 had a similar gag of Red Alert being annoyed that the enemies weren't giving her enough time to charge her attack like in this episode. The gag was down in a way that's more in-character in this episode.
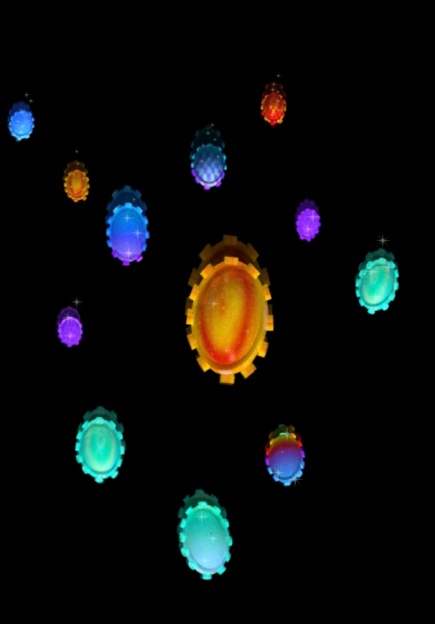
The panel that showed the superconductor crystals is the same one from episode 10 but with some sparkles painted in. Those were rendered in Infini-D 3.0 and I thought over whether to remake that panel in Blender. Due to time constraints I didn't, but the crystal on the first few panels of the episode was redone in Blender (rendered in Cycles) so it was a bit more consistent.
It would've been more jarring to see the same item depicted three different ways in the same episode when there wasn't an intentional art shift each time; the title panel shows it rendered in Blender with its higher level of detail. The first few panels showed it as a vector with a lower level of detail that's clearly 2D, and the panel with the falling crystals is rendered in Infini-D.
That render is ray-traced like the Blender one, but there were probably bound to be differences in the detail because how much ray-tracing has advanced over the past 25+ years. However, when I began using Infini-D, I didn't have a manual and nearly everything I learned was through trial and error, including how to compose surfaces and make them with translucency, with sparkles or reflections!
I replaced the 2D renditions with a render from Blender, but scaled down and with line art traced over them. It may look jarring right next to 2D characters, but that's intentional. These magic superconductor crystals are meant to be otherworldly.
When I was drafting this, the production of episode 38 was almost finished but I also had a deadline I was trying to meet with posting it. Since the finishing touches can still take hours to paint in, I needed to focus on that instead of this post. Since I published the episode first, I reworked this draft into the production notes.
This is a WIP posted on Mastodon on Wednesday:

Renegade Threat Level Red Alert couldn’t get her weapon to work in the middle of a fight, so she’s troubleshooting by seeing if its power source can be used directly! As of writing this, I added watercolor effects to the background.
Another WIP to show off more coloring effects:
Since I only needed the effects to affect her, I created a new layer above the episode. I export the episodes from Inkscape in sections to keep the export times and file sizes manageable. In Krita I put them together then add the extra lighting, color, painting and magic effects.
This panel shows off some of the coloring effects; in a layer above I painted over with a light blue color, alpha-locked the layer afterwards to keep the paint from spilling outside what I already painted then drew red squiggles in & used brushes that help paint in glitchy effects!
Usually I set these color effect layers to Overlay, but Soft Light also works well at other times.
This episode also got me thinking more about magic and technology are combined in the universe of Magical Renegades.
It shows that the Magical Renegades members' goggles on their mage outfits, which are a staple of steampunk fashion have a practical use! I like the idea that they could have some functions built in like the ability to detect enemies, but they look like regular steampunk goggles. I was trying to think over if they’d work from a combo of magic and technology like the steampunk-style magic weaponry.
With the level of tech in the new timeline, I think there wouldn’t be as much miniaturization as we have. Engineers such as Christina and Avogadro could reverse engineer some of the modern technology that was brought to the 1880's, but they probably wouldn't have been able to miniaturize it.
The methods may not be available to them because vast budgets for R & D departments went into companies making the smaller cameras, screens and recording devices that we have today.
Stylistically, steampunk and the miniaturization of modern technology don’t really go hand in hand either; if you look at Victorian-era technology, it’s far bulkier than what we have now! If you look at the furniture, a lot of it is ornate. The frames are thicker so there’s more room for decoration.
(Although I like the simpler geometric style of Art Deco, and of 1950's-1970's Space Age-style, I also think it's a shame that ornate styles of furniture and architecture fell out of popularity)
So all of this rambling is to say that the goggles worn by the Magical Renegades in their mage outfits are probably fitted with technology, but also with magic to make them a lot more compact than they probably should be. ^^;
Defining the limits of magic and technology is important in a setting that features both of them, but the line between them can sometimes be blurry. The Classical Mages take pride in their styles that are based on spell casting rituals and natural ingredients that can be used in magic. They still use wands or staves that are made from different materials including metals, but it's through smelting, one of the earliest-discovered technologies that let them shape metal and cast out its impurities to make their wands or staves.

With that in mind, this means not even the royals are above using... technology with their magic!
So where is the dividing line between the Classical Mages and the Nova-Class Mages, and why the Magestablishment usually saw the latter as a threat? The Nova-Class Mages take the use of technology a lot further than the Classical Mages do. That use of technology allowed the creation of the initiation devices which also contain a lot of magical power over their own that the wielder isn't required to have any magical ability of their own.
That idea of people without magic, who didn't go through the bureaucracy of the Magestablishment to become Classical Mages is what's seen as dangerous to many of the most powerful Classical Mages. Some who are genuinely concerned about the safety of this "mysterious technology" that bypasses the Magestaglishment's rules, but others want to restrict the use of magic and concentrate it among themselves and their peers.
The Nova-Class Mages, particularly the Magical Renegades see it as liberation, empowering people who may not have otherwise gotten a chance to become mages, and this could be the major source of conflict between them and some of the Classical Mages.
Chapter 11-12 production notes and episode 38 WIP 1
This is an earlier WIP I posted a few weeks ago on Mastodon, but I got too busy juggling things that I forgot to write out a post here sooner! ^^;
Several panels have been added since then, and this one was also shaded. So far the episode has adapted panels from pages 94-96 of the previous comic version. As with episode 37, some of them will be expanded on to be full body panels. This next WIP panel is one of them:
Most of the past chapters were straightforward to adapt, but episode 11 was tricky to adapt into a chapter. That's the episode that introduced the Magic Gatekeepers, and it was tricky to adapt for introducing four characters and describing their appearances and the appearances of their weapons all at once!
In the webtoon, the splash panels that showed each of them with their superweapons may have just been flashy splash panels for the viewers, but in this adaptation they were kept in by explaining that they're astral projections that the Magic Gatekeepers made and showed to the group on trial!
Autocorrect is usually useful but it gets in the way of some of Ragnar's dialogue which is supposed to be in Middle English.
Chapter 12 was much more straightforward after the challenges of adapting episode 11, but there were still a few tweaks to the writing. There's an extra line of dialogue in this chapter after the group at the defendant's table cheer on Camelia; she says they're in it together because they are! Mia's objection was slightly re-worded to clarify it's Camelia's snarky statements she objects to!
The Magic Gatekeepers find it admirable that Camelia continued to defend her team even after she was ruled out as a suspect. They're feared by many in-universe, but they have standards! They would've thought lowly of her if she decided that the rest of her group were on their own!
Episode 37 production notes
This episode adapts pages 91-93 of the previous comic version, and it was mostly a straightforward adaptation with a few extra panels and scenes since Renegade Knockout Tango wasn't in the previous version. Some dialogue also needed to be changed to fit dialogue and continuity from previous episodes.
Several of the panels that are revamped from these pages were expanded on; characters' legs or more of their outfits were drawn when they previously weren't in view because they were confined to comic page panels with clear cut-offs. The revamped panels fit the entire width of the webtoon episode, and their cut-offs and the transitions to the next scene come from the use of gradients that cover the bottom of that panel and lead into the top of the next one.
Because of this more gradual transition I needed to draw more of a panel than I needed to before. In a lot of webtoons, full-body panels that take the width of the episode are frequent which gives those scenes more of a cinematic feel when the reader slowly scrolls down, but it can be a lot of extra drawing, and that was a trade-off I took.
This revamped panel of Red Alert challenging the enemies was one of those panels; her lower body and more of her hair needed to be drawn when they didn't need to in the previous version. That panel is another to combine 2D and 3D since Vega was redrawn with a 3D model reference.
Work on these episodes will always be a balance between trying to be efficient while conveying that cinematic feel. When 3D modeling for this series, there are challenges to efficiently blending the backgrounds in with the art style.
In my production notes for chapters 3-5 of the webnovel adaptation, that covered the exception I have to blending in 3D backgrounds.
The techniques I used when I began extensively using 3D backgrounds since episode 25 weren't very efficient but I was still looking for tips or figuring out more about Blender that would make my process more efficient. A major step forward with this episode is that it's the first to incorporate lineart to objects in the viewport and render. Being able to see them in the viewport removes the trial and error of waiting for a render to be finished before I could see if the lineart turned out the way I wanted.
Freestyle didn't work out well for me by the time I was working on episode 27 or 28 because the renders would sometimes have extra lines on objects that were difficult to edit out; curtains in the hotel rooms (seen in episode 28) are holographic and glittery; editing out the extra lines would've been very difficult. I remember trying that before I gave up and re-did the render without Freestyle and manually drew in the lineart. That being said, I've seen others use Freestyle to great effect with stylized renders and I'd like to know how to.
The process I've been using since this episode is simple and usually works for what I need. I also switched to using the Eevee render engine since that lineart technique I wrote about for the first WIP doesn't seem to work in Cycles, and Eevee works well enough for most props and backgrounds.
I wasted several minutes rendering some the cloud backgrounds that just had clouds and stars in Cycles because I thought I needed to render all of them in Cycles! Those backgrounds could've been rendered just as well in Eevee and I switched when I realized that! The only backgrounds I needed Cycles for were the ones with effects that needed it, such as the holographic screens episodes 29 and 35, and the glowing bubble effects in episode 35 and 36.
Knowing which of these render engines to use will help save time.
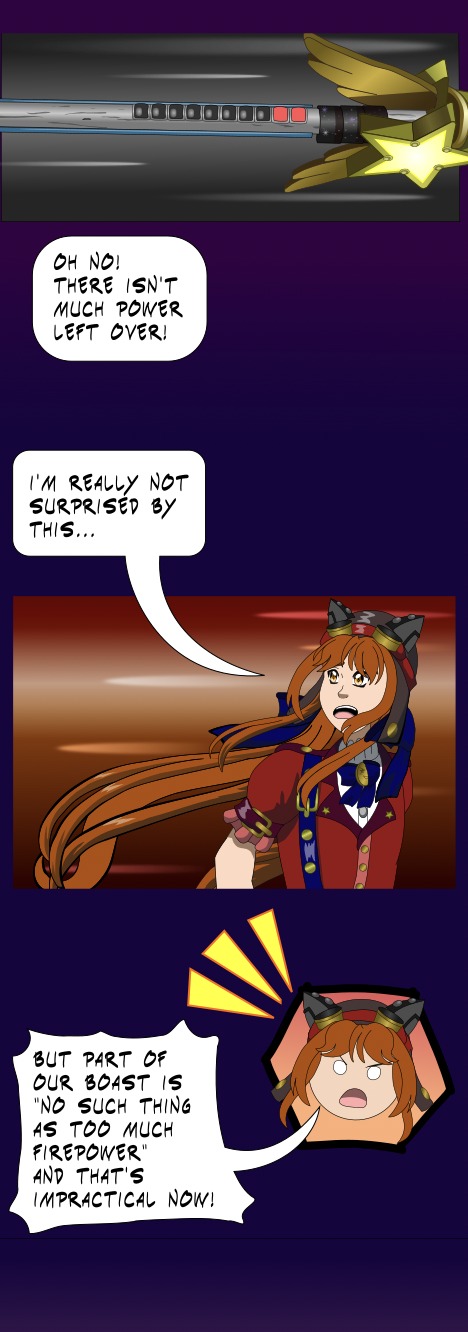
The dialogue in page 92 of the previous comic version when Renegade Midnight Conductor was about to fight back when she realized her weapon was almost out of power almost needed to be significantly changed.
Previous version:
Midnight: "Hey you! Prepare prepare yourselves... I can shoot back!" [Midnight notices the power meter on her weapon is down to one light]
Midnight: "Oh no! There's not much power left!"
Red Alert: WHAAAAAT?!
Renegade Threat Level Red Alert's expression and line needed to be changed. In the previous version, she was shocked and annoyed because this was when Midnight first mentioned that her weapon was almost out of power. Her expression and dialogue were changed to her being worried but not surprised since she heard Midnight mention her weapon was almost out of power before she got the extra power she needed for Temporal Standstill, and suspected it shouldn't be used for long.
She already knew that the Nova-class mage weapons run on a power meter, but her annoyance over that still holds up though!
Red Alert: "But part of your boast is 'No such thing as too much firepower' and that's impractical now!"
Knockout: Yeah... It's not always practical!
This scene from page 93 of the previous version was removed:
I usually like to keep gags, but this one didn't fit here. It was meant to make sense by showing that Nova-class mages are supposed to have some connection with their magic weapon that lets them begin to use it without training which is why Midnight was shocked that Red Alert wasn't able to immediately use hers.
Something wasn't right when she didn't have that connection; this still holds up, but this scene just seemed out of place for the atmosphere of the rest of the scene.
On another note, I removed the Behind the Scenes part of the title for these updates moving forward for the Neocities version because they aren't needed here since everything on this page is behind the scenes. That title is a holdover from these posts on Record Compendium to distinguish them from the new episodes and lore updates.
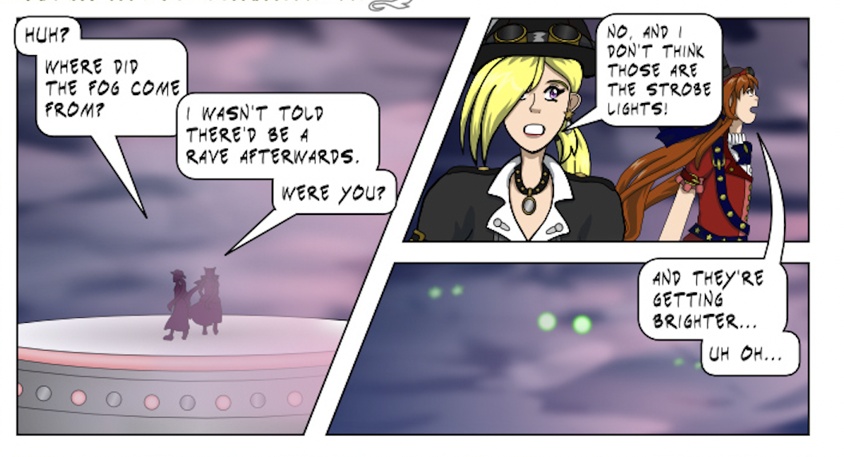
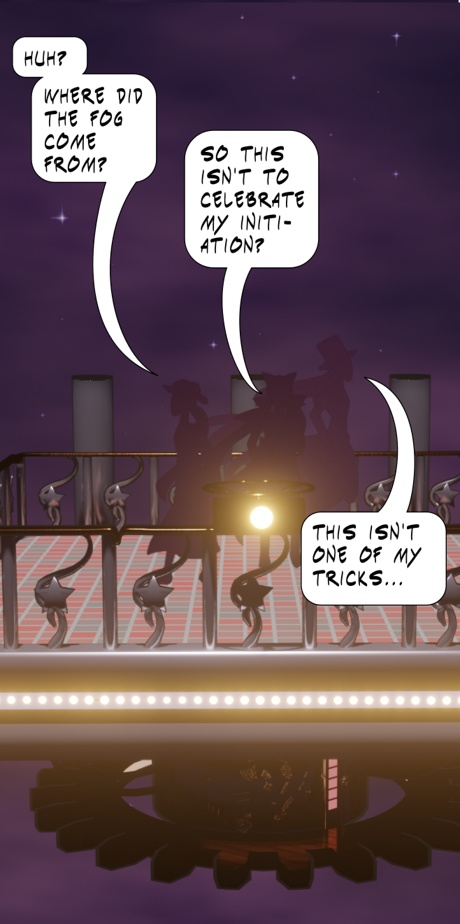
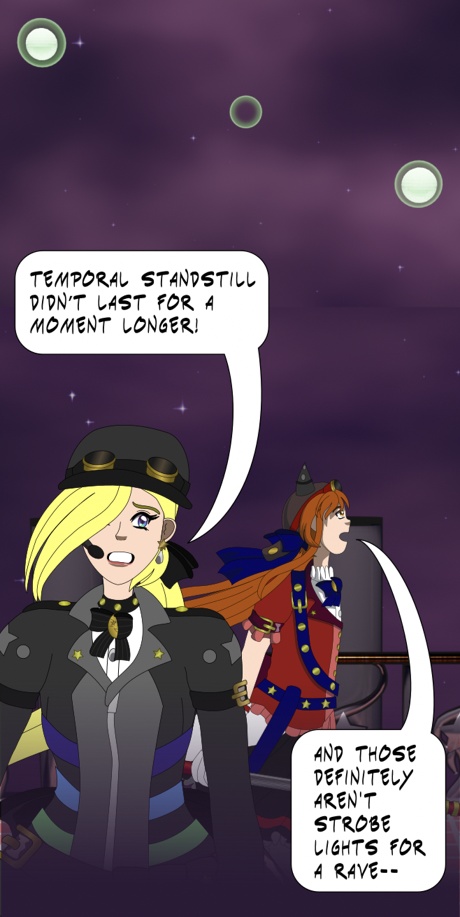
Behind the Scenes: Episode 37 WIP 2
This WIP features one of the most challenging panels for this episode. I ended up rendering just this background and importing it into Inkscape but before I did that, I tried the same technique to put the characters drawn in 2D onto a 3D setting in Blender.
Originally I put the characters and the blast as the same transparent image, imported it into Blender with Images as Planes, and put a large and bright green point of light where the bottom of the blast was. Since the image was imported with the default settings, it didn't have any emission so I exported the characters, beam and projectiles, and the impact as separate images.
When I imported these image planes into Blender, I set the beam and projectiles, and the impact to the Emit setting. The impact was placed flat on the platform, and I divided that image plane. I started with a single horizontal cut and a single vertical cut in the middle of the image using the Loop Cut tool. The Knife tool can be used to carve out more geometry that the Loop Cut tool can't and I used the Knife tool to add the diagonal edges.
I selected the outer edges of the image plane and moved them upwards to give them a more 3D look. The sparks were added in as another image plane with the Emit setting.
This technique didn't work perfectly though since the beam should appear to be in front of both characters, and when I placed the beam too far ahead, it created shadows. This is a correction I could manually make during the last step of the production process but overall this technique of placing image planes of characters and 2D effects in 3D settings has worked well!
However it didn't work out this time since there were a couple of other problem I didn't notice until I imported the rendered panel into the episode; the lineart of the characters wasn't as crisp as the vector drawings and the colors were noticeably desaturated compared to the character panels that were made with vectors. I like how the render turned out! The slightly desaturated colors and blur help make this panel look like a scene from a retro anime, but the differences in the colors and lineart just stood out too much from the other panels for them to work this time! ;__;
Sometimes the simplest solutions are the most effective! I went back to render just the background and the platform, import that render into the webtoon and put the original vectors of the characters, the blast and impact back into the scene.
That's a lot to write about for a technique I decided not to use this time, but I still learned some things from it for another time.
Another preview for the episode showing what happens when a nova-class mage has to fight but their weaponry is low on power and the discrepancy with part of the Magical Renegades' own boasts!
This part was pretty straightforward. The second panel is partially-shaded. The close-up in the top panel was modeled in Blender as a reference before being vectored. Getting the angles correct for props and weapons is one of the reasons I've wanted to take up 3D modeling. I've used this technique a few times already and it's helped a lot with showing different perspectives!
Behind the Scenes: Chapters 3-5 webnovel production notes
These chapters are straightforward adaptation of episodes 3-5, but for chapters 3 and 5 it was also tricky to narrow down which panels to include for them. Too many for a chapter's length would make the page look cluttered, but including the start of the supercharge sequence from episode 3 and the time rift scene from episode 5 were too cool to pass up!
Episode 3 was the first I wanted to go all-in with the effects!
Starting with episode 4, I used a different process of cropping the images. For episodes 1-3, I found the .SVG files I used in Inkscape and exported individual panels, but I couldn't do this for episode 4 since it turned out that I didn't save all of them I made for the webtoon to my newer computer.
The first few episodes were made on the computer that was my previous daily driver and I thought I transferred all of the .SVG files to the newer one but I missed several of them. I didn't use any services that made transferring easy so I just transferred what I could manually! ;__; Transferring them would be difficult since my previous daily driver isn't so reliable I needed to use the completed webtoon file that I had for episode 4, which is a .JPG and has some compression.
Several of the panels I wanted to use had parts of speech bubbles in them, and I manually painted them out but it wasn't as tedious as I dreaded it'd be:
The close-up panel of Aurora in chapter 4.5 was the trickiest and probably not seamless though because I needed to replicate the brush stroke effects in the background for the parts of the background that were covered by the speech bubbles!
Chapter 5 is a short chapter since there's not much dialogue and the episode it adapts is also short but this chapter features a lot of images for its length. I included the parts of the scene in the time portal because I really liked how those images turned out.
The 3D parts of the background were made in Infini-D 3.0. I was more proficient with making surfaces or textures in Infini-D than with Blender back then, but I really like the look of vintage ray-traced CGI and using a program for the 90's was perfect for that!
I'm proficient enough now at Blender I could recreate those backgrounds but it might be tricky adjusting the settings to match the capabilities of 90's-era programs to keep the renders from looking too polished for the era.
CGI in 90's video games made heavy use of image textures and they often had to be at a low resolution to fit within hardware limits, but knowing this is a clue in how to make 90's-style CGI in Blender!
Behind the Scenes: Chapters 1 and 2 webnovel production notes
Creating the webnovel adaptation was a lot of extra work, but this has been a better result than the short-lived attempt to mirror the episodes on the site. The most efficient ways to host comic pages or webtoon episodes on a site require JavaScript, which I haven't learned. There would've been the cost in time of trying to learn enough just for this purpose, but the much larger file sizes of the images would also run into the free storage limit more quickly.
Splitting the episodes up and putting them back together is more efficient than just uploading a whole episode. I tried this with just HTML and CSS, but the results weren't seamless even when I tried to make sure there were no spaces between the images. So I gave up on this for several months and just had to deal with my frustration not being able to easily mirror the main story.
To resolve this I drafted the webnovel and had a clear idea for how!
I opened the file for episode 1 of the Anathema to Commonsense webtoon and had another program window open to start typing away! Adapting the first episode was pretty straightforward and set how I’d adapt the other episodes, but adapting episode 2 was a challenge.
Already when writing it, I added several extra lines to fill in some of the scene transitions it felt more natural to write out some of the characters’ reactions or what they might say or do before the transition to the next scene.
With episode 2 in particular, a lot of dialogue such as when Christina met Susana was left off-panel, and it was just mentioned in the narration that they introduced themselves and Susana met the other Magical Renegades members.
It would’ve taken way too long then to draw out those interactions although I wanted to.
At the time when I was planning out this episode in early 2020, I was still focused on keeping the episodes concise although they were still going to expand on a lot that was left off-panel in the previous comic version.
Some scenes were more drawn out since I had a lot more room per episode to expand on scenes, but I still needed to be pragmatic with what I included.
When I was writing episode 2, I didn’t have much of a solid idea for what the interior of the Magical Renegades HQ looked like since that wasn’t relevant then. I began designing it during the production of episode 25 since there were going to be scenes that took place inside the headquarters.
However, there were differences between the timelines. Episode 2 and chapter 2 take place around where the second timeline starts to diverge while episode 25 takes place in the third timeline which is a bit more technologically advanced than the second in the same timeframe.
Anything about the other Magical Renegades members wasn’t mentioned at all in episode 2. This was to introduce them later, but since I have more of a description for the interior design of the headquarters and one of the members is a designer with a style that stood out a lot for the time period, mentioning this became relevant!
It also added on to some more character relations, that Susana might’ve seen that member’s artwork at an art fair before.
Originally in chapter 3 of Extra! Chronicles, which also covered this event, the interior of the headquarters were more plain: “The lobby of the building was a large room with gray walls, and tiled floor. The walls weren't entirely plain; they were decorated and illuminated by different colors of neon lights. Susana curiously glanced at them, but didn't have enough time to ask whether they were magic, or a technology she'd never seen.”
This was retconned so the 80’s arcade-style floor was already installed and the arcade cabinets in the headquarters (shown in episode 25) were in the process of being built.
While I was nearly finished with the draft for chapter 2, I realized that I did a lot of double work because chapter 3 of Extra! Chronicles covered this same scene!
The major differences were that chapter 2 of the Anathema to Commonsense adaptation added a conversation between Susana and Christina and chapter 3 of Extra! Chronicles added Avogadro instead.
Most of that chapter was merged into chapter 2 of the ATC adaptation. To avoid it from being redundant, the EC chapter will be rewritten to focus solely on Susana’s initiation process or could be chalked up to some of Paige's research not being completely accurate!
In-universe with Extra! Chronicles, Paige is the writer and narrator of each chapter so she’d be frustrated over doing a lot of redundant work!
The lesson with that is I needed to look through those Extra! Chronicles chapters again because some of them were stories that were completely off-panel, but scenes from the webtoon are featured in some of them. Chapter 3 of it happened to extensively feature them!
Behind the Scenes: Episode 37 WIP 1
Episode 37 may mostly be a straightforward adaptation of the pages it adapts from the previous comic version, but it'll experiment with using more full-width panels for a more cinematic feel.
This scene is from page 91 of the previous comic version.
Two parts of a remake of this scene. Renegade Knockout Tango was added because she wasn't in the previous version. Techniques from episode 35 were used again to place the character silhouettes as a transparent image as a plane onto the platform. This panel also uses the line art technique I recently tried in this experiment!
Flat shading techniques could be useful for a lot of non-metallic objects.
The line art technique I used saves some time by applying an outline material, a Solidify modifier with two changes to the defaults: Selecting Flip Normals in the Normals section and adjusting the Material Offset in Materials. The Offset is an index number that starts at 0 for the first or only material slot an object has. I add the outline material last so the Offset would be the index number of the last slot. When an object only has the outline and 1 other material, the Offset is set to 1.
Using the Array modifier for several parts of the platform such as each component of the rails was a great timesaver because that modifier is automatically added to the entire array!
Limitations: This lineart technique only seems to work with the Eevee render engine and not Cycles. I tested the render view with both and the results didn't look good in Cycles; the lineart material covered the entire object.
The platform panels were rendered in Eevee and I got most of the reflections and glowing to display by selecting Ambient Occlusion, Bloom and Screen Space Reflections settings in the Render Properties tab. Using Eevee when I can will cut down on rendering time and reduce how often I need to manually draw in line art.
In this episode I only rendered in Cycles when a scene had effects that Eevee can't render.
Behind the Scenes: Episode 36 production notes
This episode adapted pages 86-90 of the previous comic version, and it was mostly a straightforward adaptation! The backgrounds in the panels were ported from the previous version which was made in Inkscape but the "body" of the webtoon featured magic cloud and bubble backgrounds that I rendered in Blender.
This was the most practical blending of 2D and 3D; I haven't gotten to trying to render moving clouds or streams of magical energy before except when I finished modeling Shooting Star Vega from last year:
During the production of episode 34, I tried to remake the rainbow clouds in 3D but couldn't figure out a way that worked; importing the clouds as SVGs into Blender didn't let me modify them as much as I hoped to, and I also tried creating metaballs (which I kept reading as meatballs and autocorrect does too) (Created with New Object >> Metaball) with a cloud material added to them; metaballs are good for modeling some items like clouds or snowballs; they can stick together but can also be moved around and separated without affecting the meshes of any of them.
However, there was something else I remade for this episode!
When I was modeling Vega for this piece was the first time I modeled a smoke trail for a shooting star that was supposed to be in the background. It didn't make it into the final picture, but was reused for the series banner on Tapas:
The trail turned out decently but it was difficult to make. I didn't remember how I got that result, so I tried another technique to make the trail, which I created as a plane that I stretched out to be long and narrow then used proportional editing to shrink the tail end of the trail and move it upwards so shape the trail into an arc. Then I extruded it to give it thickness, and used the Displace modifier to alter the shape and make it irregular.
The texture used in the displacement is a cloud texture that is soft and scaled up.
This was the panel that showed Renegade Threat Level Red Alert when her initiation was finished:
I would've just revamped the this panel to update the art and her outfit, but her pose was also changed to match it from this drawing from Huevember 2020. I considered adding the story with it into this episode, but decided to save that for later when Renegade Midnight will mention Renegade Threat Level Red Alert to Avogadro.
The Scattered Archives stories in the third timeline happen around or during the events covered in Anathema to Commonsense, and some of the stories cover events that were meant to be included later on!
Behind the Scenes: Episode 36 WIP 1
This episode is going to a straightforward adaptation.
The slow progress was mostly because I’ve also been trying to juggle a lot at the same time. All of the panels I need are in the previous comic pages, and the most work I'll need to do is to revamp them.
Arranging them was a bit tricky as I thought about which ones should take the full width of the webtoon and which should be narrower panels. The first magical girl anime I saw was Sailor Moon and I remember the sense of awe and wonder when I first saw it; it was unlike anything I saw before!
When I was arranging the panels of Katt’s transformation to her alter-ego, I wanted to capture that sense of awe from so many years ago!
As I was placing the panels and revamping them from the previous comic version, I thought over whether to remake the flowing magical cloud and energy effects in Blender. That would've been too slow to do at this time since I still don't have an efficient method, but the sparkly cloud and bubble backgrounds outside of the panel were made in Blender.
Since I learned a process to procedurally generate clouds in Blender, it's helped a lot! All I've needed to do to make cloud backgrounds with different colors and intensities was to tweak a few ColorRamp and Noise Texture nodes. To model clouds that are in the foreground or to make clouds that are more realistic though, I'll need to learn a different technique, but the one I've been using has worked for backgrounds.
Behind the Scenes: Episode 35 production notes
This episode adapts the end of page 81 through the start of page 86 of the previous comic version. It was overall more straightforward than the previous few episodes, but there were still significant changes.
This episode establishes in this version that Katt is one of the Mage Pluses, the class of magical super soldiers that were eventually decommissioned after some "incident". In this version they were first mentioned when Monica was introduced.
While I was writing this new version, I was undecided whether Katt would've kept being a Mage Plus secret from everyone she knew and whether she was under orders by the government to do so because the Mage Pluses still have some of their power left even when supposedly being decommissioned. There was a lot of time to make a final decision because it took many episodes for this to even be mentioned, and it was going to be many episodes before there's any focus on the school setting again!
Katt is one of the magical super soldiers that's trying to live a relatively normal life by going to school and learning practical skills that she missed out on. Whether the Mage Pluses were created that way or were once humans or mages that became Mage Pluses, they missed out learning some basic skills to become more efficient fighters. This didn't seem to be a problem when their faction was active, but when it disbanded, it posed challenges for them!
This gives me some ideas for some slice of life spin-off stories and scenes that could make their way into Extra! Chronicles.
It's not much, but Katt's ability to leap really high which was shown in episode 5 is one of those holdovers of her powers, and she survived stunt accidents that the average human might not!
However, once the decision was made, I knew I'd need to stick with it! I thought about what would be more appealing; I gravitated more towards the idea that Capital Remedial would even allow these super soldiers to enroll to help teach them skills associated with civilian life, and this can be played in silly or serious ways. Katt's idea of being a civilian though is to be a stunt performer!
Just before the initiation process began, Renegade Midnight Conductor gave an explanation about the Classical and Nova-class mages. These panels were kept in this episode from the previous version, but the dialogue was changed.
Midnight Conductor also mentions that being a mage isn't practical for everyone and that being one can cut into the mage's social life, career or sleep schedule. I wanted to get a bit into the ramifications of the "wake up, go to school, save the world" trope that's common in a lot of magical girl series; the main characters in Magical Renegades are adults and some are still in school, but when they're not, they might have jobs instead.
I've pondered if someone with no social life and no responsibilities could be an ideal candidate for the Renegades, having nothing to conflict with their duties! Realistically, this is something Katt will have to worry about; she's still in school and with a group of friends who are attempting a career as performers!
There isn't such a character (yet?) with either the Renegades or the League, though Chelsea comes the closest to being one. If she dropped out of school (which she'd like to do), would she count as being idle rich when she still has duties related to the League and would also to her family since she officially became royalty? She's the ambassador between the League and the royal family because of her ties to the latter, but at least those are duties she wants.
Time travelers of a high enough rank can manipulate time and Midnight Conductor is of a high enough rank that she can to help her teammates, but this can't always be relied on. Humans and mages are supposed to co-exist, with the mages being dedicated to keeping malevolent ghosts and demons (and malicious mages) away from humans so humans can safely do what they need or want.
As Renegade Midnight Conductor said, being a mage isn't for everyone because it wouldn't be practical for everyone. When she looks for candidates to join the Magical Renegades, she also considers whether a candidate would be able to and want to put in the time to train and put up with the more tedious parts. Being a Magical Renegade isn't just about flashy costumes and magic!
Although the royal families are classical mages, even the worst royals know their societies will collapse without humans focusing on the fields that mages usually aren't able to dedicate as much time.
The incantations for the initiation are mostly kept from the previous version but with some tweaks. The verses are full of boasts, but one of the additions in the middle is a somber element: "In our hands are these wondrous devices... / Remember earlier wielders’ risks and sacrifices..."; this alludes to the Renegades' fight against the royal family's military in 1879 that cost Ainslie her life.
This new verse "From these rise ourselves, magic weapons wielding! / Keep the meter up and our power shall be unyielding!" are up-front about another trade-off of being a Nova-class mage; the weapon needs to be maintained and its power meter needs to be managed! If it runs out in the middle of a fight or the weapon gets too damaged, and the wielder doesn't have any other powers of their own, they'll be powerless!
The Magical Renegades are upfront about this because of the history of unscrupulous mages who sold phony cures and medicines to humans to bilk money out of them.
The last panel of the episode uses the Import Images as Planes tool to combine 2D and 3D:
The flames, character silhouettes and explosion were scaled up in Inkscape, separately exported as .PNG files and imported into Blender. At this angle in the viewport, you can see how each of them were placed to give a layering effect. The light at the front of the platform is moved away from the platform because it interfered with the camera angles in some of the other renders, but it'll be moved back for any front view shots of the platform that are further away.
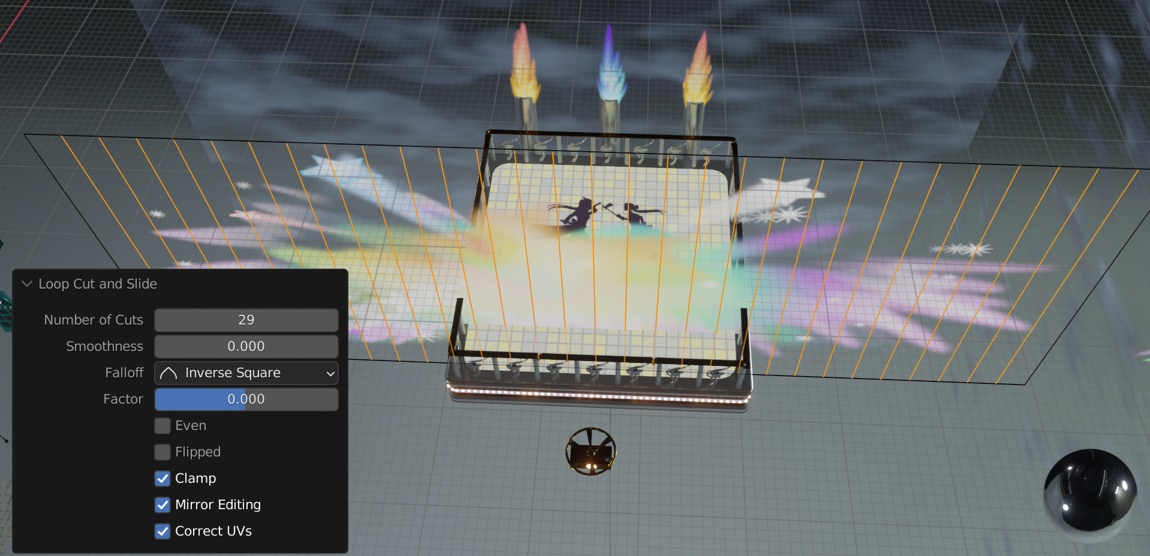
The explosion isn't in front of the platform because I'll make it curve around the front to make it more dynamic. Images as planes can be scaled, subdivided or moved around like any other plane!
I used the Loop Cut and Slide tool and chose an odd number of cuts so I can select one right in the middle. With Proportional Editing on, I selected the cut in the middle and moved it forwards along the X-axis. The larger the number of cuts, the smoother the proportional editing will be. I also moved the leftmost and rightmost edges back along the X-axis so the plane is more curved.
This presented a problem though. At this angle and the emission strength the image plane with the magical explosion effect had, the image plane with the character silhouettes couldn't be seen in the camera view anymore. Lowering the emission strength made the silhouettes more visible but also made the magical explosion not as bright as I wanted it to be.
I moved the character silhouettes closer to the camera and shrunk them down slightly, went to the Shading node to reduce the Alpha value to around 0.6. This kept them partially visible and gave the illusion that the explosion was closer to the camera as intended!
In my production notes for the previous episode I said I'd try a different technique for the lighting effects that'd be more efficient than manually painting all of them in. I was going to make clipping masks for each panel in Inkscape by duplicating each character in each panel, moving the duplicates aside, and using boolean operations on each of them to remove the shaded areas.
These would leave just the parts that weren't shaded. They'd be exported into Krita, placed over the panels they correspond to, and would be alpha-locked so I could color in the shading only in those areas.
However, because of the amount of detail in my art style, this process took so long with just the first panel of the episode that I realized I wasn't going to be saving time. It could've even taken longer than the manual painting technique I've been using before so I went back to that!
Behind the Scenes: Episode 35 WIP 2
This WIP got delayed because I've had to juggle a lot of other things lately, but I still had the time to continue this episode.
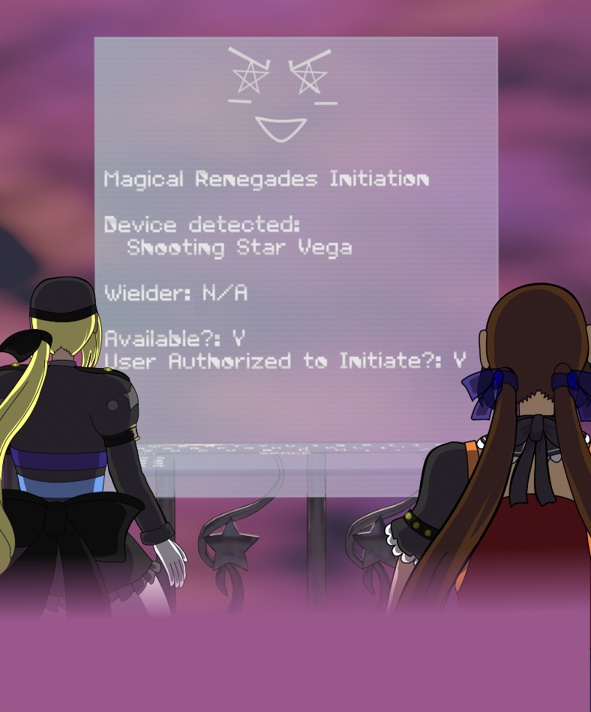
A major step forward in this next episode: The initiation process is about to start! Compared to the previous version pages this episode adapts, the process is a bit fancier; Renegade Midnight Conductor activates a holographic screen with information about it!
I made holographic screens in Blender before for ep. 29. As you create different kinds of materials, the easier it is to make similar materials through more experience using the shader nodes, and through the ability to copy and paste a material into a new one so you don't have to re-enter all of the same nodes!
Most of the same nodes and values for them could be used again but this screen color has a gradient to it. It’s satisfying when I can build onto techniques that I learned!
Most of the panels after this will be adapted from pages 83-85 from the previous version so it'll be pretty straightforward... Or so I thought!
This isn't the first panel to show characters standing on the new 3D-modeled platform design, but it's the first to use a technique that's more efficient!
In the earlier panels I just rendered the background and put it behind the characters, which could get inefficient since the platform rails could appear in front of the characters. There was some manual editing I had to do with that step.
This time, I exported just the panel of the characters as a transparent .PNG image and imported it into Blender with File >> Import >> Images as Planes.
I didn't know how to give the flames a softer look; I modeled them from elongated sphere objects and lifted up some of the vertices to add the points, so I painted over them in Krita with effects to give them a softer look. This'd be something good to learn for another time I need to model flames!
Behind the Scenes: Episode 35 WIP 1
This episode will be a more straightforward adaptation of pages from the previous comic version than the latest episodes, but there are still some challenges!
The initiation process will be shown soon! One of the characters on the cover will make her appearance within the next few episodes!
The previous version got far enough to introduce the Mage Pluses, a class of magical super soldiers with cyberpunk-style uniforms and combat gear, but not much was able to be shown about them in the story before the previous version got discontinued -_- One of the things I was able to show in the previous version were their uniforms! Those will be brought back but with a bit of a redesign, but it will keep the color scheme of red, white and orange with either gold or steel gray for the metal pieces so the model isn't quite finalized.

Their updated uniform design appears in a panel which also shows that Mage Pluses can generate weapons and shields. I made a model of the uniform as a reference for the pose and lighting since this panel will have dramatic lighting effects! This has been my most ambitious try at modeling and attaching clothing and armor to a rigged character model yet. It's a very rough model though as you can see from this reference, the pieces of armor clip through clothing! This still serves its purpose as a lighting reference, but I'd also like trying to make a model that's more polished.
Adding the glowing orange details on the front of the uniform was a pain. I made those with curves I manually adjusted, converted to meshes when the placement was correct, and used sculpting tools to refine them. I'll really need to look into how to add details such as these more efficiently when modeling clothing and I'm thinking over if I should remake the base model before I continue. I created it before I realized that it's a common and very helpful practice to add, but not apply, a Subdivision Surface modifier. After that screenshot, I tried it on the model and the clothes and they look more polished already! There's not as much clipping, so progress!
Behind the Scenes: Episode 34 production notes
This episode adapts pages 79 - 81 of the previous comic version. There are extensive changes to the dialogue and many new panels due to retcons and the addition of Renegade Knockout Tango to the scene.
In this episode, Renegade Midnight Conductor clarifies that the initiation device reacted unusually to Katt and that shouldn't have happened to anyone. Before Midnight clarified this, Katt asked if the device detected if she was an unworthy wielder until she either broke the mechanism or proved her worth. Midnight Conductor's explanations reveal that the initiation devices also need to be kept out of the hands of the Minions of Nemesis since they could try to brute force the security mechanism.
I designed that part to look like a security infographic! XD
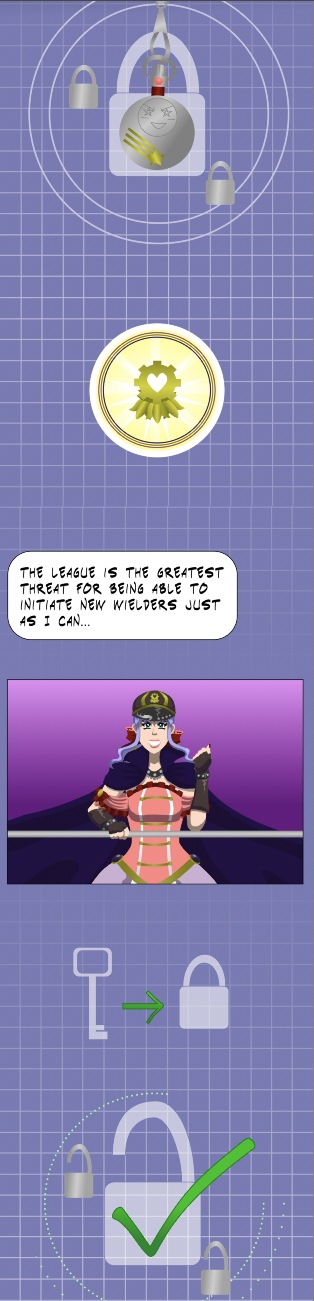
Shown in the graphic: A unauthorized user who still has the credentials (i.e: ability to initiate a wielder), and an unauthorized user who doesn't but could try to brute force.
In page 81 of the previous version, the magic barrier to repel the swarming robots was automatically created. That was a convenient way to wrap up that page and the end of that chapter; the previous version always had chapters of 27 pages, not counting any extras. Since the webtoon episodes don't have that constraint, I could retcon this scene so that Midnight Conductor used Temporal Standstill, her spell to freeze time around her. This is a powerful spell that she can't keep up for very long and it'd take a lot of power to keep up, but Knockout had some spare superconductor crystals to give so the spell could be possible here!
Knockout's addition to the scene made this possible, and this let me show off another idea far sooner than I planned and I'm glad for that! I wanted to show off this spell at a later time, but it would've been in in a story arc far ahead.
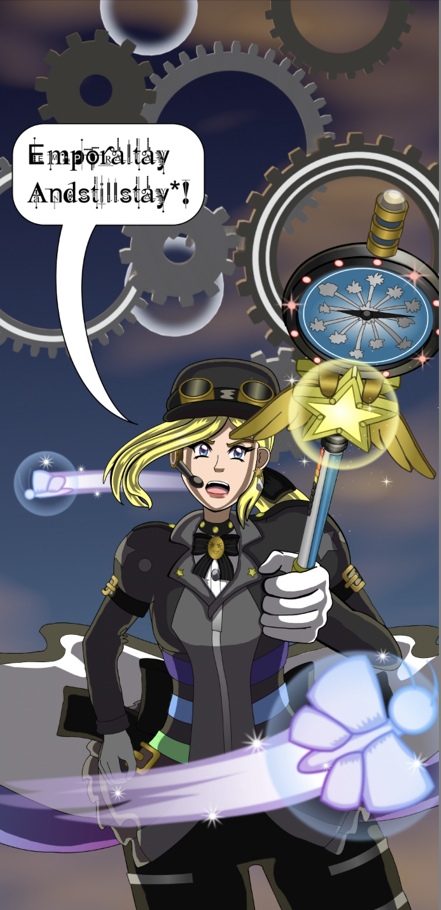
This was one of the most ambitious new panels in the episode, and I watched the Time Stand Still music video. A song that's extremely relatable :')
When Midnight Conductor activated Temporal Standstill, I could've reused her weapon as it appeared in the previous panel. It would've been really tedious to adjust the positions of all of the nodes on her weapon to match the perspective that it should have in this panel, so I 3D modeled it and made the render to use as a reference!
This posed another challenge with blending 2D and 3D. I used techniques to paint over 3D backgrounds to blend them in with the art style, but with an item a character is holding, I needed to vector it for it blend in seamlessly. I tried some of the Trace Bitmap features and got some decent line art from the settings I tried, but still needed to vector every individual shape. I'm sure all these steps took a lot more time, but I'm more satisfied with this result and wanted to add extra visual impact into that panel!
The magic gear background reuses the gears and bubbles from the earlier background when Midnight Conductor's weapon changed forms. The base colors of the gears were tweaked to fit the orange lighting but when I put the lighting behind them to match how the lighting would be behind her, it was hard to see them and there was little contrast between them so I added a small level of Emission to them.
The color lighting effects! I added them to so many panels in this episode that it took hours and sometimes my hands hurt and I needed to take a break T__T
When I imported the episode into Krita, I manually painted in the lighting effects. Selecting roughly where to add them, using the fill tool and painting in the areas that were missed saved some time and effort, but this still took hours! I've been able to do these effects in Inkscape and have used them a lot in the previous comic version; the lighting effects would be made from several paths per panel since they often had gradients at different angles, but each of them would need to be adjusted if I wanted to adjust their color and brightness. If I needed to make any changes, adjusting them would be tedious.
It's been more efficient to do this step in Krita by putting the lighting effects in a layer that can be used across panels and to limit use of gradient lighting although I like the extra detail it offers. When I needed to change the color of lighting I'd just lock the layer and paint over the part that needed to be changed. Adjusting the brightness of the lighting which is usually in Soft Light mode is as simple as adjusting the opacity of the layer.
When I had only a few more panels to add the effects to, a method that might be a lot more efficient crossed my mind! How annoying that I didn't think about it until that late! Oh well, I could try it for the next episode and see how much time it'll save.
Behind the Scenes: Episode 34 WIP 3
Production of this episode is almost complete! It may be completed by this weekend so here's a mid-week WIP!
In the last WIP, there's a preview that shows how Renegade Midnight Conductor's weapon will change form in a battle!

This is a panel of when her weapon is about to change form! Getting to adapting the next parts for Anathema to Commonsense are exciting but have also felt daunting because I wasn't sure whether to keep the magical backgrounds in 2D or convert any of the effects to 3D. Those bubbles in the background are 3D and I was excited when I figured out how to make those!
In the previous comic version, the cosmic backgrounds and nearly all of the magical effects were made in Inkscape. I could keep them that way; I split the production of each episode into multiple .SVG files to keep each individual file from getting too large and too slow to work with.
When I was using Windows as my daily driver to produce the early episodes, this was also necessary! Sometimes I got a "Too many heap sections" error that'd make Inkscape crash, and when I had the misfortune of saving the file at the same time this error happened, that file would be corrupted and unusable and all of that time was wasted! TT__TT
It's important to save often, but the risk of this error happening and losing progress from it grew when the file got rather large. I don't remember at what size that started happening but when I split off panels into a new file and kept each of them under 10 MB, that helped me avoid that risk. I switched to Mac and upgraded to a newer Inkscape version since then, so I don't know if this error is still an issue with recent versions for any platform. After I switched, I've gotten files as large as 30 MB without this error happening, but I still split them up to keep files from getting too large and from slowing down performance too much.
This is the first panel of episode 34. This was all made in Inkscape, and the built-in blur filter blurred the shapes of the background. This is still very doable but since the files for these episode segments are larger than the files were for individual pages, scrolling can sometimes be slow. Keeping these backgrounds on a separate layer that's hidden when it isn't be worked on is a key to better performance. I may be able to remake this background in Blender and put the render in as the background, and that'd fit with the magical, otherworldly look to it, but I was concerned about how much longer that would take than just keeping what I already had.
As I was writing this post, I tested out how doable it'd be to recreate the effects in Blender with what I know. I got the most viable results by using metaballs clustered together into a cloud shape and applying a cloud material to them for the larger clouds, and making the smaller clouds with curves, but these looked very different and metaball clusters are difficult to get in a precise shape that isn't entirely round even after converting them to meshes. I don't have any experience using the Grease Pencil but I'd be willing to learn it and try it out for the cloud effects for the next episode so this one doesn't take too long to finish. Update schedules have mostly been monthly!
Some decisions to leave effects 2D are pragmatic. I think the background I made in Inkscape looks good enough as it is for this scene and I already spent a lot of effort modeling the other form of Renegade Midnight Conductor's weapon, since it's needed as a reference for an ambitious panel near the end of the episode when she uses one of her spells and it's being held at an angle!
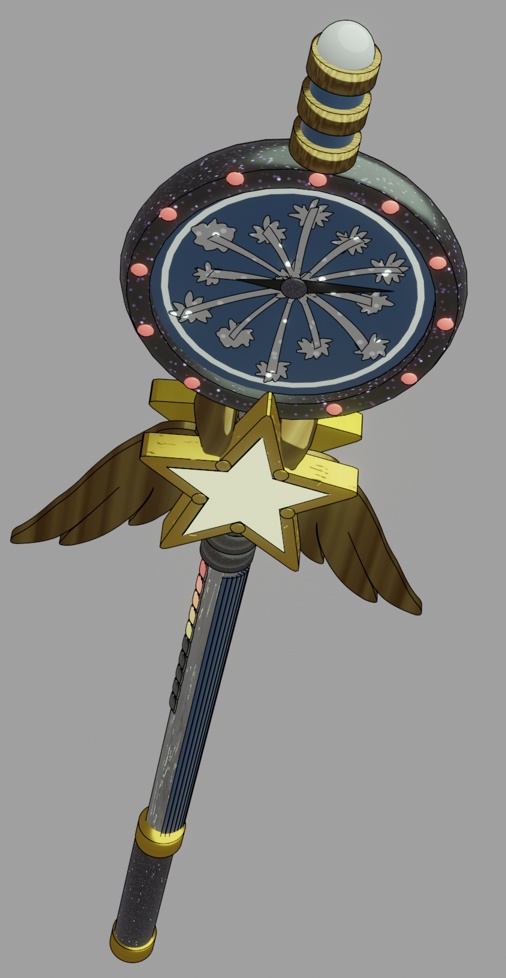
Behind the Scenes: Episode 34 WIP 2
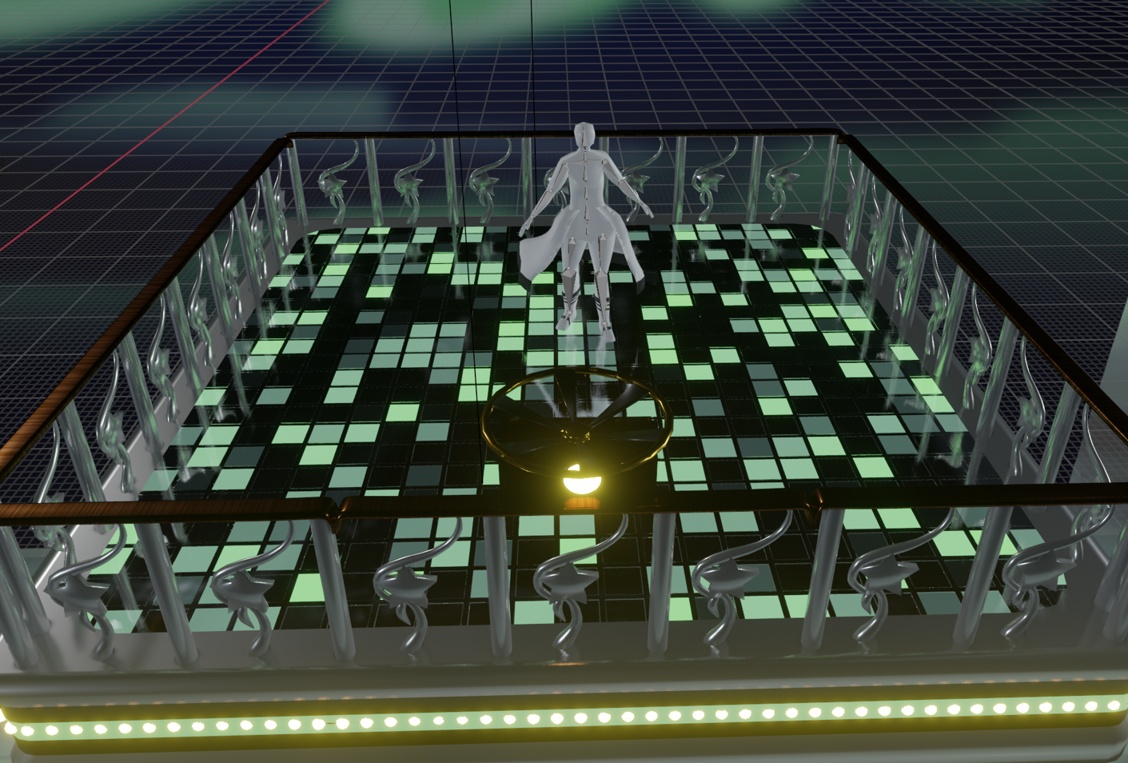
Progress steadily continued on episode 34 over the last two weeks but I didn't feel ready to post a WIP last weekend. This WIP is of a new panel and of another flashy effect that wasn't in the previous version; it adds procedurally generated light-up tiles to the platform floor! They shape and placement of the tiles are formed from a Brick Texture node plugged into a Bump node into the Normal of the Principled BSDF shader. The colors are from the Brick Texture node. The Principled BSDF node and an Emission node are plugged into a Mix Shader between them and the Material Output, and the colors of the Brick Texture are also plugged into the color of the Emission node.
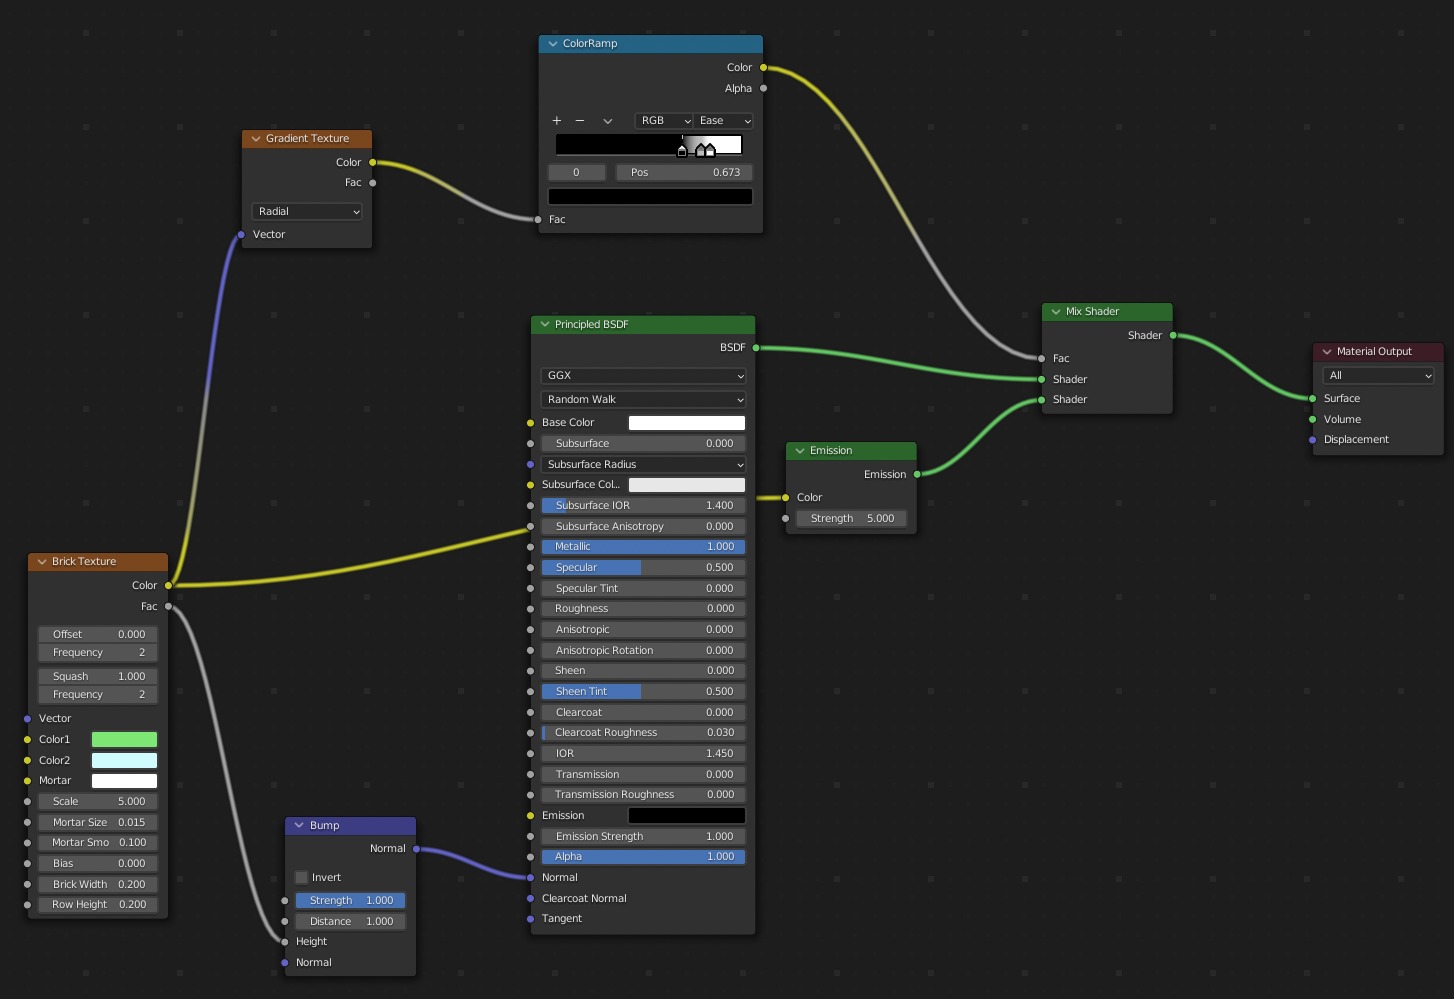
The ColorRamp plugged into the Fac of the Mix shader controls which lights will be turned on or off. The nodes that also plug into ColorRamp are also a part of this.
This panel will have a close-up of the tiles that Renegade Midnight Conductor is standing on. Posing the base model gave a reference for her pose, but I'll need to make multiple renders. One render will include the model as a reference and another will be identical but without the model. 2D and 3D will need to be blended on this panel and several others that show the characters on the platform. So I recently noticed that the Eevee render engine can display reflections! I'd been using Cycles for that the entire time! If I can get all of the effects I was intending in just the Eevee render engine, that'd save time with making backgrounds where I had been making separate Eevee and Cycles renders and mixing them together to get the effect I wanted!
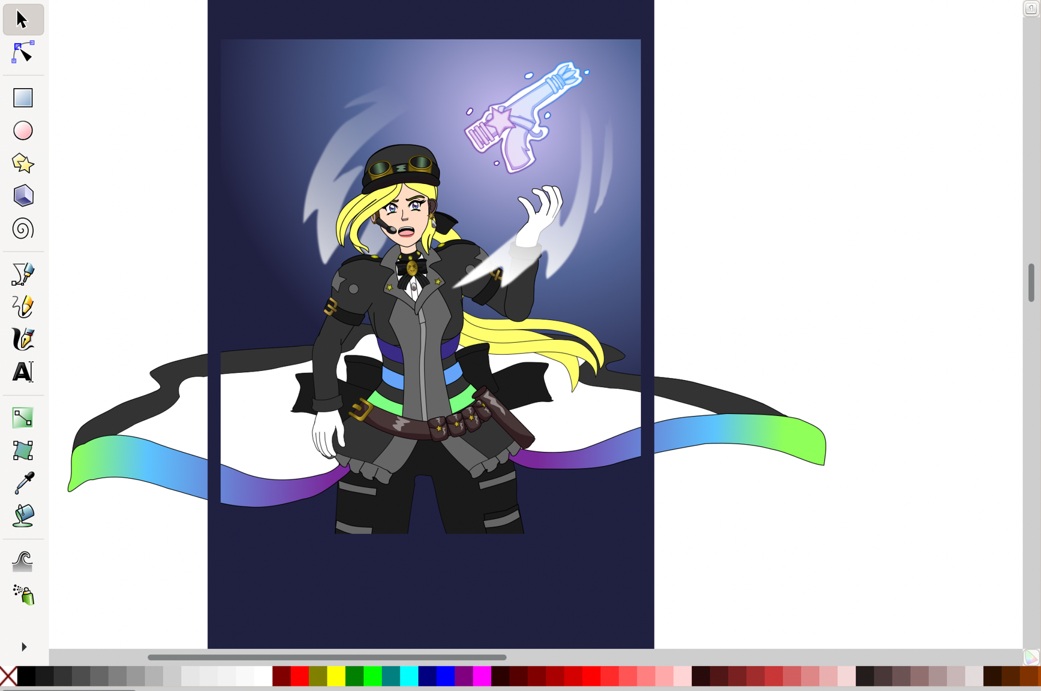
Midnight Conductor's weapon gets a form change! It's not the supercharged mode since the power meter isn't high enough for her to activate it although that'd be very exciting to get to, but her weapon has another form with different capabilities!
Behind the Scenes: Episode 34 WIP 1
This episode will adapt pages 80 and 81 of the previous comic version, and also expanding on a scene with several new panels!
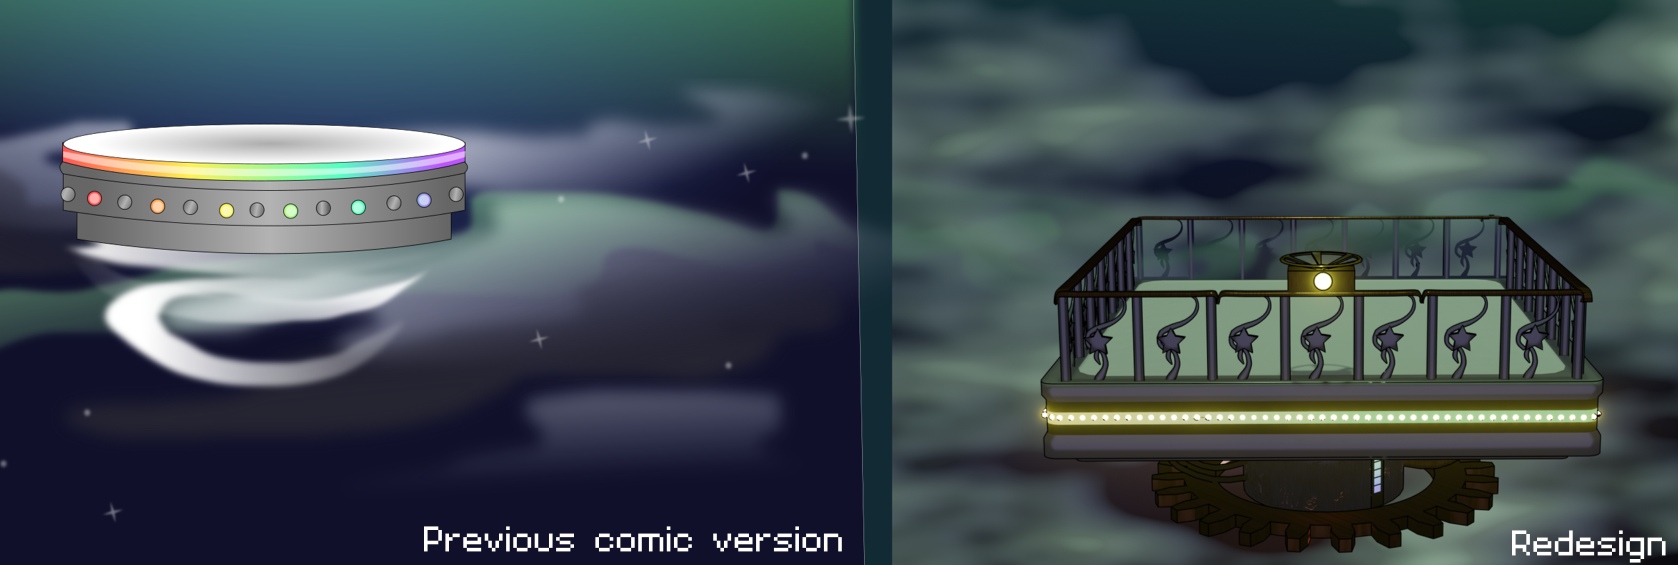
When Katt met Renegade Midnight Conductor in this scene, they met up on a floating platform. Redesigning it took a few hours and wasn't really necessary but I wanted to redesign it to add rails, more steampunk and glowing LED elements! The rails are inspired by Art Nouveau-style railing.
A new panel before this one shows a close-up of the underlying design:
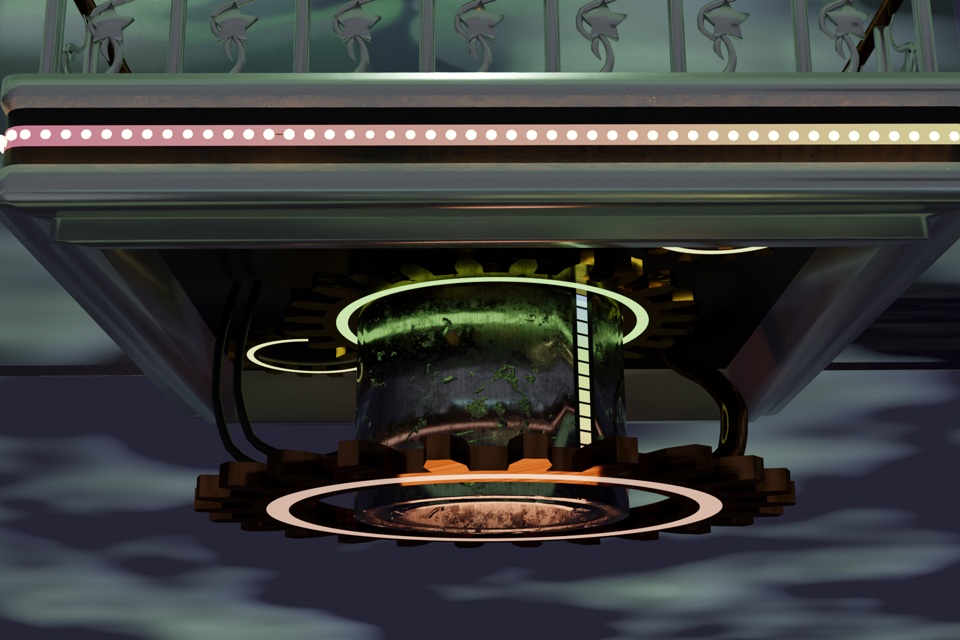
These panels need a blending of 2D and 3D to keep the same backgrounds. In the previous comic version, nearly everything was made in Inkscape and I hadn't started using Blender for backgrounds. I wanted to keep the sky backgrounds from the previous version but also redesign the floating platform. What to do when I'd also need to adjust the world setting and lighting in the .blend file that I'm modeling the platform? I scaled up the background by itself in Inkscape, exported it as a .PNG file, and imported it into Blender through File >> Import >> Images as Planes. Importing images as planes is an add-on available under Edit >> Preferences.
When I imported the background and put it into place, I was disappointed that the colors were more darker and washed out in the renders I made. I might've needed to turn up the brightness of the lights I placed in front of the background and the platform. These were large area lights at 1000 - 2000 watts each. Perhaps I could've gone higher on the brightness, but I can always manually adjust it in Krita.
I recently did an experiment with stylized shading for a background, which could be a lot more efficient if I can keep implementing it, but I went back to my usual method of mixing renders together from the Eevee and Cycles engines for a composite background that'll be used in the episode. The reflections and other effects that only the Cycles engine has are sometimes too cool for me to want to give those up, which is why I made composite backgrounds to keep some of those effects without them standing out too much!
Behind the Scenes: Episode 33 production notes
This episode adapts pages 77 and 78 of the previous comic version. Panels from these pages are mostly kept, but with expansions to the glitchy and psychedelic visual effects, and new panels to expand on the scene!
WIP posts for this episode go into detail about these expansions, but there's still more to write about for the production of this episode! The dialogue was changed a lot, which led to some retcons and other changes:
In the previous version, Renegade Midnight was in a battle alone, tossed the extra transformation device she had to Katt since Katt happened to be someone there at the right place and time. Midnight didn't intend to initiate anyone then, and was surprised by how the device reacted when Katt held it and again when she could harness any part of its power without yet being initiated.
At the start of page 78, Midnight said "I'm so sorry! I didn't know this would happen!" When the device tried to overpower Katt. She then thought "Is she going to use its power?!" When Katt overcame it and gained control of it. I intended to explain this ability, its strengths and drawbacks but couldn't before the previous version got discontinued. :-(
Page 72 of the previous version established that she and Katt already knew each other somehow. For them to know each other already seemed a little too convenient and contrived in the previous version... unless Midnight Conductor might've saved Katt before some time in the second timeline. This'd give more of an explanation for how they could already know each other and be one of the reasons why Katt wants to join the Magical Renegades.
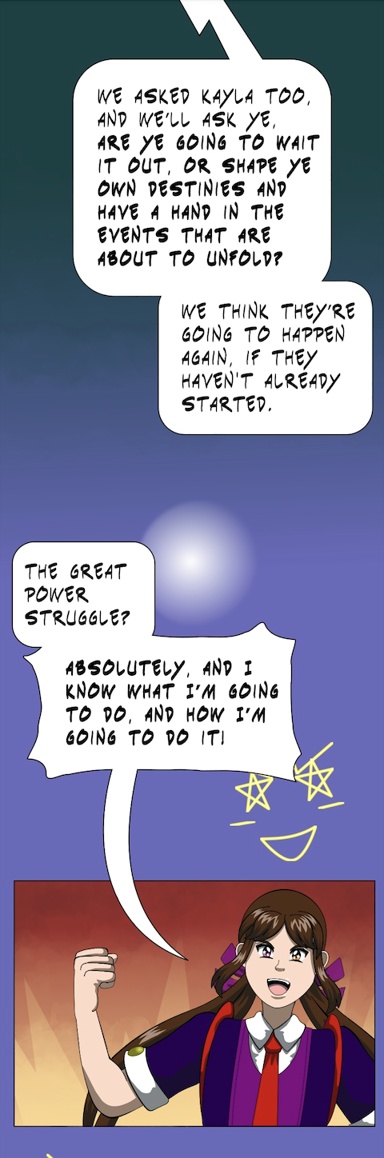
Episode 29 establishes that Katt wants to join the Magical Renegades and that she wants to seize the opportunity in the new timeline. Her and Kayla's parents asked if they were going to wait it out until they could return from the past, or if they wanted to shape their destinies and have a hand in what would most likely be ahead. Her motives shown in that episode are ambiguous though and that's intentional; does she want to join the Renegades because she thinks it's the right thing to do, does she want to fight for glory or just for the sake of fighting?
When writing stories, there may need to be some convenient allowances that help move the plot forward and keep the writer from being too bogged down by all of the details about how to go from one plot point to the next. It may be convenient that some characters already know each other or some things are in a protagonist's favor, but alternatives to those may be too difficult and time-consuming to write. They may also slow down the pace too much as to frustrate the writer and negatively affect the reading experience for the readers who would've preferred for the story to get to the point!
This episode expanded on the scene when Katt caught the initiation device from Renegade Midnight Conductor, but the device was trying to control or overpower her. The additions raise the stakes and add more tension!
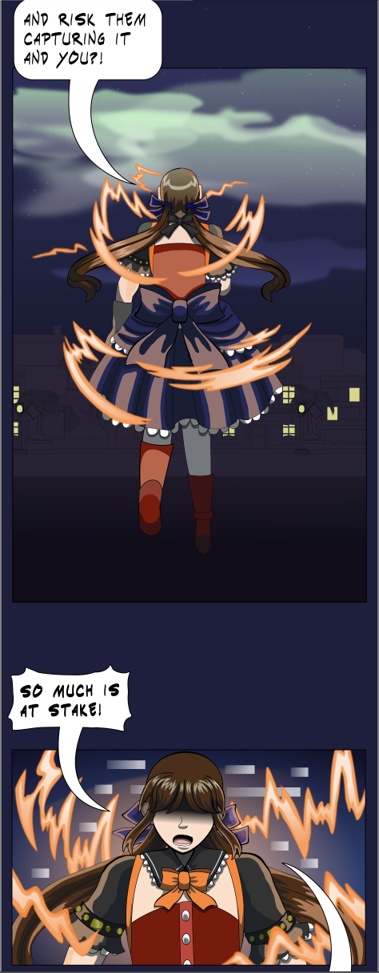
Midnight regretted tossing the device to Katt and asked if Katt wants to toss it back; Midnight would've rather taken her chances with the League than for someone to get caught in the crossfire. Katt refused because she wanted to fight the robots and join the Magical Renegades!
Panels were added to show the robots closing in; this shows that Katt has a clear and short time limit to gain control of the device to keep herself from getting overpowered by it and to keep the device from getting captured!
The addition of Renegade Knockout Tango as a new character in the adaptation also led this scene to be expanded! She is in a support role. Panels were added to show more of her outfit, and to show her using her weapon to slow down the robots to buy Midnight and Katt a little more time.
...That is the question!
I usually blend in 3D backgrounds to fit the art style. When drawing in 2D and using 3D backgrounds, blending the 3D model backgrounds is widely recommended because not blending them can feel distracting to readers; this is also the case with 2D and 3D animation that isn't smoothly blended.
The techniques I've been using to blend backgrounds haven't been the most efficient although I like the effects. I painted over the shading of the background so it's more cel-shaded, but with a watercolor brush. Using a watercolor brush gives scenes a style of 80's and 90's anime; characters with bold blocks of color for the shading and highlights with painted backgrounds.
In this episode I didn't blend the glitchy 3D render backgrounds because I wanted them to stand out more! Not blending 3D backgrounds or models when the rest of a scene is 2D can be a stylistic choice to make the 3D things seem more jarring or otherworldly. The first episode to have 3D backgrounds that deliberately weren't blended was episode 5 in a scene of a time rift!
They might not have already known each other, but Midnight knows from one of her teammates that most of the guests at the Stranded Inn Time hotel have good potential as recruits. In episode 32, she instructed Midnight to fly to the hotel and fire a warning flare in the chance that a good candidate will help. This was still risky, but it seemed like the best immediate option to keep the extra initiation device away from the hands of The League.
It's still unusual that the device immediately reacted to Katt when she held it, as if the device was testing her. She was able to harness it without being initiated, which is unusual. The strengths and drawbacks to this would be explored this time!
Behind the Scenes: Episode 33 WIP 2
The production of this episode is going to be similar to episode 32. It's an adaptation of pages from the previous comic version, but with changes to the dialogue and several new panels from expanding on scenes!
This is a preview of the expanded scene:
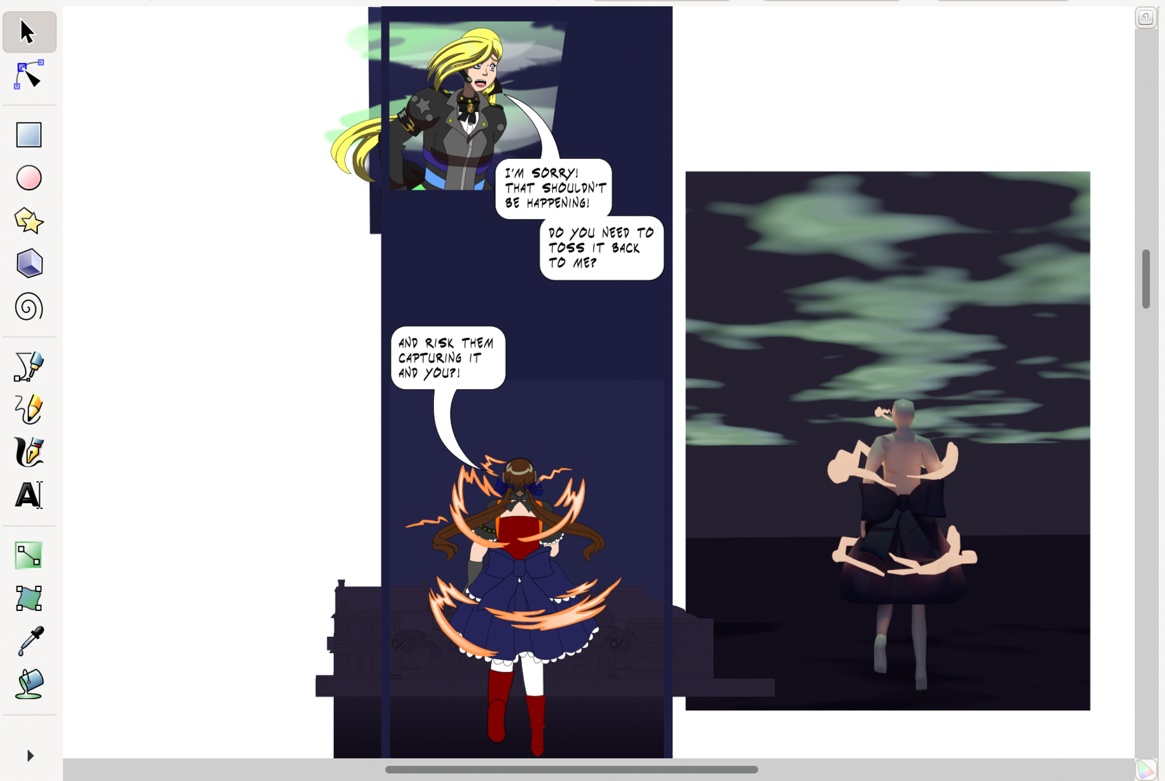
Transcript:
Panel 1: "I'm sorry! That shouldn't be happening! Do you need to toss it back to me?"
Panel 2: "And risk them capturing it and you?!"
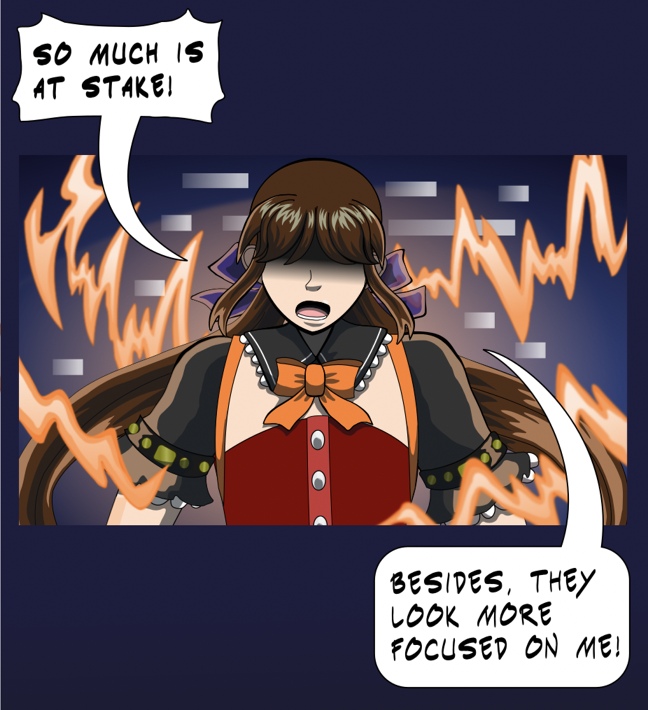
Panel 3: "So much is at stake! Besides, they look more focused on me!"
The first panel is a revamp of a page from the previous comic version, but the second and third panels are new. I made rough sketches and posed the 3D model I've been using in Blender to provide a more refined reference for the pose for the second panel. Katt's skirt was added to the model to show how much of the legs I'd actually need to draw and to give more of a reference for the lighting.
Adding pieces of clothes in these references also gives me more practice modeling them. This skirt didn't turn out the best and I don't know how to add the lace at the edges yet, but the bow was new!
The glitched magical streams are made from curves that started as a single vertex. With the camera set to the Z-axis, I created a single vertex (Shift A >> Single Vert >> Add Single Vert), extruded it several times and then converted it to a curve (Object >> Convert >> Curve). I found this to be the easiest way to shape the streams to add the spikes and to adjust the thickness of the end and middle areas.
The end of the last episode cut out Katt falling into mud after she caught the initiation device since the tone of that clashed with the rest of the scene. Here the power of the device lifted her into the air and she's looking up when she asks Renegade Midnight Conductor "And risk them capturing you?!" after Midnight Conductor asked if Katt wanted to hand the device back because of the danger.
I've added most of the panels for the rest of this episode. It will be a major expansion since Renegade Knockout Tango was a new addition from the current episode and she will have her weapon in battle!
Behind the Scenes: Episode 33 WIP 1
The production of this episode is going to be similar to episode 32. It's an adaptation of pages from the previous comic version, but with changes to the dialogue and several new panels from expanding on scenes! The next WIP would be about the expanded scene.
This first WIP is about the beginning of the episode. It's a fairly straightforward adaptation of page 77 of the previous comic version. On that page I crammed in as many psychedelic visuals as I could without it getting too crowded!
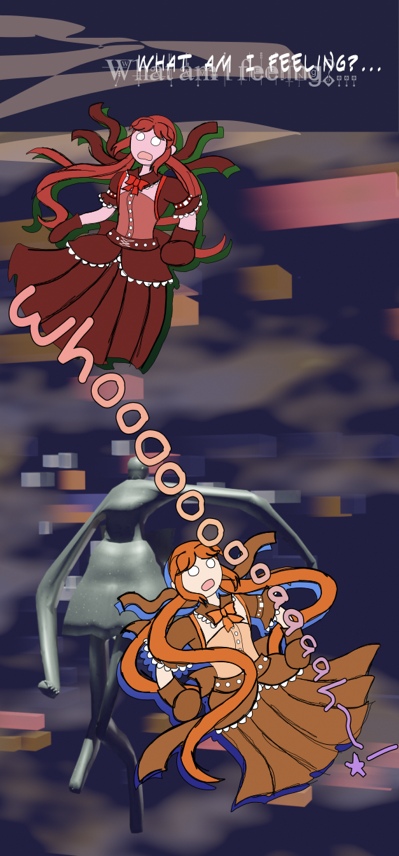
Adapting them to episode 33 started out very straightforward. Everything on the page including the cloud visual effects were vectors so they could easily be moved to episode 33 and re-arranged to fit the vertical format as this WIP shows here, but I also want to take these visuals another step further since I'm no longer restricted by the height of the pages and have more room for more effects!!
With more room I added glitchy background effects, inspired by glitchcore aesthetics and a couple of neat tricks I learned in Blender several months ago but didn't have a practical use for... until now! 👀
I immediately knew that I wanted to use glitchy 3D renders to put in the background, but I thought over whether to use Blender or Infini-D for this. After thinking over the possibilities, I used Blender this time to put some tricks with it I learned to use and these effects either would've been far more efficient with or required the use of a modern 3D program.
This is how the effects are arranged:
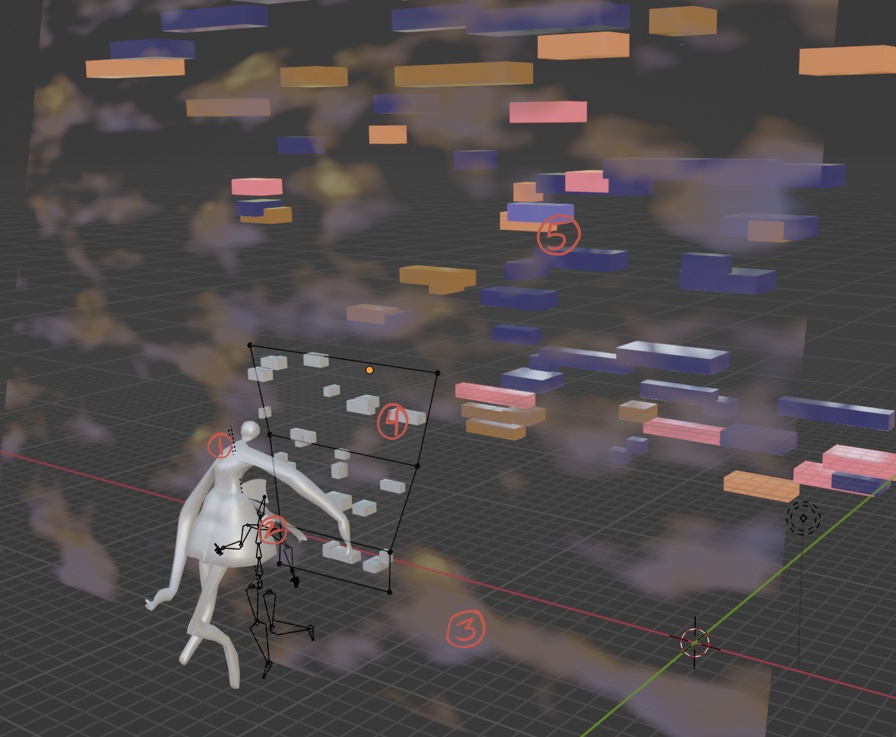
One of the "glitchy" effects I stumbled across was when I was rigging a model: When the rig (or armature) is made the parent to the model, the model will move with the rig when you move it as it should, but when you select just the model and move or scale it without the rig, the model gets distorted in all kinds of bizarre ways! It was interesting to see what results I got from that, but it was a trick I needed to shelve until I had the chance to put this to use!
I could've replicated the blocks in 2D, but I knew how to easily make this effect in 3D with my recent practice of starting to learn how to use geometry nodes! This practice started with learning how to use the Distribute Points on Faces and Instance on Points nodes; the points are invisible until an instance is assigned to them, and the blocks are the instances (in the Object Info node, plugged into Instance in Instance on Points).
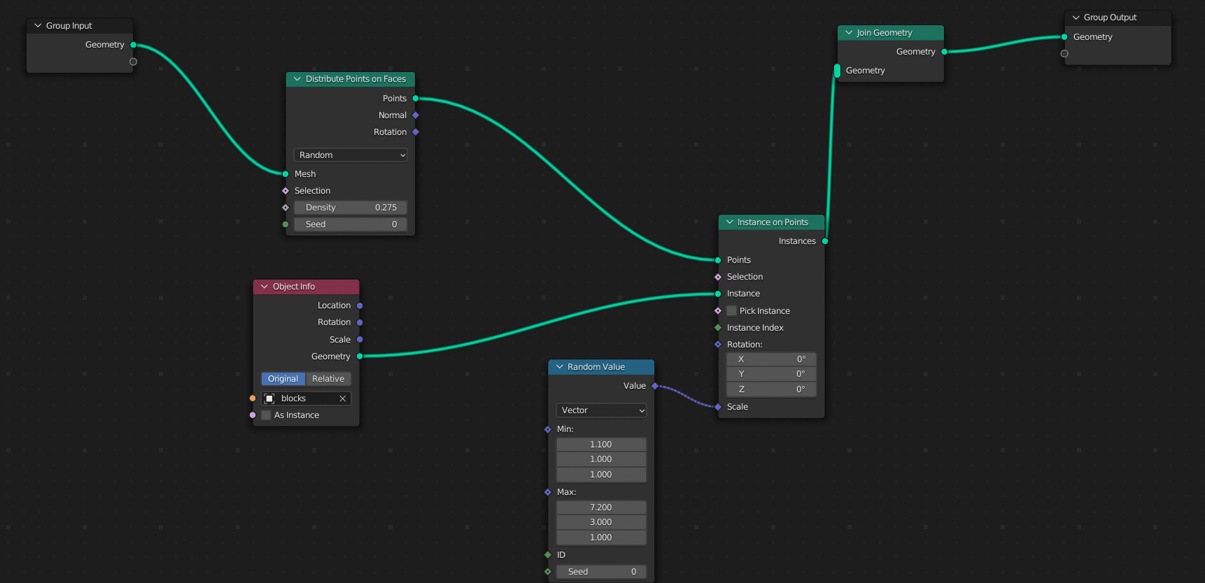
These are the geometry nodes for the blocks. Random Value is plugged into the Scale of Instance on Points to randomize the size of the blocks.
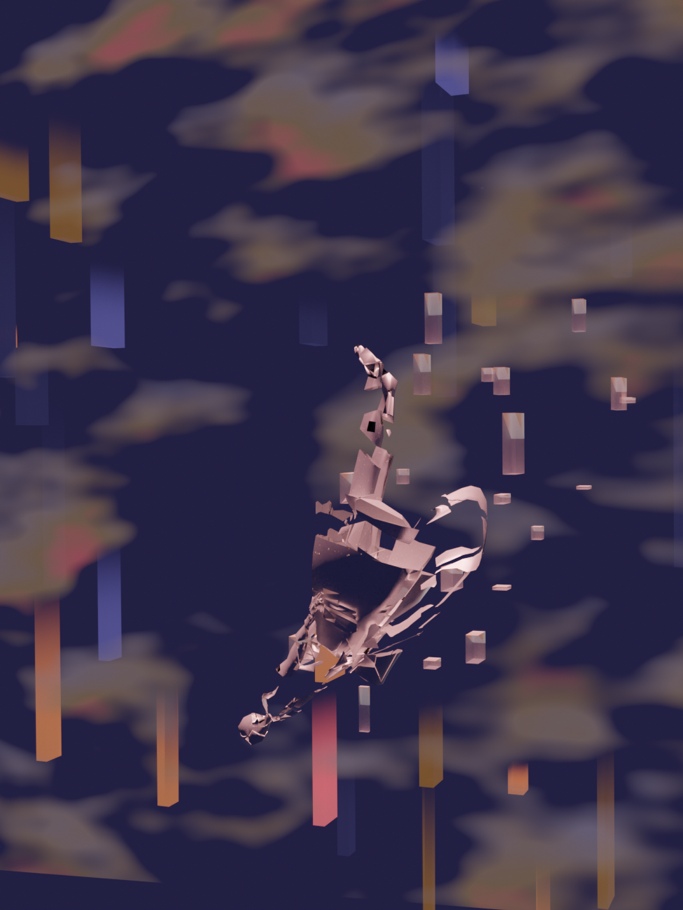
This is another background that will be used later in this episode.
It reuses the background elements, but with tweaks to the meshes, and changes to the values in the geometry nodes by adjusting the Density in Distribute Points on Faces, adjusting the randomized values for the scale, and setting the Y-axis rotation of the blocks to 90˚.
The disintegrating effect is from Cell Fracture, after I converted the posed model into a mesh. Cell Fracture is an add-on for Blender that's included. Move pieces around with proportional editing on and watch a trail form!
Behind the Scenes: Episode 32 production notes
There are a lot of notes for this episode because there are a lot of changes!
This episode adapted pages 74-76 of the previous comic version, but is a looser adaptation of pages than episode 31. Nearly all the panels from pages 163-167 fit in with episode 31, but more panels from the pages that episode 32 adapts were left out to rewrite major details. The panels that were used were re-arranged between new scenes, and events from the previous versions across chapters were re-arranged!
At the start of episode 32, Katt is lying in bed because of her injuries. This alludes to a scene that was in-progress in the previous comic version before it was discontinued. She ran to the time travel office with Alicia, Kayla and Melody. They were keeping a steady pace, but Katt had the idea to jump across trees to get to the office more quickly, and tried a stunt and wanted to show off, but she missed one of the trees, got tangled in vines and fell! She would've wanted for her friends to continue to the office without her, and would've made it there at the last minute!
This scene will carry on as one of the events to be mentioned in chapter 14 of Extra! Chronicles. It's better suited as a chapter than part of an episode, and drawing out the scenes of the new arrivals reporting to the time travel office in the previous version was the final straw of pacing problems that did it in. I was only able to finish and publish one page a week at the most, so every page counted! The start of chapter 7 of the previous version was meant to be slice-of-life segments that showed more about characters' lives as they handled a mundane task, but I just couldn't keep my attention on this comic form.
I could get through several other slower scenes because the next battle or major lore reveals were in sight, but not with this one. The next major arc I had planned was just spaced too far away. Writing a long-form webcomic or webtoon takes so much patience and to keep hope in ideas that may be weeks, months or years away from drawing! Spacing and pacing are so important!
In page 74 of the previous version, there were a few panels of Renegade Midnight Conductor's fight against the League's robots that were trying to capture her and steal the extra transformation device that she had. This was expanded into a longer scene that showed her talking to another of the Renegades through a headset. It made more sense for Midnight Conductor to not do her mission entirely alone, and for another Renegade to help her find a way to escape.
The teammate helping her is Renegade Knockout Tango! Her codename is based on two colors; Knockout is a bright shade of pink or magenta, and Tango is a light red.
There's also a monologue about her worries about the risks of trying to recruit another member now to help her fight and to keep the League from taking that initiation or startup device. I'd been using "transformation device" before but I've gravitated towards calling them "initiation devices" or "startup devices" instead!
A monologue was also added for Katt when she rushed to catch the initiation device. This line "I'll be one of the people she said has potential to be initiated if I'm not one already!" Is similar to how Susana was originally unsure if she had what it took when she was offered the chance to join the Magical Renegades, but wanted to become someone who could be counted on. I had to leave this off-panel, but from the second timeline, Susana wrote an autobiography that was famous, and it's the same one that Paige read from in chapters 3 and 4 of Extra! Chronicles. Katt would've known about Susana's thoughts on becoming a Renegade from it.
The card stack idea from the Fateful Stack of Choices spin-off shows up again and I should add a page about it! It was first included into Anathema to Commonsense in episode 16. Midnight Conductor has a few of the cards of the most disastrous outcome!
She doesn't have any other cards that could provide any context for how this could happen though!
The dialogue between Katt and Kayla on pages 74 and 75 of the previous version was changed to be more serious. There was still a bit of room for Kayla to snark but even she is worried about Katt trying to run outside while she is still injured.
The rest of the panels from page 75 are mostly the same, but when Renegade Midnight Conductor asks for Katt's help, Katt knows more in this version than she did the previous one. In the second timeline, she knew of the Magical Renegades and wanted to join them although that possibility seemed so far away; she might've crossed paths with them not too long before she was taken to the third timeline!
In the previous version, she asked about what would happen if she missed, and if the machines would chase after her since she wasn't sure she could defend herself from them. Midnight explained that Katt could borrow the power of the magical device she catches to defend herself from the machines.
Katt knowing more about this in the new version than before also ties back into the end of the courtroom scene from episode 19. This introduced that the Magic Gatekeepers don't like the Magical Renegades, but see them as the most likely last hope for anyone to overthrow the League and restore space-time since the Gatekeepers' own rules don't let them use their full power unless there is an immediate crisis!

These panels showing Katt operating a steampunk-style computer in the hotel had to be removed since it contradicts the new scene at the start of the episode, and the updated designs for the hotel rooms don't include computers. :(
This removed panel also shows that the hotel rooms previously had an Art Deco-inspired style which I intended to keep when the hotel was introduced in episode 27, but switched to a vaporwave style!
The scene at the end of page 76 when Katt fell into a mud puddle after she caught the pocketwatch was also removed. I thought over whether to keep or remove it since it would help determine the note the episode would end. Although I like silly moments and wanted to keep this one, I ultimately removed it because it took away from the tension and sense of urgency of the scene at the wrong time.

It worked as a punchline in the page format, but this was also one of the wrong scenes to reduce tension and urgency from; Katt successfully caught a hold of the transformation device that Renegade Midnight Conductor threw to her, but there will immediately be two problems ahead; how the device reacts to Katt and her having to worry about how she'd defend herself against the League's robots!
Behind the Scenes: Episode 32 WIP 3
At the time of writing this, episode 32 is close to being finished and I already started the finishing touches! The WIPs for this post show another scene that's expanded from the pages it adapts.
Transcription:
Part 1:
"There's the hotel!"
"This is so risky..."
"The League already has the advantage and if I recruit a new member now, they'll be forced to learn on the spot. They could get in the crossfire and get hurt."
"There's also the risk of a recruit we didn't take the time to vet being a liability, or causing disaster for us..."
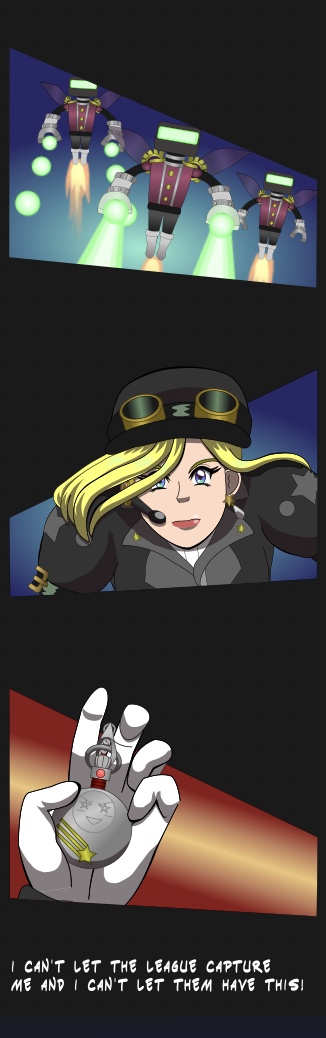
Part 2:
"I can't let the League capture me and I can't let them have this!"
Renegade Midnight Conductor worries about the correct decision when she's flying away from the League's robots. While she's flying away and heading to the Stranded Inn Time hotel, she considers the benefits and risks to immediately initiating someone to keep the extra transformation device from falling into the hands of the League. Catherine talked with her about this in episode 31 and said that the guests at that hotel have a lot of potential. This would be the Magical Renegades' best bet to initiate someone ASAP, but it's still very risky.
Behind the Scenes: Episode 32 WIP 2
Learning how to do basic character modeling and rigging with Blender was a great idea! I'm still far away from being able to use those skills for much, but having a model I can pose is so helpful for trickier scenes!
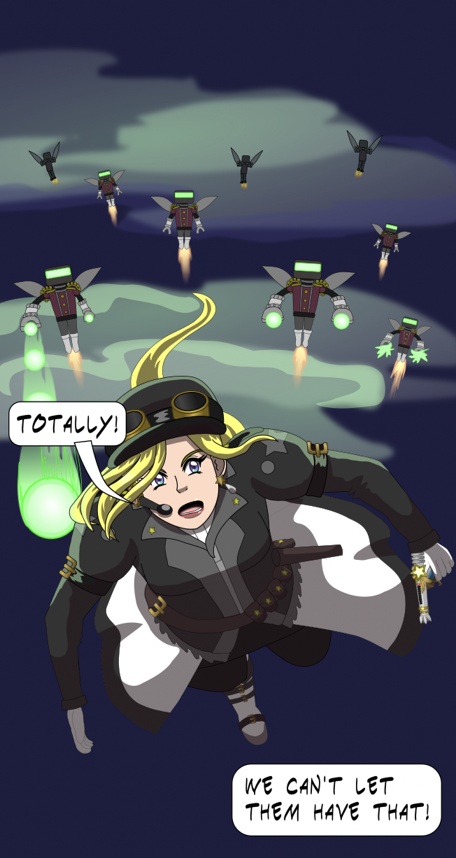
This is a WIP of a scene of Renegade Midnight Conductor flying away from the robots that are chasing her.
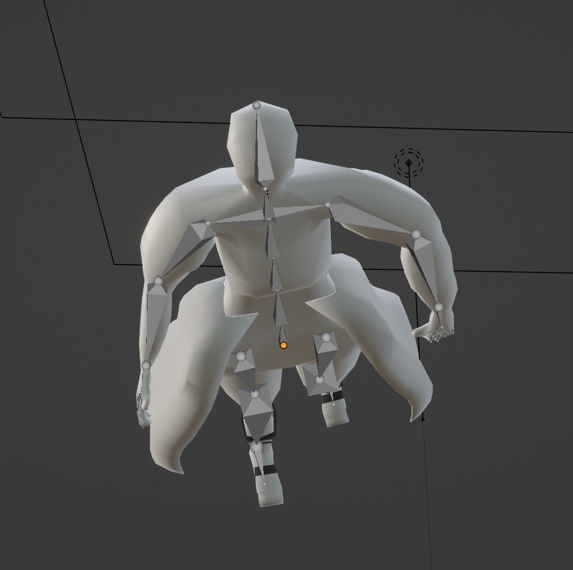
This is the reference I posed. The proportions are a bit off on the model, but this will be a good enough reference and I can correct the proportions the final drawing. Pieces of clothing can be added to the base model, but they're not included by default because it's is a mannequin that isn't for a specific character. It was designed to be be basic but highly versatile. I could adjust its proportions and body type by editing the base mesh and adjusting the bones in the rig to match up with it. The rig or bones can always be visible after being placed in the mesh by selecting the rig, and select Viewport Display >>In Front in the Object Properties tab. There was a bit of trial and error with this process:
Rigged models can be reverted back to their base poses by selecting the entire rig in Pose Mode, and selecting Pose >> Clear Transform >> All. Adding onto the base model wouldn't be practical after you pose them because in Edit Mode, the model will revert to its base pose even when it has been changed in Object Mode and Pose Mode.
The clothes, hair and props that are needed should be added before posing the model to avoid doing what I did: spending time posing it just the way you wanted only to remember that adding on it would be too difficult, and undo all of the effort to pose it. That happened when I was posing this but decided to add the skirt and boots from Renegade Midnight Conductor's outfit onto the model as a reference for how they'd appear in a shot of her flying. ^^;
I created the copy to keep it posable since I converted the other model using Object >> Convert >> Mesh. This tool makes the converted model no longer poseable. Its rig will no longer work, but that's what I need to add pieces of clothing in this specific pose. After I wrote this part of the post, I changed my mind on that method and went back to the base model that's adjustable and added a top skirt layer and boots to it. I made this change since I may need to adjust the poses of characters flying through the sky and to keep an accurate reference with how their skirts would billow out. Keeping a possible model would be a lot more efficient! The skirt was made by selecting the faces around the waist of the model, duplicating them, and making the duplicate a separate selection. I extruded the bottom edges downwards several times. When the length was correct, I rounded out the shape so the skirt would billow out by moving the bottom edges outwards with proportional editing.
If I made models for specific characters, I'd add the clothes and hair to them in the base pose so all of them can be posed. I've been able to model basic clothes to fit a rigged character's movements. This was a step in that direction. My main use of Blender is for designing rooms, but I learned some things about modeling characters, and tutorials I kept seeing made me curious to learn more!
Behind the Scenes: Episode 32 WIP 1
Episode 32 will adapt pages 74-76 or 74-77 of the previous comic version, but it will be changed up to fit the pacing and add details that will make Katt, or anyone else at the Stranded Inn Time hotel and Renegade Midnight Conductor crossing paths a little less coincidental.
A lot of magical girl series start with the protagonist being at the right place and right time to become a magical girl if she wasn't already destined to be one. This is still true with this story. Renegade Midnight Conductor was told in episode 31 that many of the new guests at the Stranded Inn Time hotel have potential as recruits for the Magical Renegades. She saw that strong spark of potential for herself when she crossed paths with Katt, but and it was still a risky decision to initiate Katt. The risk was in that Renegade Midnight Conductor was in a rush for a new member and because Katt is a wild card compared to several other guests at the hotel. She will wonder if she made the right call.
In the Fateful Stack of Choices spin-off idea, Katt was going to be the protagonist and the player would have the choice for whether she accepted the opportunity to join the Magical Renegades when she crossed paths with Renegade Midnight Conductor. This spin-off would explore a lot of what-if scenarios. If she took that opportunity, she still could've taken a different path than she would in Anathema to Commonsense!
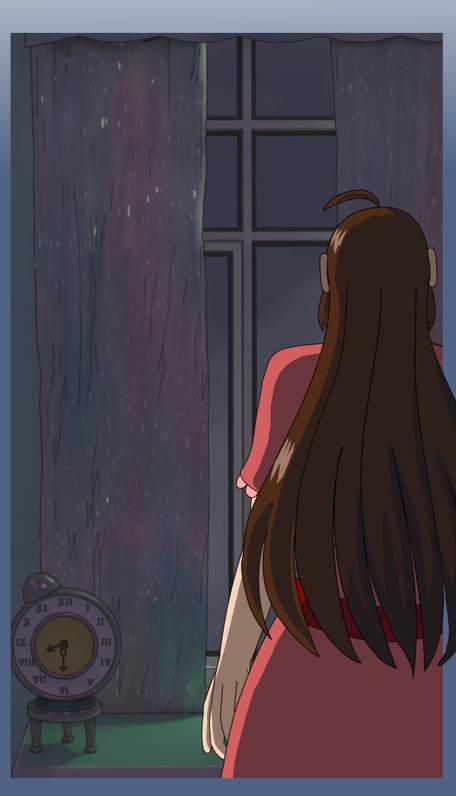
A failed stunt caused her to lose time when she was heading to the Time Travel office, but she let her friends continue there without her. In this episode, she'll still need to report there by the end of the day, but with only a few hours left, something else will immediately call to her attention and she'll get caught up in it. A race against time will get more intense!
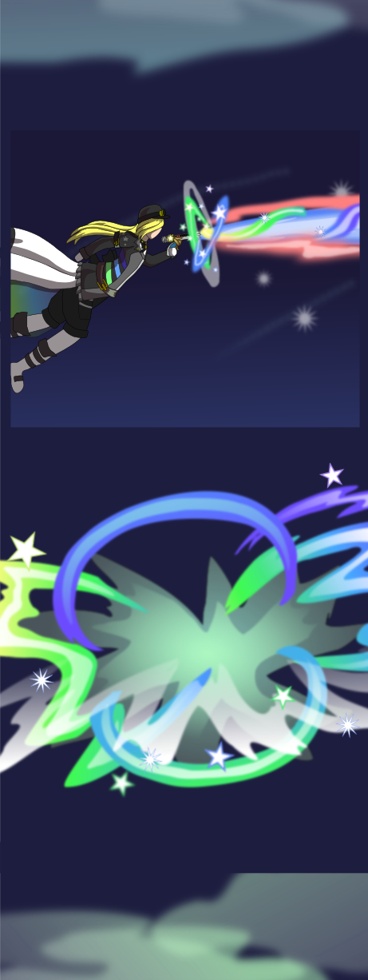
The scene of Renegade Midnight Conductor fighting against the flying robot enemies that are after her is also expanded! This is a preview of the scene. In the previous comic version, the explosion was off-panel. It wasn't clear if her attack even hit them. Here it does, but the battle won't be over yet!
Behind the Scenes: Episode 31 production notes
This episode adapts some of the last pages from the previous comic version but expands on them with extra panels. When I made the comic pages, they needed to be more compressed because I wanted to fit plenty of details on each page while I considered the panel layout and how the layout affects the readability. Since my update schedule then was usually publishing one page a week, I didn't want to stretch out scenes very much even if that could give a more theatrical flair, and I wanted to keep the page sizes consistent.
A scene from page 163. There wasn't enough space to fit a panel that showed the radio on the page, but it wouldn't have been needed. The webtoon adaptation of this scene adds extra panels to flow between parts of the dialogue, and cuts to a panel showing the radio.
Legionnaire Imperatrix's speech over the morning radio was expanded on to convey more details, and parts of it were spread out over several panels which included recaps of the events she had a had in at the start of the third timeline. I feel like this is easier to do with the vertical webtoon format, and even with a slow update schedule, I'm still publishing several panels at once which would've been the equivalent to at least a few pages!
These recapped events were from episodes 20-23, so check those out to see the full versions! This episode was something of a clip show because of the recaps since these episodes were from around a year ago, but it also gave more of a visual impact to space out the speech with more panels. I looked back at these episodes and thought over which panels to use from them, and wanted to include at least one of the highlights which was Renegade Liberty's Final Impact attack!
This episode also brought out the use of Infini-D and BrushStrokes again! The last 2 3D backgrounds were made with these programs! When I started modeling 3D backgrounds for episode 5, I was more proficient with that than I was with Blender! I could recreate those backgrounds in Blender and could for a challenge, but at this point it's become a stylistic rule that the 3D visuals in the time portals and around the Magic Gatekeepers' superweapons are modeled with Infini-D! Several of these backgrounds are in episodes 5, 9, 10, 11 and 13.5.
During the phone booth scene at the start of the episode, the perspective shows Catherine talking to someone on the phone booth screen, but the screen is off-panel. During the conversation, the perspective changes and shows Catherine on the screen.
When I added the panels of Catherine being seen on the phone booth screen from the other person's perspective, I planned to edit those panels to have Catherine fit that screen when I'd add the finishing touches in Krita, but I forgot before I published the episode!
This error was corrected, but I also realized that the easier option all along would've been in Inkscape: Make the panel of Catherine a group, make a path that fits the shape of the screen, and use Object >> Clip >> Set to fit that panel of Catherine within the screen! I've used this command a lot to fit characters and backgrounds into panels, but it slipped my mind this time. I had been busy and tired a lot, thought I looked the episode over enough times to catch bloopers, but I also rushed to complete this episode and have it ready to post before the end of the year!
Episode 31 WIP 2
What happened to part 1? It's part of my writing for Comics Challenge, which covered daily progress on the production of episodes 30 and 31 throughout October!
Progress on this episode was put on hold during November and part of December for Huevember. Soon before the wrap-up, progress resumed! This will be a long episode; it will adapt pages 163 - 168 of the previous comic version and add several extra panels to space out the dialogue.
A render of the radios in the hotel rooms. What are they tuned into?
The renders that were made for this episode were pretty easy. The most time-consuming thing for this episode was fixing up characters' proportions in several panels! It wasn't all that difficult with the use of vectors, but it still takes time to manually adjust everything in a panel. When I adjust anything on a character, the duplicated line art path would also need to be adjusted or redone, the shading would also need to be adjusted.
Episode 30 WIP 3
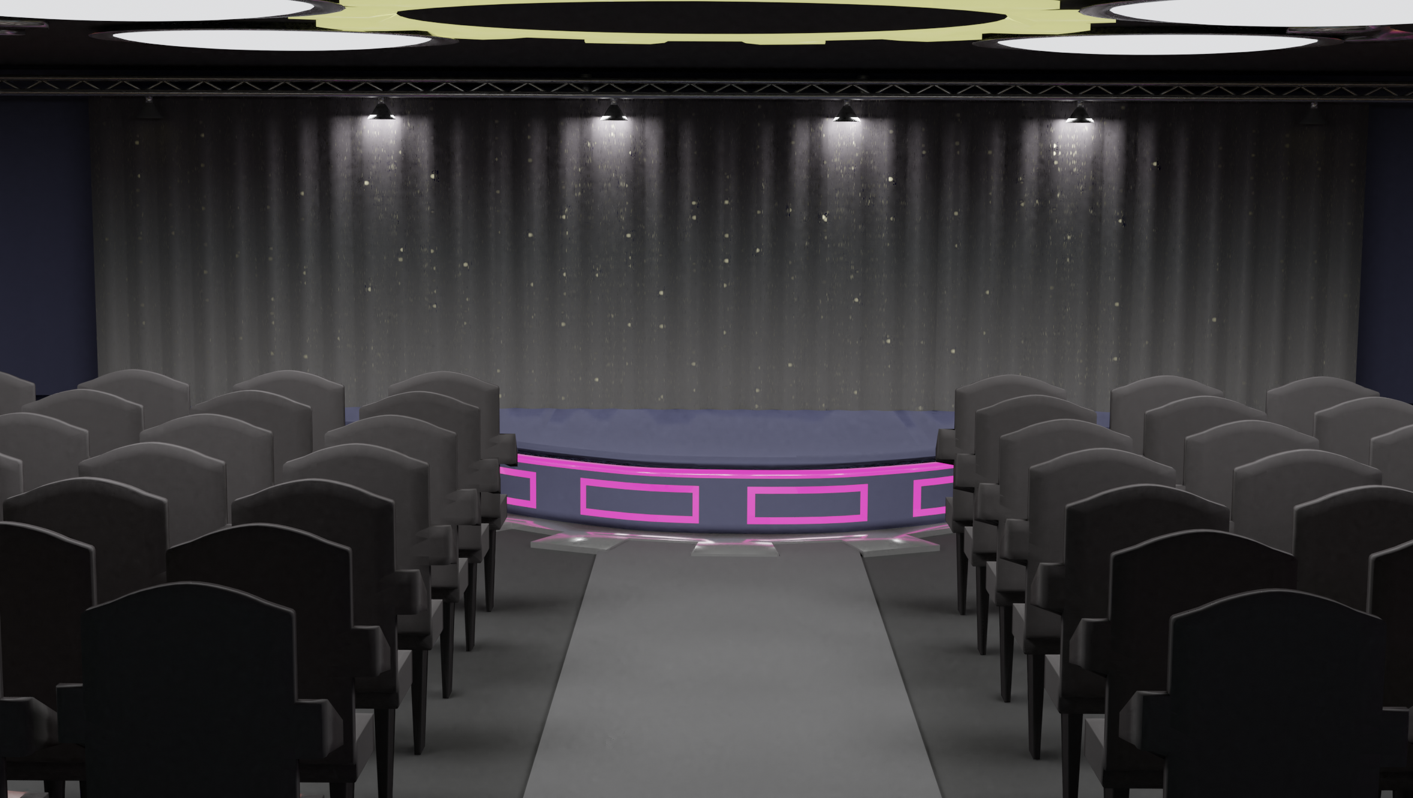
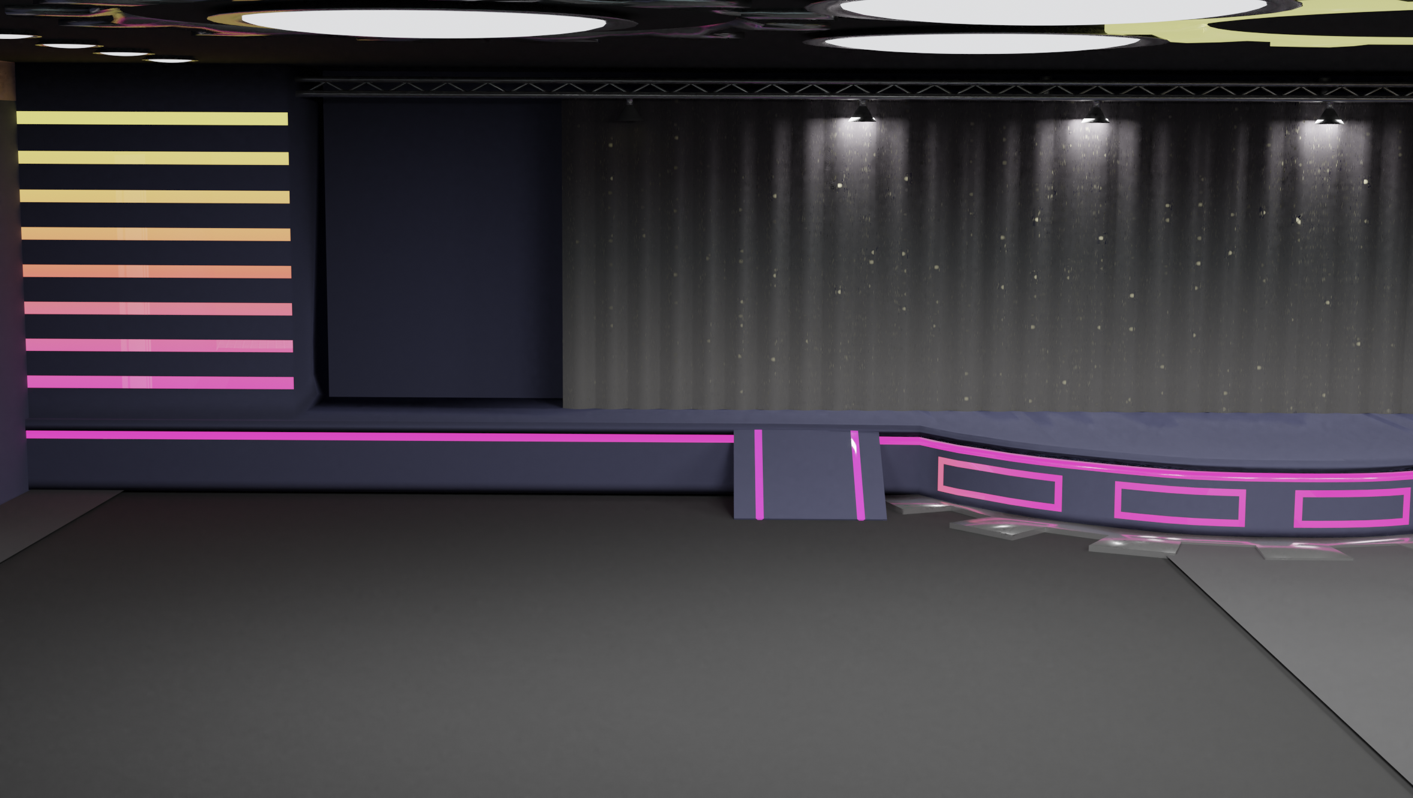
The model of the stage was so long that I needed to make two renders to show it off! The second render removed the chairs to show off the lights and a ramp on the front of the stage.
Materials for the gradient lights on the stage and the curtain share a set of nodes that adds a gradient, sets it to be vertical, and adjusts its colors. On both materials, the colors are set and adjusted through the ColorRamp node, which plugs into the base color in the Principled BSDF node. The glitter effect on the curtain material is from a separate set of nodes that joined this set through the Mix shader.
The stage curtain is a low-poly object. I used the cloth simulator for the curtain in the hotel room from episode 28, but I used a low-poly technique without it for this stage curtain. It wouldn't be moved around, so this simple technique saved time and gave quick, effective results:
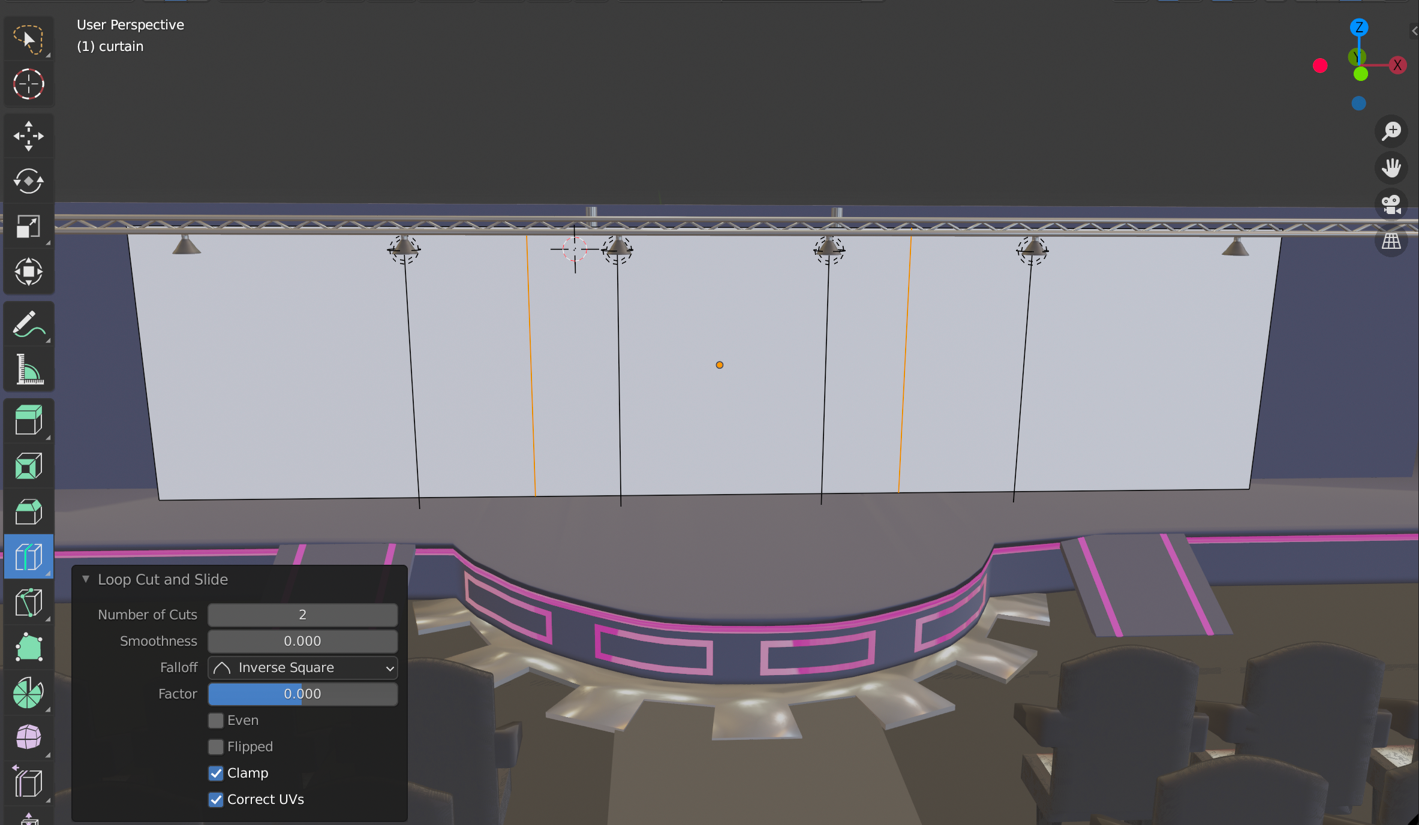
The curtain after it was placed on the stage. It's been divided up with the Loop Cut and Slide tool for the next steps:
Ta-da! They're back! This'll save some time so you only need to edit one portion of the curtain, which is shown with how the orange highlights for the selected edges are only on it. Any changes made to it will automatically apply to the duplicated portions thanks to the Array Modifier's properties.
On the face to the left, use the Loop Cut and Slide tool again to make several vertical loop cuts to form the creases. Select every other loop cut, but not the ones at the leftmost and rightmost edges. Move these out with G + y if the curtains are along the X-axis or G + x if they're along the Y-axis.
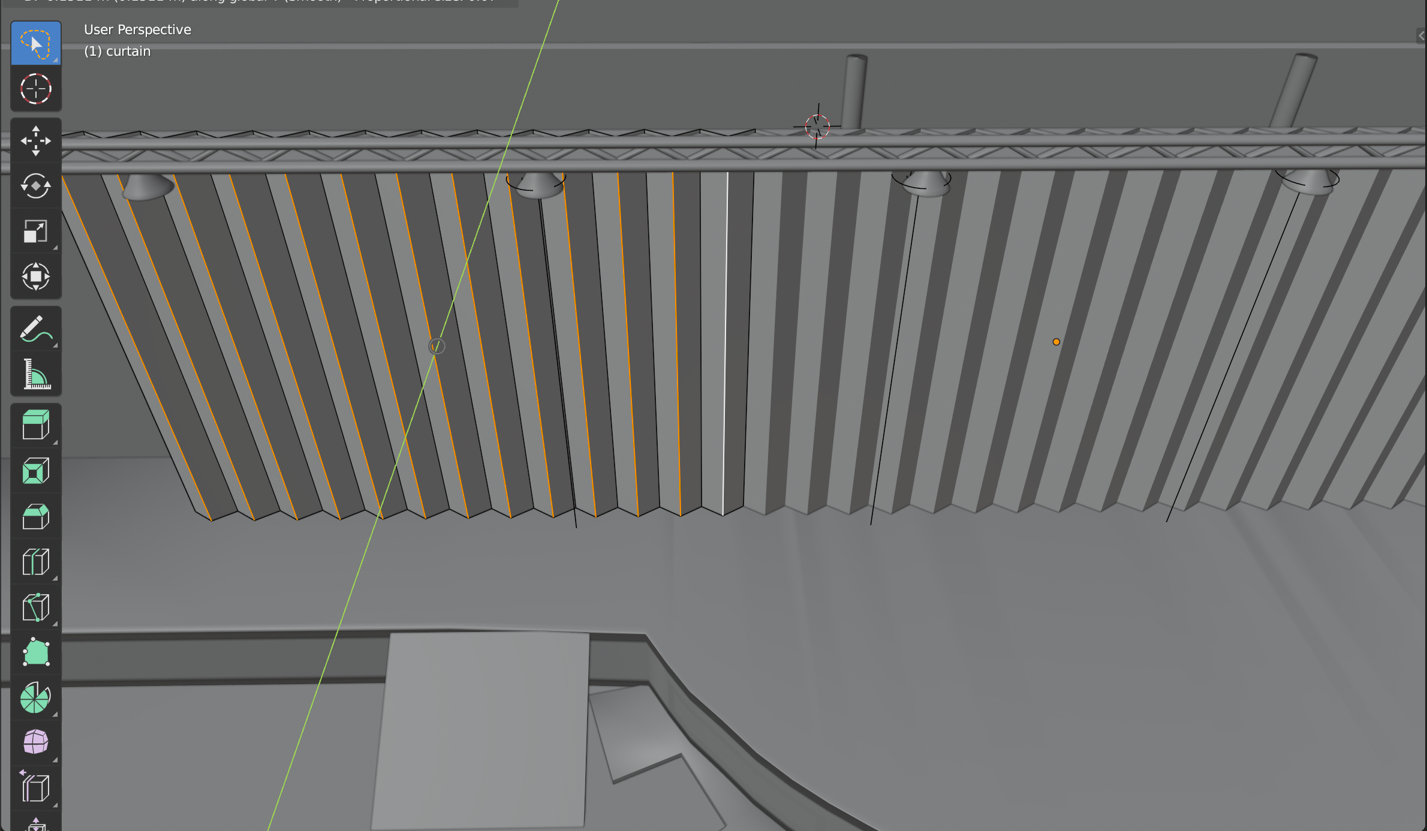
They look pointy but can be smoothed out by Beveling the edges (Cmd + B). I put in 3 segments. The creases in between can also be smoothed out with the same technique.
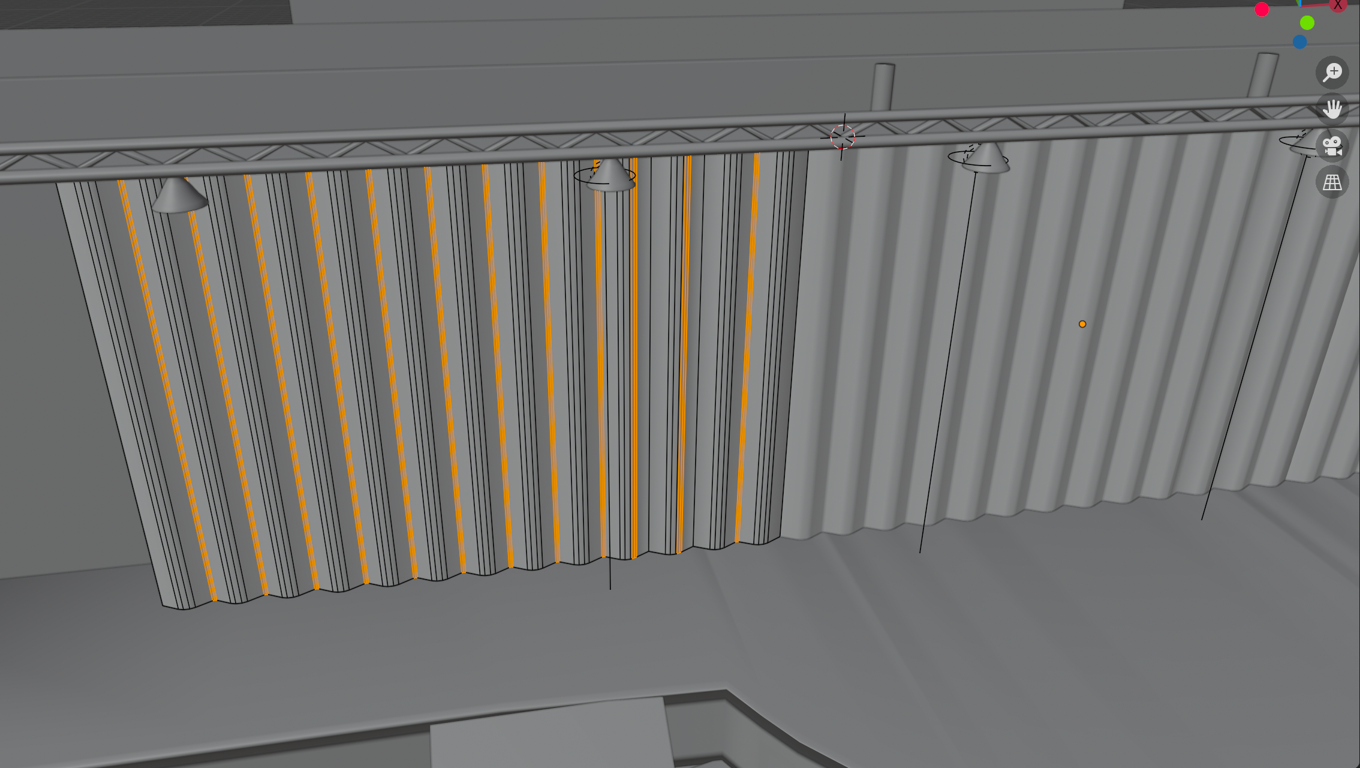
Months ago, I tried 3D modeling a character for the first time. It was more ambitious than I should've started with, so I never completed it. I left it off with a basic body, but it became useful again when I needed to determine the scale of the auditorium, the distance between the rows of seats, and to show the basics of what a crowd shot would look like.
There are many human 3D models that are available for these purposes, but since I already started one, I used it! The model was originally created in a standing pose, and duplicated. Adjusting the duplicate to a sitting pose wasn't elegant; there was no rigging for it since I didn't know how to do that, but if I did, the poses would've been a lot easier and less messy to adjust! I just altered the mesh directly, but it got the job done since the model will be traced over with characters!
I placed copies of this seated model in several of the auditorium seats, and adjusted the camera to render the seated crowd from the back view.
Episode 30 WIP 2
This is WIP 2, since the screenshots of the auditorium interior were moved to episode 30 and were the first WIP for it. Production still continued when I was drawing for Sketchtember!
This is an earlier WIP that shows the sketch that was used as a reference. The drawing for the "Break a leg" prompt (In The Scattered Archives, third timeline) is being incorporated into this episode! This is another episode that is all new. I finished the script and rough sketches for it, and started applying the line art and base colors in Inkscape!
Later WIPs that include the backgrounds. These are mostly finished but need shading, and to merge the parts of the speech balloons.
Writing the script was daunting because this is another all new episode, and one that'll feature a standup comedy duo that also tries to be educational! This drawing worked well as a lead-in to set the tone for this episode. Some parts of the script underwent multiple tweaks, but much of the writing process was from brainstorming gags, putting together what worked the best, and how they flowed. The timing of each panel was also important because the timing can make or break a gag!
Now, writing out an entire standup comedy performance would take too long; there will be skips in it to leave some details to the readers' imaginations and to be practical, but what will be shown will include more character lore and worldbuilding details! With all of the sketches that I made for this one, this'll be another long episode. I'm excited to work on it, but even more excited to wrap up the first night at the hotel; episode 31 will be the next day and start the next arc!
Episode 29 WIP 3 or episode 30 WIP 1
This week in progress was focused on blending the backgrounds that I modeled for the phone booth, and modeling the auditorium that will be featured in one of the next parts after the conversations!
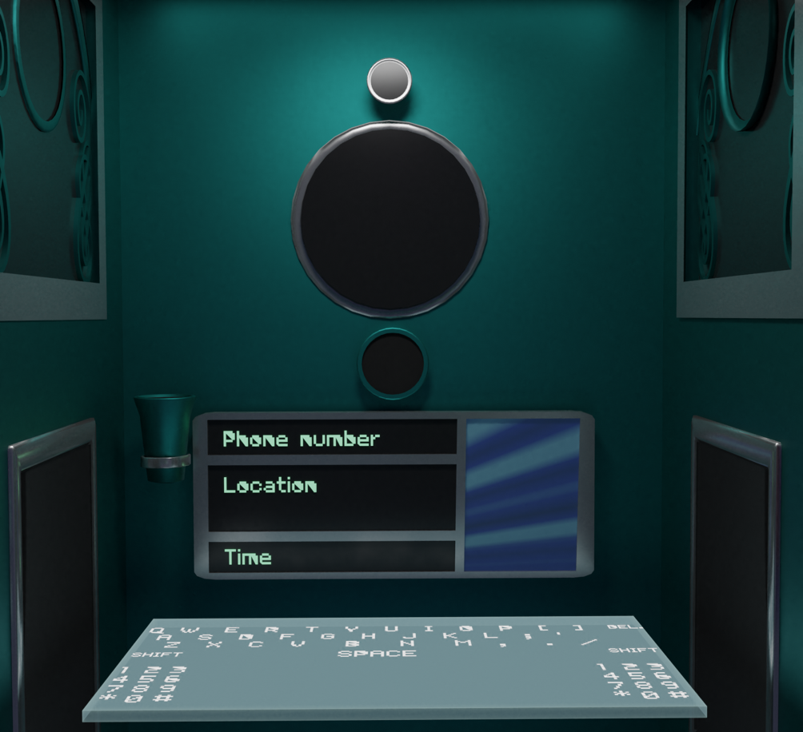
This is one of the backgrounds after it was rendered and blended in. I manually added the line art, painted in the glass effects and some of the metal effects.
Episode 29 is also turning out long that I'm considering splitting off the stand-up comedy scene that was going to be at the end to become the start of episode 30. Some of the dialogue in episode 29 will be serious and the silly part at the end would be mood whiplash. Length of the episodes, the length of the production time, and whether there'd be too much mood whiplash within an episode are pragmatic reasons I've thought about whether to split an episode.
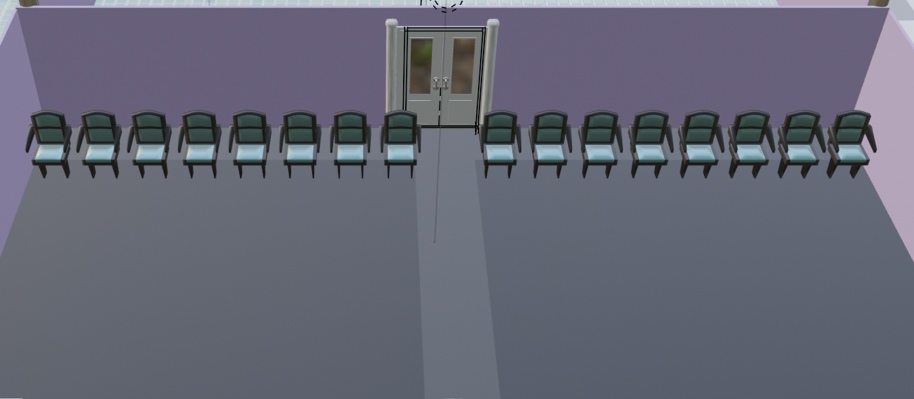
Hello, Array Modifier! I only needed to model one chair from the entire group of them.
The chairs were formed from a single object. A flat plane was created to be the seat. Some extrusions and loop cuts later, the back of the chair was formed from extruding the back portion upwards, the legs were extruded downwards, the arms were extruded sideways then out, and the cushions were formed from carefully pushing out the middle portions to give them height! The Mirror modifier is helpful for creating symmetrical objects such as this.
The seats can't easily rotate upwards like a lot of theater chairs do when they're not in use. I tried that, but the results were messy. These are basic chairs to be used for this scene. Designing the stage was more of a priority since I plan to include an establishing shot of it, and the scenes will have a lot more focus on the stage than the chairs!
Having only one object makes it easier to use modifiers. There should be a way around it to apply the same modifier to an entire group of objects when one of them is the parent to others, but I haven't gotten that to work yet.
I used the Array Modifier to create a row of chairs, and adjusted the Relative Offset to give a little bit of space between them. The offset is along the X-axis. The color scheme isn't finalized but this looked like a good placeholder that could be final.
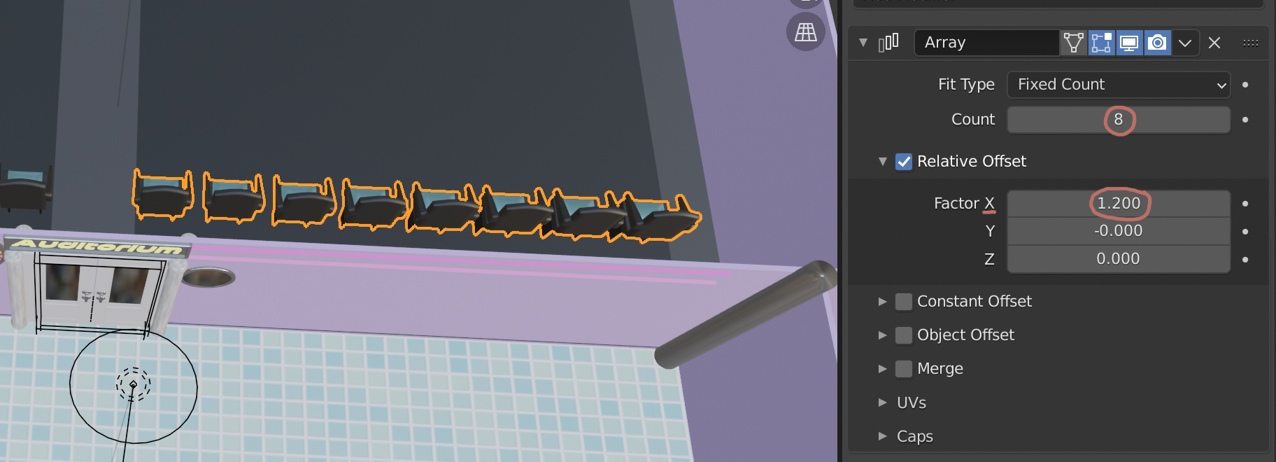
After I made this screenshot, I may have adjusted the size of the chairs and may have fit one more into the row, but the process is still the same. After applying the modifier, I used it again to duplicate the row, but set the X offset to 0, and adjusted the Y offset to space out the rows in front.
The auditorium isn't finished yet, but I'm prioritizing finishing the panels that will certainly be in episode 29 and shading them so the episode might be finished and ready to publish next weekend since there is a clear point I could split off the other part into episode 30.
Behind the Scenes: Episode 29 WIP 2
The last week of updates was focused on rendering several backgrounds, and adding vectored line art and base colors to the first several panels. Some of the group will use the phone booth from the end of the last episode to talk with people they know in the previous timeline!
I've done holographic screen effects before in Inkscape, but I made them in Blender this time since the background was also 3D modeled. Modeling the screen would also help show what the lighting would be in that background. It was also good practice and something new to try!
![Image description: Two panels inside a phone booth that has a holographic screen in front of the control panel. The control panel can be seen behind the screen. In panel 1, the screen reads 'Welcome to the Cross-Space/Time Bridge phone service!' And 'The walls of the booth are soundproofed for your privacy'. In panel 2, it reads 'To continue, select the [Yes/continue] button on the keypad below.'](/90s_Resort/images/ep29_phonescreen_WIPs.png)
The startup screen! This is what everyone will see when they enter the phone booth. It'd also have options to see a tutorial or to skip directly to using the control panel.
The control panel that's used to enter the details that would be needed to make the call. It might look like a panel on a time machine, but this booth is for calls only!

Transcription:
Panel 1: Hey... I'm not making this up when I say this, but Katt and I won't be back for dinner, because we got stranded in the 1880's.
During this week I also resumed a draft I started for the characters page, and began modeling the auditorium area that a later part of the episode will take place. The next episode will reveal more about some characters' motivations so this would be a good time to prepare the first version!
Behind the Scenes: Episode 28 production notes and episode 29 WIP 1
This was another episode that had an extensive use of 3D backgrounds. Moving forward I may keep modeling interior backgrounds in 3D if I expect that I'll need to use them from different angles.
The design of the hotel interior is fairly simple since the vaporwave aesthetic for rooms tends to use minimalist furniture, a lot of pastel colors or white throughout the room. Furniture or pillows often are metallic too; the better to reflect the lighting with! These colors and metallic effects easily take on the color of the lighting, which is the real star of the room! The furniture is very quick to model from scratch, and the metallic cushions were also easy to make.
However, this simplicity was offset by the need to figure out where the staircases would be placed on each of the hotel floors and figuring out logical layouts for them! Yet I may have spent more time than was necessary at least during the production of this episode because the staircase to the third floor didn't appear in the episode. I could've just placed the staircase to the second floor since it was needed in some of the panels, but I also wanted to be prepared in case there was a shot of anyone going to the third floor.
A full model of parts of the hotel would be an ambitious project and could be fitting for a portfolio piece, but I modeled several parts of the hotel since they were needed for interior scenes in the webtoon so I need to prioritize the areas that'd appear in panels. It'd be more efficient to know exactly what I'll need to show in an episode, and I could add on to more of the hotel later. Since the next episode or two will also take place in the hotel, production of it will be easier.
There is at least one more room I'll need to model for the next episode, which would be an auditorium, but it should be simple enough. I haven't tried to model an auditorium or another room with rows of chairs before, but I'd imagine that the Array modifier will be extremely handy for this!
The next step has been modeling the interior of the phone booth. It has a round screen with a camera above it, and a control panel below it. The control panel will be used to enter the information needed to make a call across space and time. A microphone a holographic keyboard will be added in!
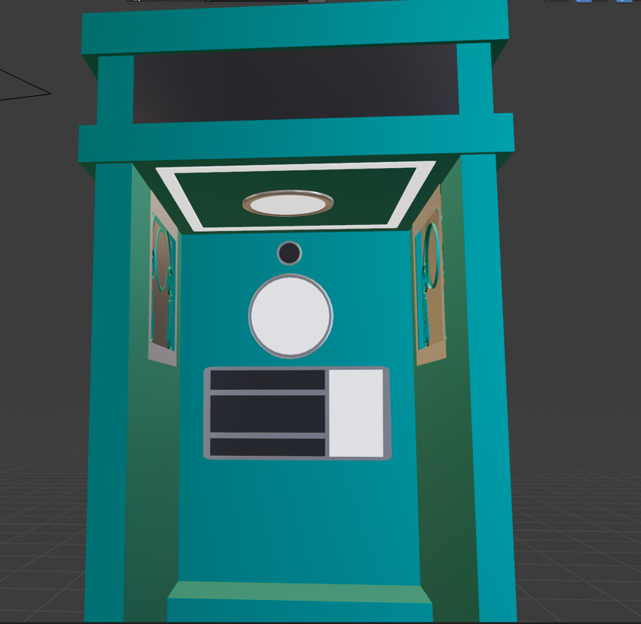
Behind the Scenes: Episode 28 WIP 2
This week was focused on modeling more items, refining the hallway and hotel room, and rendering more backgrounds!
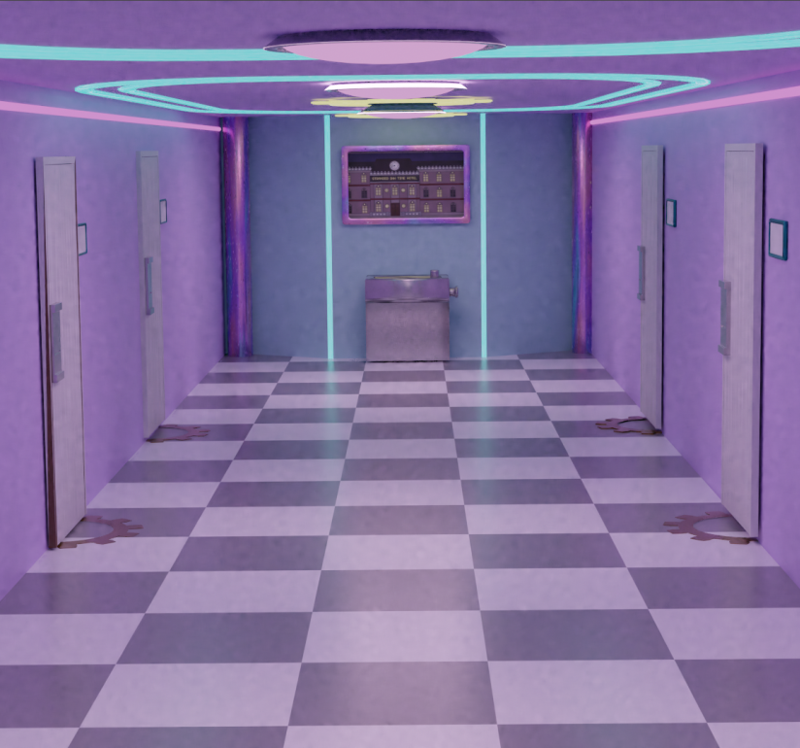
A render of the hallways in the hotel before blending it. In between WIPs, the doors changed colors to fit the color scheme of the hall.
The hotel room from the last WIP was updated with a closet beside the desk, the blanket on the bed, and a beanbag chair by the bed. A grid pattern was added to the floor, and although it's not in view, it's also on the ceiling. This background was blended to add line art, increase contrast to the shading and add the reflection in the window-- and the clock hands since they weren't in the render!
Before the group can go to their hotel rooms, they need to meet the receptionist!
Who's there?...
A 3D model of the phone booths used to communicate across space and time! This'll be moved into the hotel lobby. Some characters the group will use it in this episode!
These appeared before in episode 27 during the tour montage. The style of them is based off of 1880's phone booths, which also appeared in episode 2!
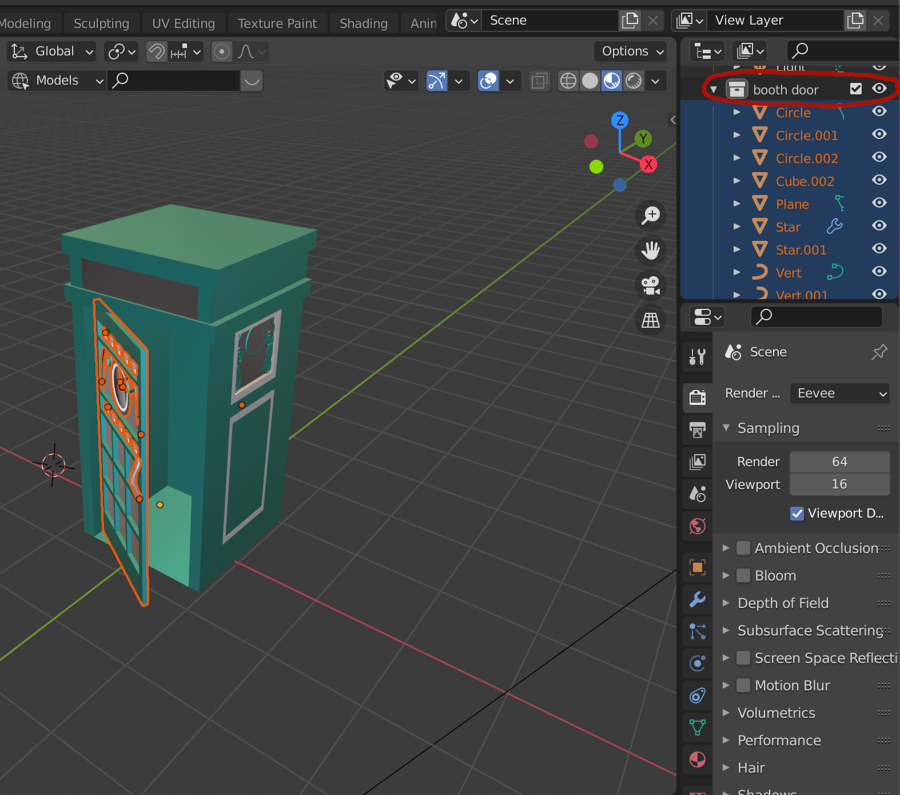
Screenshot of the door edges. They're all selected to highlight them and demonstrate that most of the door was formed from one object through loop cuts, beveling and extrusions.
Grouping components into collections will save a lot of effort when you need to select just them! The collection was circled to show this. (Shortcut: M)
Modeling this was simple enough it could almost be a speed run! I started with a single cube object that was extended vertically. I made loop cuts to mark each section before making any more changes. The sections between the top front panel were extruded outwards (Extrude along Normals), and the door was formed by duplicating the long vertical rectangular face in the middle of the cube and separating it from the rest of the object (shortcut: P; separate by selection).
The original face was selected and extruded inwards to carve out the interior of the booth.
Loop cuts were used again to mark each section before different materials would be assigned to them. This is when I added a glass material to leave a metal lattice pattern. The lattice on the front door was made from loop cuts, and the edges were beveled to give them their thickness.
The glass panels were selected and extruded slightly inwards, and the other shapes were moved to fit in the extrusion.
What wasn't as easy was designing the interior and interface of the booth, but I needed to since episode 28 will show someone making a call. The panels that show off the interface and startup process wouldn't be as relevant to the story and they'd slow down the pacing, but I considered adding a few to bring in more immersion! How technology is designed could be a form of worldbuilding.
This episode was going to be a lot longer but will be split in two since only the first half of it is close to being finished. I found a point to make the split and end the episode with a punchline!
Behind the Scenes: Episode 28 WIP 1
I thought the hardest part of modeling the hotel interior was done when I modeled the front lobby. In episode 25, I needed to model a hallway with stairs, doors and rooms. With this prior experience, modeling the hallways for when the stranded people are shown their rooms in the hotel should've been easier...
As if! I spent hours just trying to figure out where to place the staircases, elevators, walls and hallways, and then re-arrange some things after I decided to replace the elevators with warp pads! This was frustrating, and the hardest part was figuring out what to put in the front parts of the second and third floors that were directly above the front lobby on the first floor.
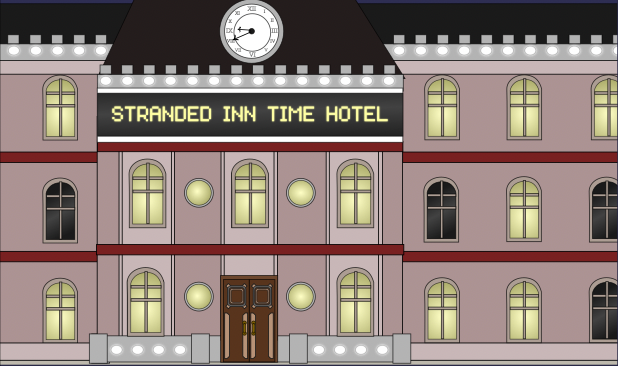
The front lobby is in a section that juts out from the rest of the hotel, and is only wide enough for a few hotel suite-sized rooms. Putting any suites there didn't seem to be worth it, so they were put further back on the second and third floors. This left me needing to find some ways to use the space here.
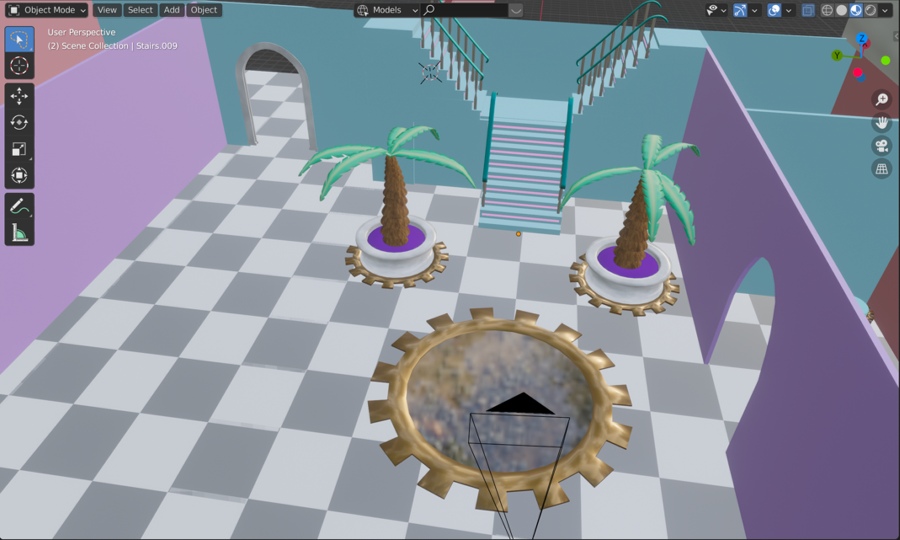
The lobby area on the second floor was made into another lobby. The arched doorway on the right leads to a room with couches and chairs, and a view from the front of the hotel! It's an extension of the first floor. The other rooms by the front might be conference rooms.
The third floor was the most frustrating. Each of the rooms the group were staying at all could've been on the second floor, but I still modeled the third floor in case there were to be any scenes with it.
It could've had another lobby, but when I was at a loss for how to make it different from the ones on the other two floors, I suddenly had another idea for what to do with that space: I put a roller rink in it! I only started the beginning of it because it might not appear in the next episode. It'd be more efficient to focus on the sections of the hotel that will appear, and model the rest later.
Since the hotel rooms would be identical aside from some potentially being larger, I only needed to model one room to use as a template, and it was a lot easier!
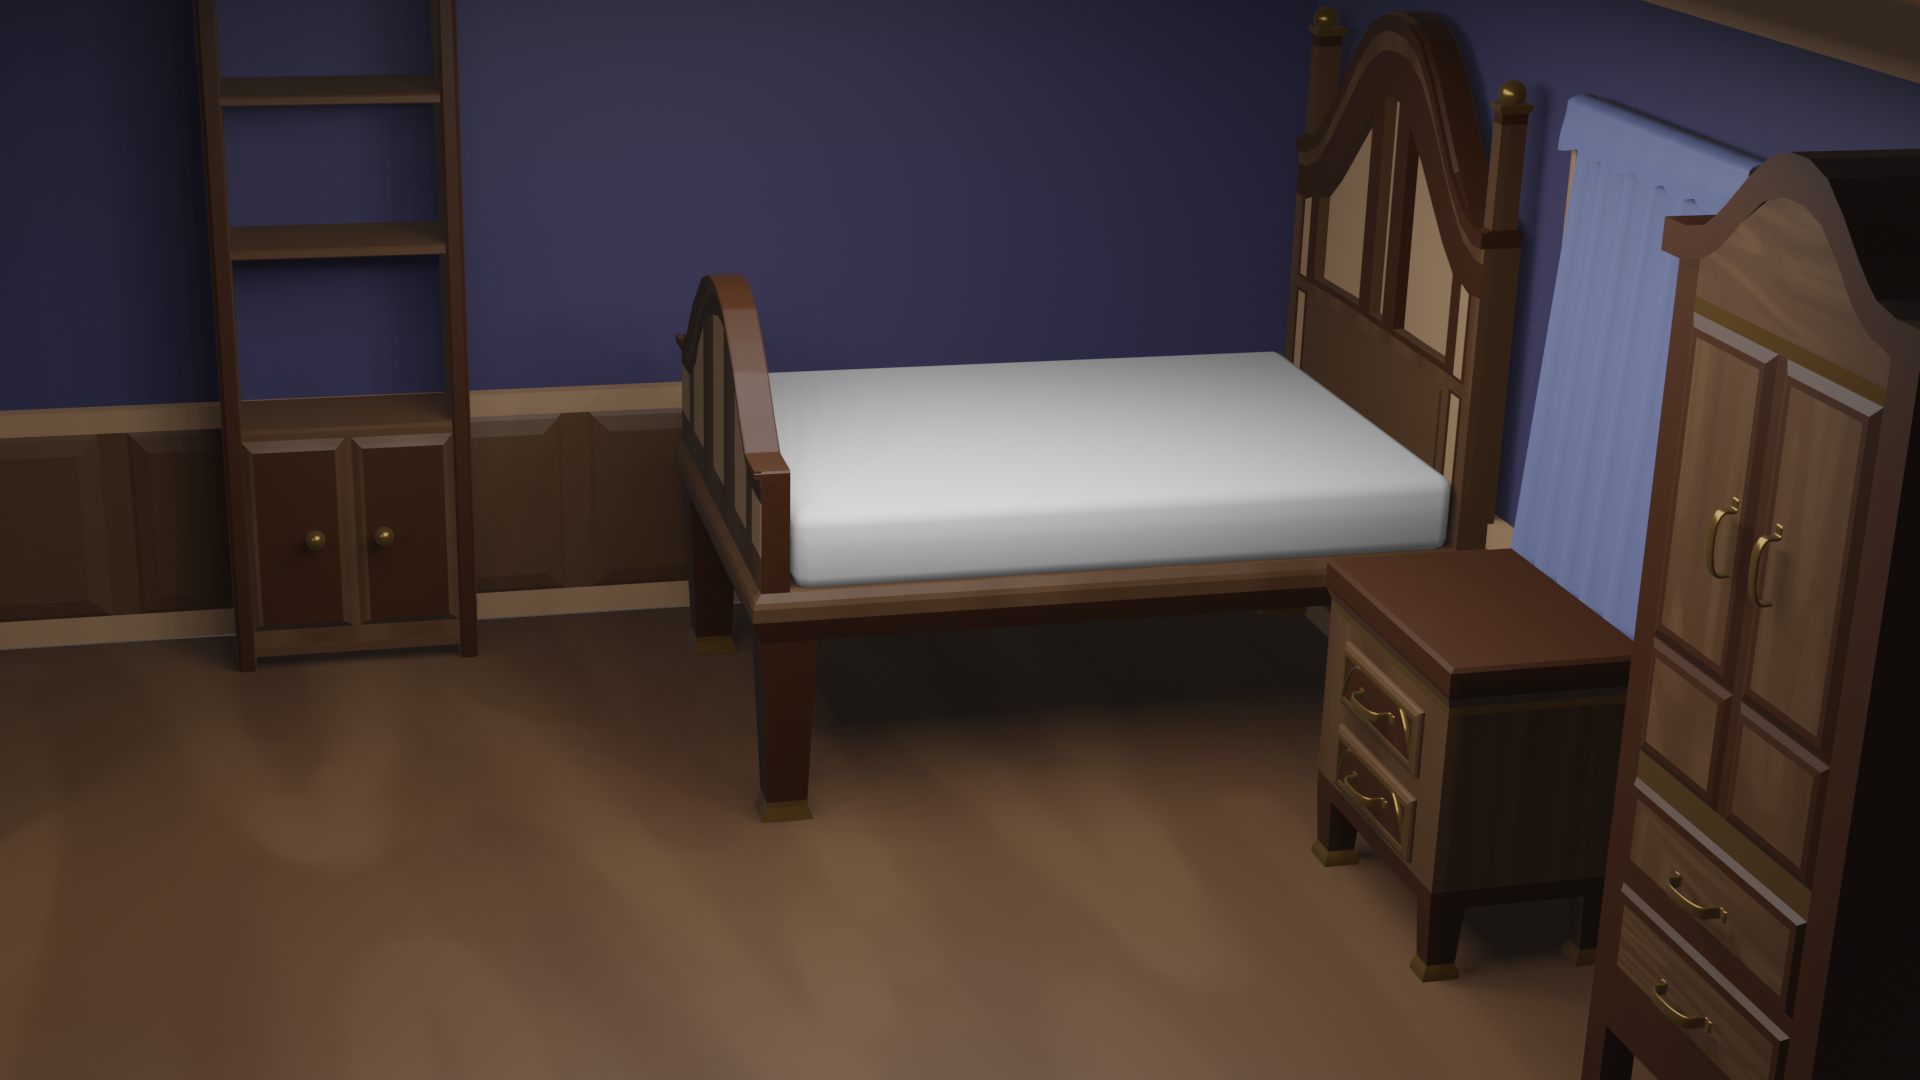
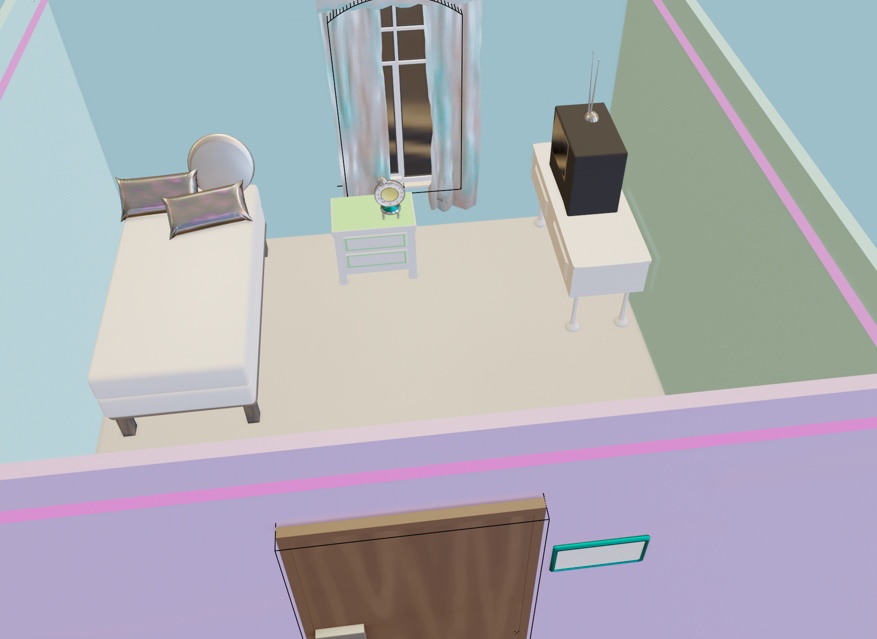
The hotel room WIP. The empty bedroom that I modeled for episode 26 served as a guide for this, but the furniture was swapped out for simpler versions. This wasn't just to save time, but to fit vaporwave style decor. Furniture in a room tends to be minimalist, and the focus is far more on color and lighting!
I'll add the blanket later, which will require getting the cloth simulator to work again, but it worked for the curtains! :D
The first set of 3D backgrounds for episode 28 have been rendered and blended!
Behind the Scenes: Episode 27 production notes
In comparison to the production of episode 26, episode 27 was a lot simpler. This episode is an adaptation of existing pages from the previous comic version, but there were several new panels in the first section to slow down the pace a bit, and extra panels at the end to show off vaporwave aesthetics. This was to focus on the characters and their reactions to suddenly being warped from the courtroom to the city plaza, after they had just been put on trial after the space-time continuum crashed! This group's first day in the new timeline was incredibly hectic that there should be some breathing room.
The design for the Stranded Inn Time hotel was heavily based on Art Deco style. I kept the exterior the same as it's still one of my favorite architecture styles, but when I was looking for reference pictures of hotel lobbies since I considered showing interior shots of the hotel, I got inspired to make the interior vaporwave!
I may have spent more time than I needed designing the lobby, but I got carried away when I was looking for references and found articles about the principles of lobby design! ^^;
The hotel lobby panel is a composite between renders of the same shot in the Cycles and Eevee engines. I made identical renders in Blender, resized them to fit the size of the webtoon panel and imported them into Krita.
Without any blending, the Eevee render fits more closely with the art style, but I like the extra lighting effects and reflections that the Cycles render has.
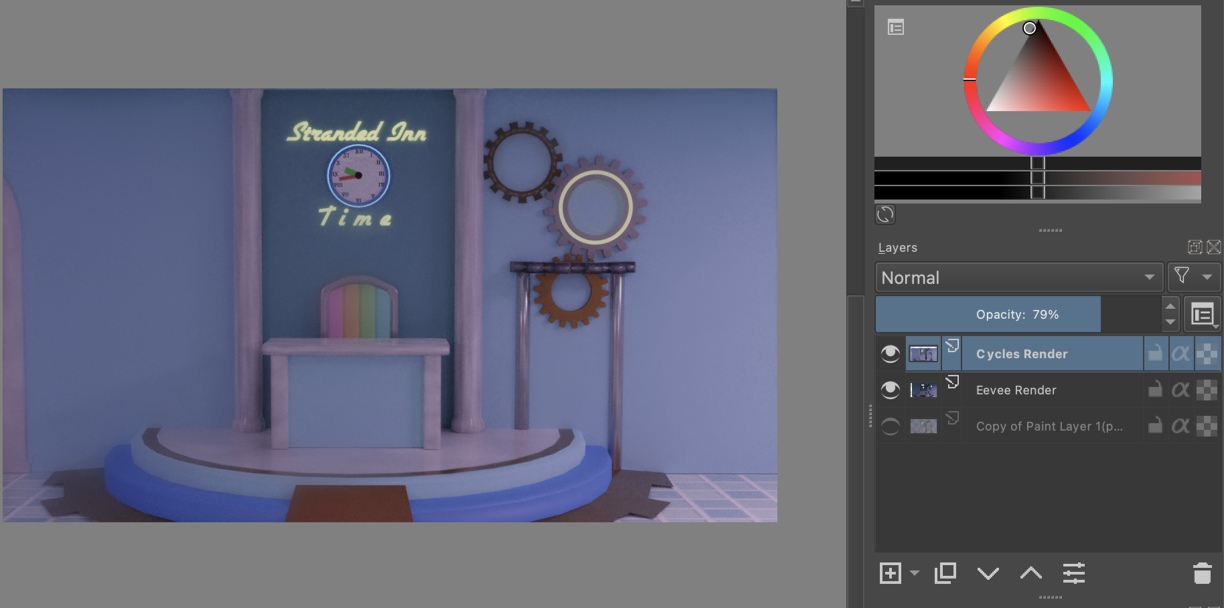
The Cycles render was placed on a higher layer over the Eevee render, but with an opacity that's not 100%. I wanted it to be around 50-80% to show the smoother shapes of the Eevee render while keeping some of the reflections and lighting from the Cycles render.
Denoising the Cycles render was tedious. I didn't use the automatic de-noiser with Blender because Blender sometimes crashed on me when I tried. Not taking my chances with that, I decided to just manually de-noise the render in Krita although it took a lot longer than if I successfully rendered it with the de-noiser, but perhaps I should have tried it! I tried with the automatic de-noiser on one of the first rendered backgrounds for episode 28. It worked without crashing! ^^;
It feels risky to do that because the Cycles renders take minutes to complete, and Blender has crashed at the end of a render and I lost all progress with it. This happened before when I rendered one of the backgrounds in episode 25 multiple times. I'm not using the latest version, but I'm willing to upgrade to it if it's more stable than the version I'm using.
While I tried different layer modes for the Cycles layer to see if there was one that could blend both layers more smoothly than the Normal mode, Addition seemed to be one of the best for what I needed, and what I used, but the Divide mode produced such a cool aesthetic effect!
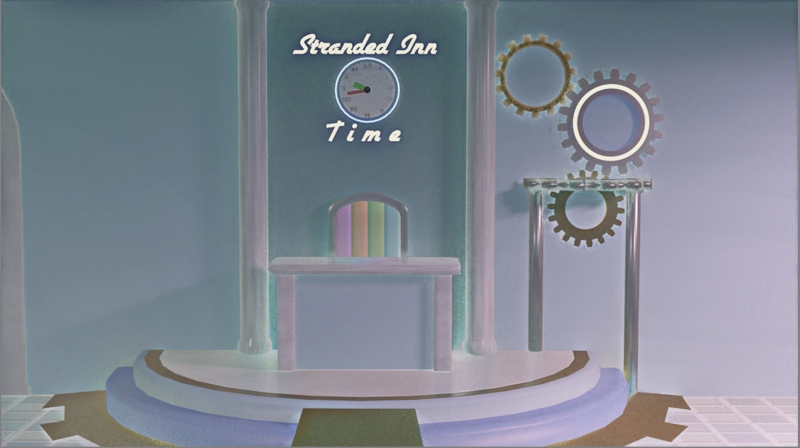
Behind the Scenes: Episode 27 WIP 2
Episode 27 of Anathema to Commonsense is still in-progress! Some extra panels were added in the first part of the episode to slow down the pace and put more focus on the group and their reactions after they were warped from the cosmic courthouse to a downtown plaza!
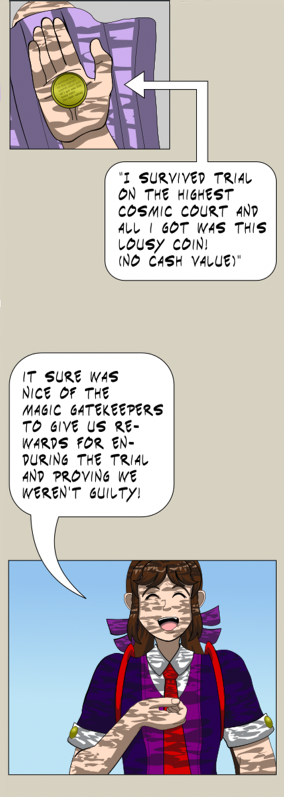
The Gatekeepers gave some souvenirs to the group! They respected that the group kept their cool under pressure, but these are souvenirs you wouldn't want to get and not only because they have no cash value!
Transcriptions:
Panel 1:
"I survived trial on the highest cosmic court and all I got was this lousy coin! (No cash value)"
Panel 2:
It sure was nice of the Magic Gatekeepers to give us rewards for enduring the trial and proving we weren't guilty!
This episode was nearly finished if I didn't add any extra panels, but I wanted to add a few that show the interior of the hotel that the group that's stranded in time would be staying...
Go to Stranded Inn Time? We already are!
Fittingly, this is a hotel that caters to people that get stranded in time. It's unusual for so many people to get stranded at once and the exact same place, but they can help people wherever they are thanks to the magic of the time travelers who designed them. It'd seem that most of the time, many rooms in these hotels go unused but when there aren't guests, but there are still community events through the hotel's museums and rooms for concerts to justify keeping these buildings in operation year-round!
The pages this episode adapts only showed the exterior, but then I had ideas for showing an interior shot or two of the lobby for that establishing moment, which then led to me looking at the principles of lobby design and start sketching floor plans and furniture!
My first choice was to give the lobby an Art Deco look since the exterior was based off of it. The exterior will keep the Art Deco look, but when I was looking for reference pictures of hotel lobbies, I got inspired to make the interior vaporwave! And so I began to spend time modeling the lobby. This is a WIP of the front desk!
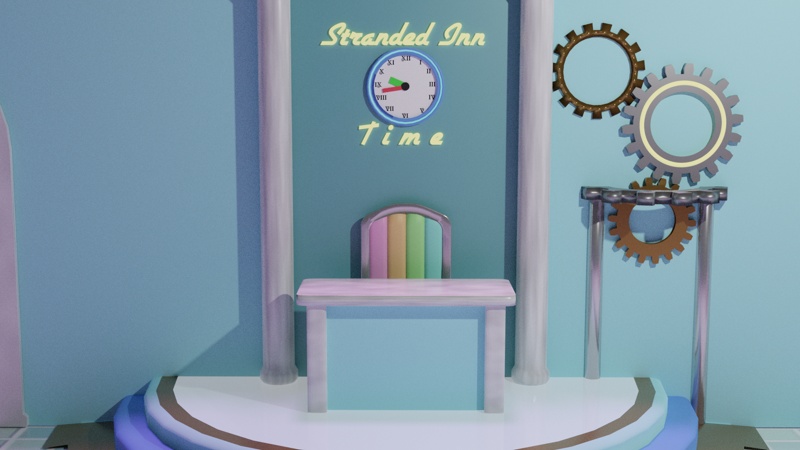
The concept behind the design of the interior is a vaporwave clock tower! There will also be neon lights on the ceiling that are shaped like gears.
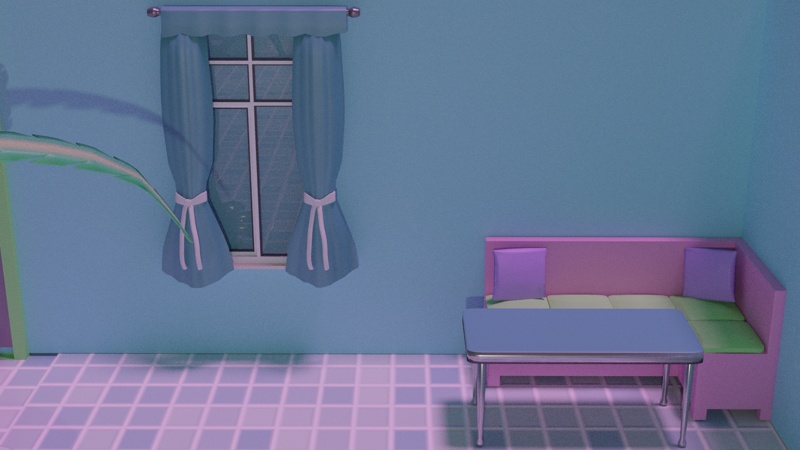
This WIP reuses the curtains that I modeled in a room in episode 25. They could be kept as-is, fixed up a bit, or replaced if I can get figure out the cloth simulator. These were rendered with plane meshes. I've used the cloth simulator to render a blanket and pillows, but I didn't succeed in getting the simulator to work the way I wanted when I tried to model curtains. Maybe I'll try again since I have the time.
Episode 28 will take place in the hotel lobby.
Behind the scenes: Extra! Chronicles Chapter 13 launch and more!
Both sites were updated today after finishing some updates that were overdue!
On 90's Resort, Chapter 13 of Extra! Chronicles was published! The text was finished but I forgot to make a thumbnail image when it was ready to publish so that held it up! ^^;
This is the first chapter with a mood whiplash warning. This chapter takes place around the same evening as episode 26 of Anathema to Commonsense. They can be read in either order, but I'd recommend reading episode 26 before this chapter.
When I began to export the line art for the illustrations in chapter 12, I started drafting a tutorial about how I did the coloring. The tutorial is on the home page.
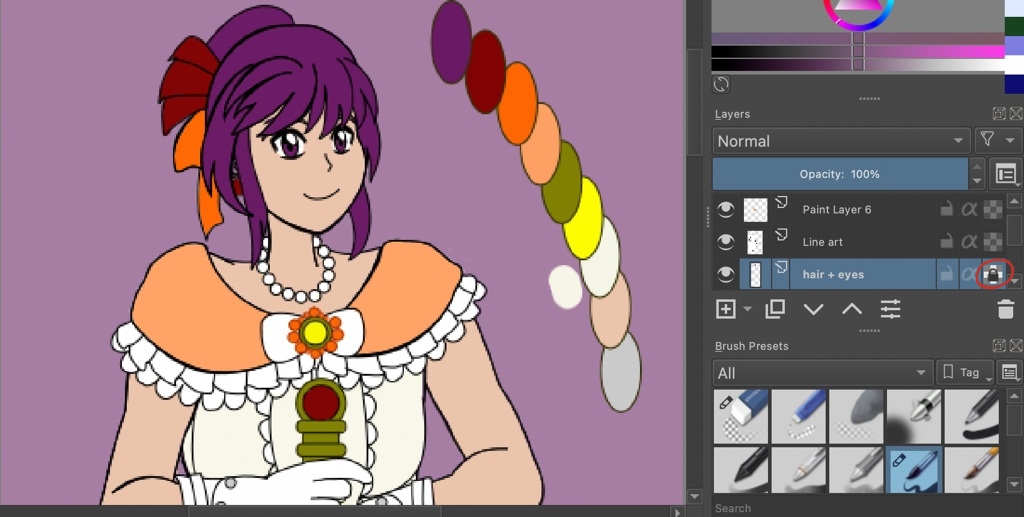
Behind the scenes: Episode 26 production notes and episode 27 preview
After 2 months in production, episode 26 of Anathema to Commonsense was finally released! During its production, episodes 10-12 of Extra! Chronicles were also written and published. Other than when juggling those chapters, some incremental progress was made on episode 26 nearly every day.
This was the longest episode yet, and it extensively used 3D backgrounds! The longest part of production again was the modeling them since most parts of them were made from scratch!
Producing 3D models from scratch starts out very slow, but they can be reused even in different scenes to save on production time later. Free resources can also help cut down on production time, though I haven't used very many! ^^; The walls, wooden paneling, the couch, and the posts from the top of the staircase were reused from my models of the Magical Renegades HQ arcade room. The stairs, doors and windows were made with the Archimesh add-on.
Each of the 3D backgrounds for this episode were rendered without Freestyle since I haven't been able to get consistent results with it yet. I manually drew the lineart and painted over the shading to look more cel-shaded and blend them in with the art style. It may not be completely seamless without vectoring over everything because my hand-drawn lineart is sometimes shaky, but vectoring over them may take even longer.
It's a trade-off between blending in a way that may save time but not be perfectly seamless, and blending in a way that'd be perfectly seamless but may take even more time.
Chapter 13 of Extra! Chronicles and episode 27 of Anathema to Commonsense are in-progress now! Chapter 13 is almost finished and will be the next update. The rest of the interview in episode 26 will be in it!
Episode 27 resumes adapting the previous comic version, but will add several extra panels to give characters who haven't been seen as much more screen time. It'll start with a quick recap covering the events from episodes 8-19 since those were published so long ago!

Transcriptions:
Moments after that, the space-time continuum was falling apart and needed to be rebooted!
The Magic Gatekeepers, the heads of the Magestablishment and the judges of the highest cosmic court, put the unlucky group on trial for questioning!"
Camelia had photos that proved the groups' innocence, and the perpetrator showed up to brag about her actions!
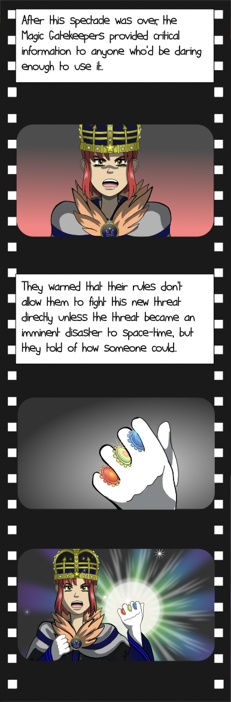
Transcriptions:
After this spectacle was over, the Magic Gatekeepers provided critical information to anyone who'd be daring enough to use it.
They warned that their rules don't allow them to fight this new threat directly unless the threat became an imminent disaster to space-time, but they told of how someone could.
Episode 26 WIP 4
Most of the panels for episode 26 of Anathema to Commonsense have been vectored. It's almost the final stretch so this episode should be finished in the next week or two if everything goes to plan! More parts of the lounge room needed to be modeled to cover different camera angles. The last WIPs showed the area in front of the room, and this new WIPs shows the bar area beside the staircase at the back!
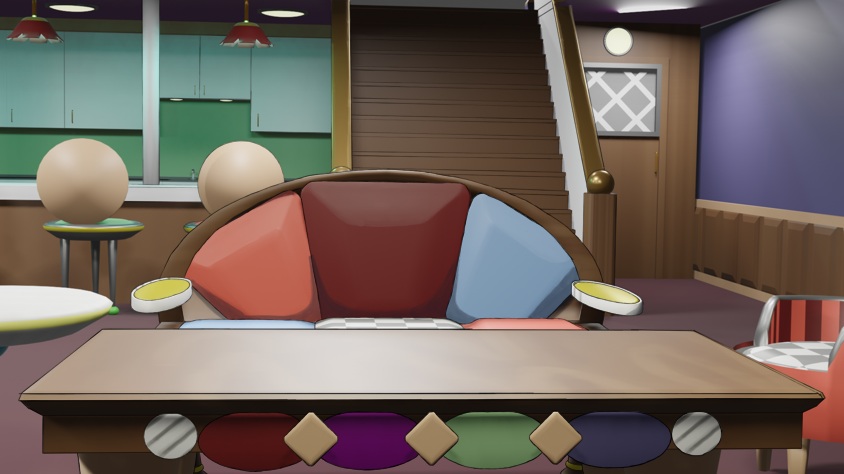
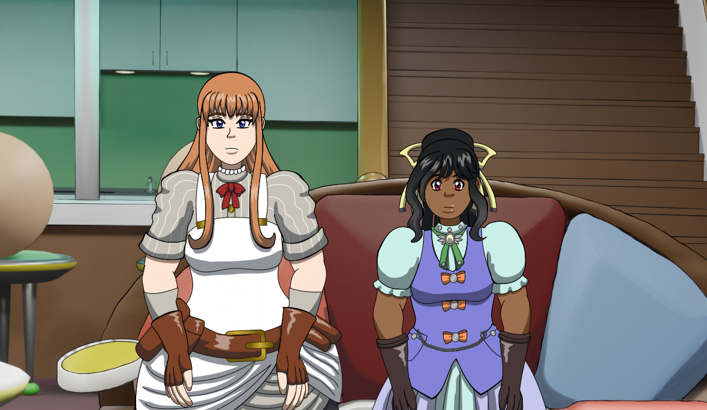
A preview of the efforts to blend the render with the art style! The table appears closer to the camera than the characters so I'll need copy and paste the table in a higher layer. This WIP shows the render after manually drawing the lineart and painting some of the shading.
Sometimes things that were meant to be placeholders are cool enough to throw them in! When I put the light objects underneath the lamps, the cyan color was just a placeholder I chose when I was testing out the size and intensity of the lights but I thought they looked so cool and provided a nice contrast that I kept them!
They should've been spotlights instead of points, but making them points made a more dramatic effect!
After this episode will be chapter 13 of Extra! Chronicles. Episode 27 will be an adaptation of pages from the previous comic version again, but they'll be tweaked a lot. It should still be faster than episodes 25 and 26! ^^; The timeframe for events shifted in this rewrite to make them less compressed, and give some more breathing room for character focus and worldbuilding before the next major plot point!
The events in episodes 25 and 26 were in 1884 of the new timeline, a few days after its point of divergence. Episode 27 will bring us back to 1887 in the new timeline when the League is the S.O.C's ruling party and the group of students and teachers from Capital Remedial got stranded and are trying to survive!
The events in chapter 7 before it got cut short of the previous version will be moved up and would be episode 28 or 29.
Episode 26 WIP 3 and Chapter 12 WIP
Two WIPs for the price of one in this update!
Episode 26 of Anathema to Commonsense and Chapter 12 of Extra! Chronicles are in-progress!
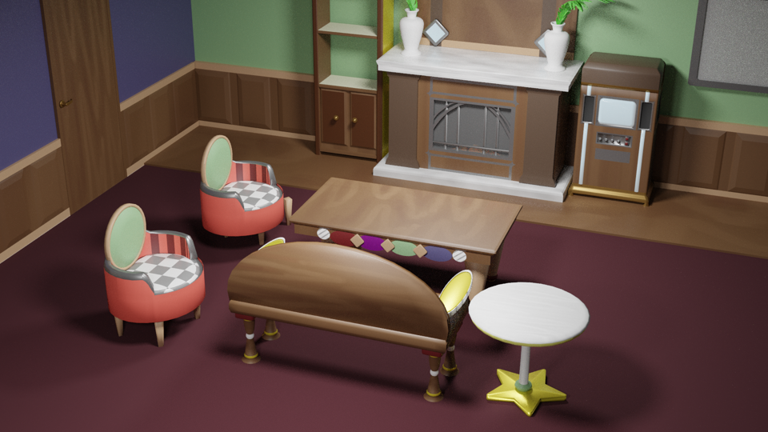
This part of the lounge room was shown in the last WIP. More refinements to the wall, and the furniture was added! The couch was reused from the arcade room in episode 25, but the tables and the two round chairs are new.
Chapter 12 of Extra! Chronicles will introduce some new characters, but their establishing moments as this chapter was being drafted were long enough that the interview is going to be moved to chapter 13! Chapter 12 will be next. Episode 26 of Anathema to Commonsense will take place the same day as chapter 13 and part of the chapter will make its way into episode 26. Since it's been several weeks since episode 25 was released, it'd be better to release episode 26 before chapter 13 though either order would work just as well.
This is another event that spanned longer than I expected. The original plan was for chapters 10 and 11 to cover the visit to the royal banquet and the interview, but a lot got added on as I wrote! XD
There'll be two illustrations for this chapter, which are also in-progress but here's a WIP of one of them which features one of the new characters!
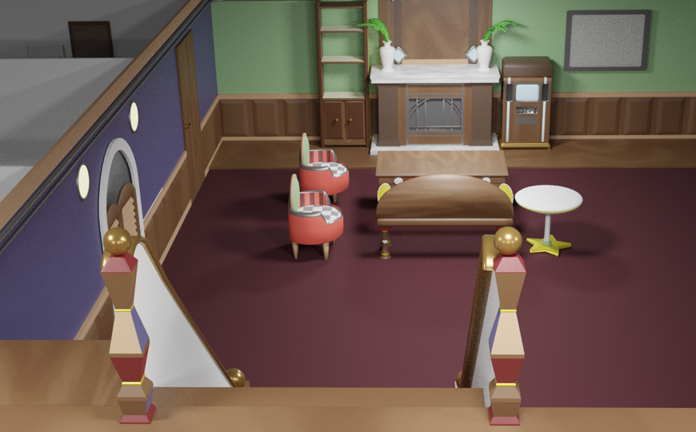
A render of the room from the view of the staircase. The model of the Magical Renegades HQ lounge room also includes the rooms next to it, and the staircase that leads to the room. Is this really necessary when those rooms might not ever be shown?
Maybe not, but it was still good practice to model approximations of the furniture and appliances that would be in those rooms to scale since they also helped me determine the scale of the rooms. When I got the scale of them, I could place the doors.
I didn't have numerical measurements for this room or the other rooms that were modeled. They'd definitely be needed in an all-3D work. Since this isn't all in 3D, I could skip that, but needed another unit of scale. I used the wall panels for that!
Those wooden wall panels are a staple design of Victorian architecture, but they're also a convenient unit of scale for determining the width of rooms! The room further ahead is 3 panels wide in both directions from the door, so 3 panels were placed to each side of the door. The closer room is smaller and is 2 panels wide in both directions from the door.
The lounge room is in the basement of the HQ. Before I began modeling it, I sketched a blueprint of the basement, the key pieces of furniture in the lounge room, and where each of the rooms in it would be in position to each other. They weren't always drawn to scale since plotting out where items and rooms would be in relation to each other was the priority in that sketch.
If you read this blog long enough you'll see I usually don't do the most straightforward option! I saw some free resources to help people visualize the layouts of rooms and free 3D modeling assets that could be added, but as always I didn't know of them before I started doing a lot of modeling!
Episode 26 WIP 2
These weeks in production for episode 26 have been more of the same. More fussing over how to blend in the 3D backgrounds to fit in with the art style. The search for the most consistent solution.
A later section of this episode will take place in the lounge room in the basement of the Magical Renegades HQ, which I began modeling.
Since I'm more used to working with 2D illustrations, I sketch layouts for rooms and sketch objects before I begin to model them. The decorations on the jewelry box from the last WIP were made from curves, and re-shaped through sculpting tools, but it may be more efficient to import some decorations as SVG files and import them into Blender.
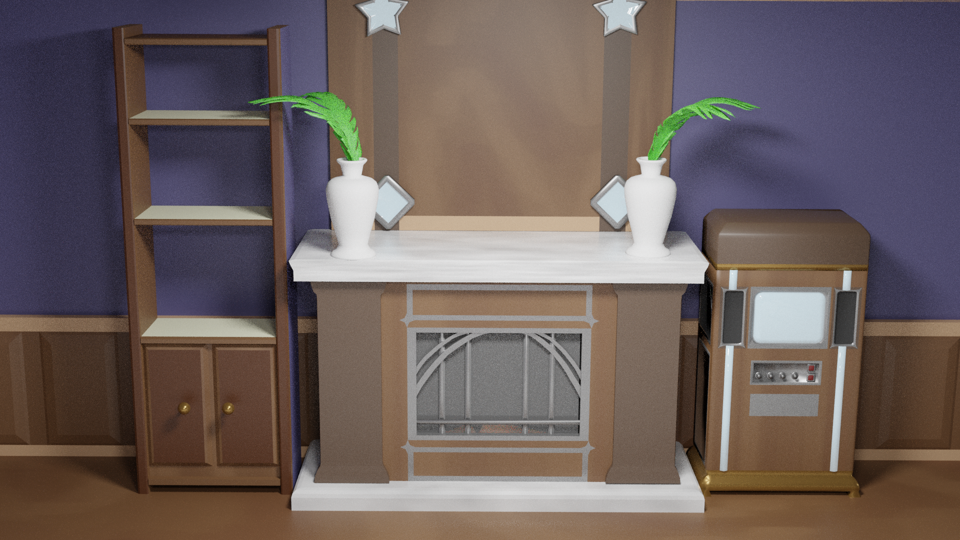
Caption: WIP of the lounge room showing a shelf, fireplace and media center. This is a semi-final version. There may be tweaks to add finer details.
To the right of the fireplace is the media center. It's inspired by a media player I saw in real life that could play records, CDs and cassettes. This media center has a small screen like the earliest TVs from the 1920's and 1930's, but the screen is made of magic-conducting crystal. Where the exact steps couldn't be reverse-engineered, magical tools have been used to fill the gaps! Magic can do just about anything! but that's usually kept in check by bureaucracy.
Christina helped build that one in the Magical Renegades HQ, but these devices also became mass-produced. Is that regulated? Not really, but there's a demand for these in the new timeline!
The world is similar to our own with a similar rate of technological progress despite the existence of magic. Radio and TV were unknown to the residents in the 1880's before time travel changed that. Music players were known of though, and the 1880's had its own format wars: Records vs. wax cylinders!
In the S.O.C, records won out because they were more practical. Wax cylinders tend to degrade too easily in the climate.
Efficiency tips:
Chapter 11 of Extra! Chronicles will be published soon! The draft is finished, but illustrations are in-progress. The draft for the characters page and more sections to add to the lore page also continue!
Episode 25 production notes
After multiple WIPs, there's still something to say about the production about this episode!
It's out of order because I forgot I didn't publish this before the first episode 26 WIP! ^^;
There was incremental progress on it every day between its release and the release of episode 24. Modeling the backgrounds in the Magical Renegades HQ may have taken at least half of the total production time since I didn't just model them, but also decided on the colors and textures. I had to figure out UV mapping quickly for this to make the textures display properly. Out of everything I've learned so far in Blender, I dreaded UV mapping the most because I was confused by some tutorials, but I just needed to find the right tutorial to help me understand it.
On just the wall clock, arcade cabinets, couch and staircase, I spent hours on those! ^^; The panels just showing furniture and decor were so those wouldn't go to waste. When I modeled the backgrounds, I couldn't be sure how much would be cut off when they were scaled down for the panels, but as it turned out, it was a lot! About half of the width was cut off.
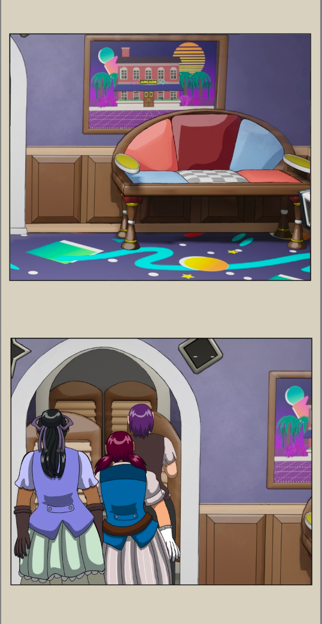
Caption: I spent hours modeling this couch and this is all I'd have to show for it?! Not if I put a panel showing it off!
Blending the 3D renders into the style of the webtoon! Without any blending, they'd stick out too much, and not when I want that! I tried multiple techniques in this episodes, but wasn't consistent because different ones worked better for some of the backgrounds.
The shading in the 3D backgrounds for this episode were painted over a bit to make them closer to cel-shaded. The walls had watercolor textures to them, some wood trim had wood grain added to them, and metal objects had their line art colored over. The shading was sometimes simplified on the metal objects.
I got more practice when I tried these out with the backgrounds I showed in the WIPs, but a new obstacle appeared in the hallway backgrounds!
They make use of damask wallpaper patterns! The renders of this room looked fine as they were when the walls were all solid colors, but it felt a little *incomplete*. Damask wallpapers are one of those staples of Victorian architecture so I added them to some of the walls. I think they contrast well with one of the walls that was kept a solid color. It feels more balanced, but painting over the shading on patterns is more difficult. There needed to be a workaround.
This is the workaround I did in Krita! Pretty exhausting, isn't it?
Most of the backgrounds were rendered in Eevee with Freestyle to generate line art because it's easier to blend them... Except for the hallway with the window and curtains. They were rendered in Cycles without Freestyle, because those results looked better. I manually traced the line art for it because I couldn't avoid messy creases in the curtains when I rendered it in Freestyle, and the colors looked better in Cycles. Perhaps I could but don't know how to do that yet.
The panels showing the staircase had two renders, and the Eevee render was used as the base, but some colors were taken from the copy rendered in Cycles, because the colors in Cycles are more vibrant; the metallic surfaces look closer to how I intended them. I used the render in Eevee as the base and painted over some of the metal surfaces to look like how they were rendered in Cycles in most of them.
Comparing the same render in both engines also helps me with which shadows to keep and which should be painted over.
The cloth simulator wasn't used to model the curtains. They were just modeled from planes that were molded into shape to save time. I haven't had the best of luck figuring out how to use the cloth simulator to render curtains yet for it to be more efficient.
The next episode is also going to be completely new and have more backgrounds to model! I already spent a few hours sketching floor plans for the basement of the HQ and made sketches of the panels! This might not be so bad though since I expect there will be scenes in this part of the HQ again at a later time. The first WIP for episode 26 will be up soon!
Episode 26 WIP 1
First WIP for episode 26. This is another episode that's all new, but production with this episode had a smoother start!
A render of the bedrooms in the Magical Renegades HQ. This is a barebones room without pillows or blankets on the bed, or any items on the lamp. Each of the bedrooms will be similar to this, but with some changes for each person. I spent hours modeling these pieces of furniture too!
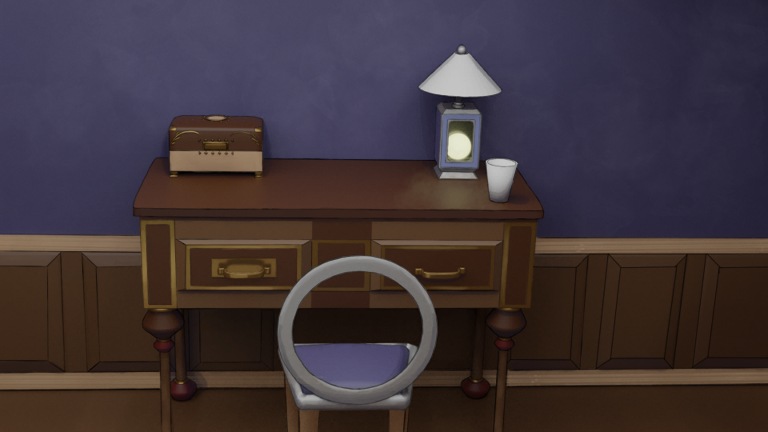
The desk in one of the rooms with a jewelry box and a lamp! The lamp may have a magical energy source, and the design is based off of modern incandescent lamps and oil-burning lamps. Drawing these could've been faster, but modeling can help a lot when drawing detailed items at an angle. While I used some of the tools, I sometimes found interesting results by chance that I wanted to use!
The star decorations on the wooden box came from when I beveled the vertices (cmd + B) around the metal clasp. I use the bevel command more for edges than vertices, but beveling the vertices could give more decoration for this purpose. 1-3 segments usually works, but more tends to be less practical for smaller objects.
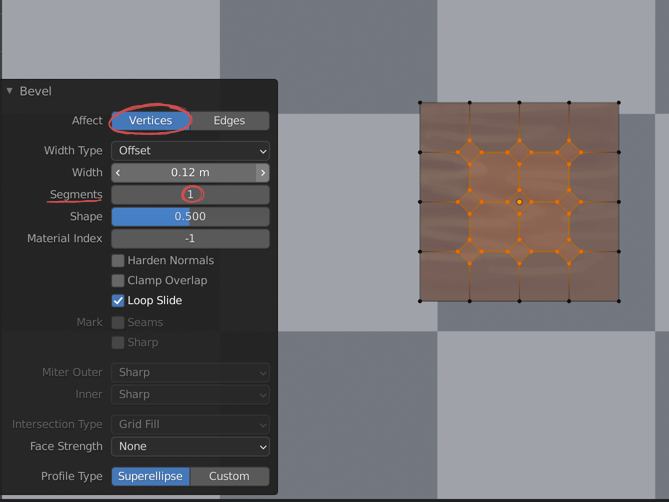
When it was set to one segment, they looked like diamonds and I was going to use that...
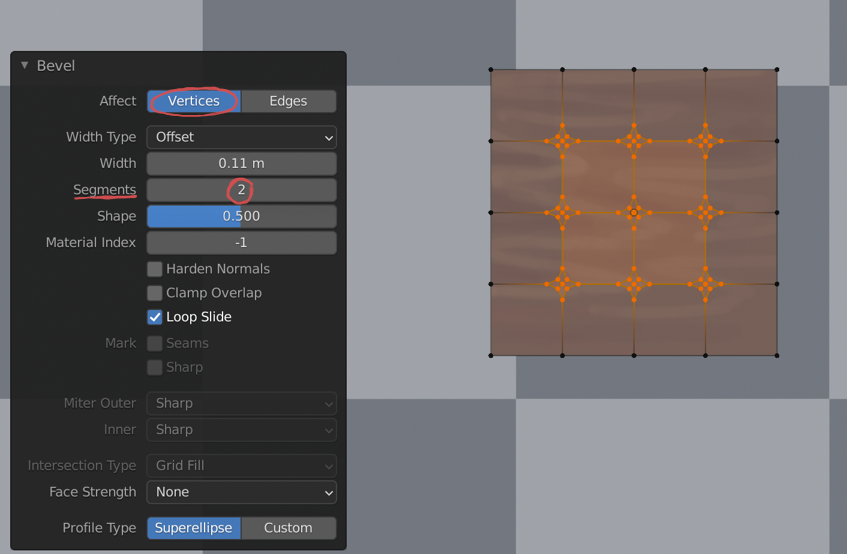
I set it to 2 and liked the star shape that I saw and wanted to use it. It was used by deleting the surrounding faces.
This background shows the technique I've been using to blend them. They were rendered in Cycles instead of Eevee, and didn't use Freestyle. That lineart was traced by hand!
Cycles tends to produce more accurate and vibrant colors. I would've used the built-in de-noiser with Cycles, but Blender kept crashing just before a render was complete! >_< It was less of a headache to render it without the de-noiser and edit it in Krita to smooth over the noise, but there was more trial and error!
The first rendered background for this episode took a few hours to trace the lineart for and to paint over the shading to reduce the noise. As I prepared to de-noise the next background, I noticed a far more time-saving way!
Filter » Enhance » Wavelet Noise Reducer
Only if I noticed this when I was trying to remove the noise from the first background! ^^;
Efficiency tips:
Episode 25 WIP 3
After more than a month in the making, episode 25 is almost finished! The production of this episode was going to be lengthy because it's an entirely new episode, but it took even longer yet since I needed to model several backgrounds.
I can't be sure how much I modeled would be used in the webtoon panels when the backgrounds are resized, so I modeled extra things in case they'd appear. These were a lot of extra steps, but they could be useful later if there'd be panels in the same scene at different angles. It could also be helpful to show more of what the headquarters look like!
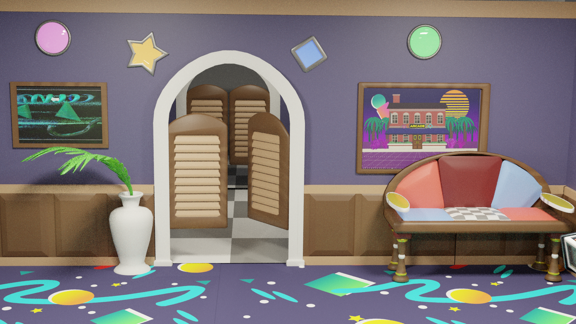
3D modeling was a large upfront investment of time as I was studying and practicing it instead of drawing. Knowing that I'd be slowing down my update schedule worried me, but I thought of the opportunity costs. In the previous comic version of Magical Renegades, I drew complex backgrounds but drawing them at an angle from scratch without the help of 3D modeling was such a pain! TT_TT
Learning 3D modeling would be worth it to save me from this frustration, but how frustrating would the learning process be? Many webcomic and webtoon artists have taken to using 3D models to help them with poses and backgrounds, but I didn't choose the easiest option for that! ^^;
SketchUp Free is one of the easiest free options for architecture so it's recommended a lot. I considered it but I was concerned about its restrictions in its license and whether I should buy the Pro version, or if I have to shut out any chance of ever monetizing if tried, such as doing commissions or allowing revenue from Tapas if I made any backgrounds with the free version instead of SketchUp Pro. Keeping the option on the table would be nice though it's not my main goal, and there's a bit of a fear of missing out.
I'd still recommend it as a helpful tool for someone who needs an easy and free program to design architecture, and isn't concerned about the restrictions.
Blender is far more complex but doesn't have the restrictions. When I started using Blender, I intended to only learn the basics by just learning enough to model backgrounds and props with enough detail to help me with perspective and lighting. I would've drawn over them and added in the color and extra details in another program.
Leaving it at that would've saved me time since the production process was already long without it, but then I considered making 3D renders that could be complete works so I needed to learn more of the tools. Adding color to the backgrounds and props, and learning about properties to make materials that are translucent, glow or are reflective are also useful references for coloring the backgrounds.
Leaving it at that would've saved me time since the production process was already long without it, but then I considered making 3D renders that could be complete works so I needed to learn more of the tools. Adding color to the backgrounds and props, and learning about properties to make materials that are translucent, glow or are reflective are also useful references for coloring the backgrounds.
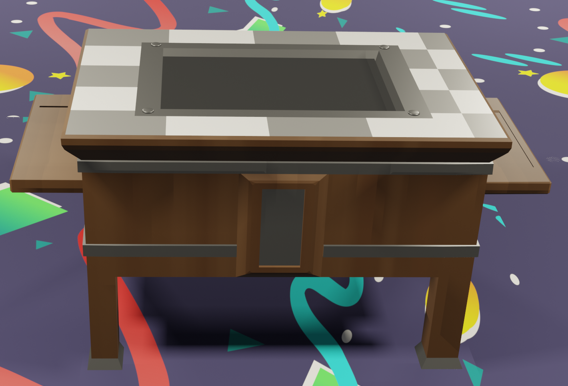
"You mean I could sit down and play these new-fangled games over a cup of tea?" An onlooker likely asked this upon stumbling into the arcade that's *totally* not a disguise for the Magical Renegades headquarters!
This is one of the extra items, a sit-down arcade cabinet built like a table. I'd imagine it'd be modeled after an ornate Victorian-era table, but with arcade parts built into it!
Another challenge when designing this background was combining Victorian-era architecture with Memphis Design! It may still look like a chaotic mess, but there was a method to this! Finding a common element between them helped fuse them, but they're so different from each other! What could they possibly have in common that could make them fit together?
Keeping the tall wooden paneling was a must. It's one of the most recurring design elements associated with Victorian architecture. The rest of the wall often had patterned wallpaper, but that would've been overkill when I chose to model the design of the floor after the designs of arcade floors! Balance is important.
The elements of memphis design has some balance in using simple shapes, solid blocks of color, and using patterns sparingly.
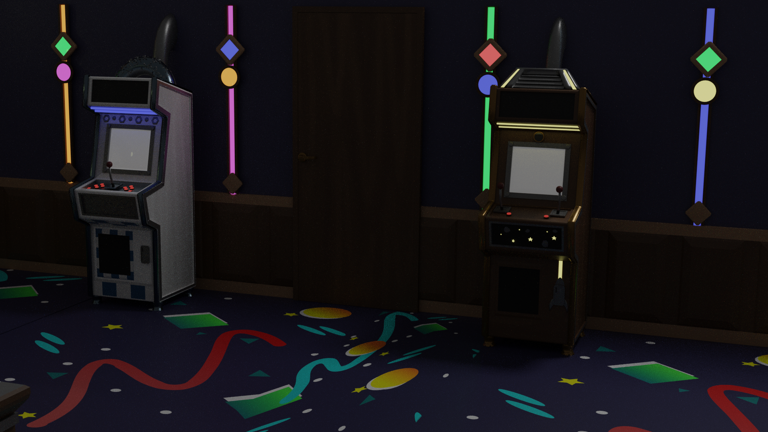
Caption: Section of a wall in the Magical Renegades HQ arcade room. Adjusting the lighting and a few materials shows off the lighting in the decor and on the screens!
The dividers on the wall were based on geometric shapes that are commonly used in Memphis Design, but in wood colors to blend them in with the rest of the wood paneling. They were also a fitting place to put in some neon tubes to blend this 1980's arcade design element!
Episode 25 WIP 2
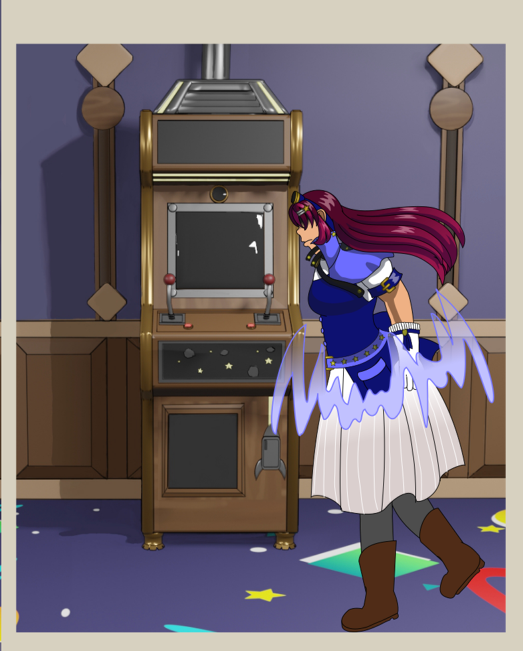
This is the panel from the first episode 25 WIP with the background added to it. So much preparation time on this episode has been spent on some backgrounds in Blender that another WIP is about it! I tried a different method to render them and blend them into the art style because complex items would be very tedious to manually trace!
I'll have more to say in the next WIP, but the architecture in this room is supposed to be a blend of Victorian-era architecture with Memphis Design! The floor pattern was made from scratch and was designed to give a 1980's arcade feel to the room!
The previous background that was modeled in Blender was in the illustration for Travel Logs 3. I intended that render to be close to the final background even though it wouldn't be used directly. I vectored over it to add the line art and replace the soft shading with cel shading to blend it in with the art style. Adding materials and lighting in the render when it was going to be vectored over were still helpful references to show where to put shading, lighting, transparency and reflections.
These renders also didn't need to be exact because I could add missing items and details when I was vectoring over them.
See the Travel Logs 3 WIP from 6 Feb for more details about that process!
Vectoring over that safe and trying to accurately trace over the curves in its shape and shadows was very tedious. While I was modeling the backgrounds for episode 25, I remembered a rendering option that Blender includes that automatically adds line art to renders and can shade them in a cel-shaded style!
Freestyle saved me the time of manually tracing and adding the lighting to blend the backgrounds. These were my first experiment using Freestyle, but I used some trial and error and this part of the Blender manual to adjust the settings. I still needed to manually make some touch-ups to these renders in Krita to blend them in more, but it saved me the effort of having to trace the line art for everything.
The time cost is more upfront with modeling. This method requires me to be exact with everything in the background from the shapes of the items, the materials, lighting and any textures.
My first attempt used the default Freestyle settings other than the line width being thinner, but the soft shading didn't let it blend in with the art style. I attempted to blend it in by painting over the soft shading with solid blocks of color but it was a mess! ^^; Trying a few more different settings helped so much! The shading still needed to be painted over in several parts, but some adjustments to the settings cut down on the effort I needed to spend.
Settings I used:
Through more practice I hope I can be more efficient with this. I had to draw in some of the line art when it didn't render because I didn't know what settings would help render everything I needed.
Manual tracing allows me to not be exact. I don't have to model everything upfront, but everything needs to be manually traced over with vectors to blend them in. This may work better for simpler backgrounds.
Freestyle rendering is far more efficient at generating line art for complex backgrounds, but I still need to learn how to adjust the shading so it will render as cel-shaded so I'd spend less time painting over areas in the backgrounds to blend them in.
The top 3 ways I learned things in Blender:
This episode will focus on the Magical Renegades as they find out about Eminence Danger leaving. Some members who were alluded to in chapters 2 and 4 of Extra! Chronicles will be appearing here now!
Avogadro appeared before in The Scattered Archives in an entry from 1873, but this is his first appearance in Anathema to Commonsense. Between 1873 and 1884, he enlisted in the royal family's military police, but dropped out and left to be one of the co-founders of the Magical Renegades!
Episode 25 WIP 1
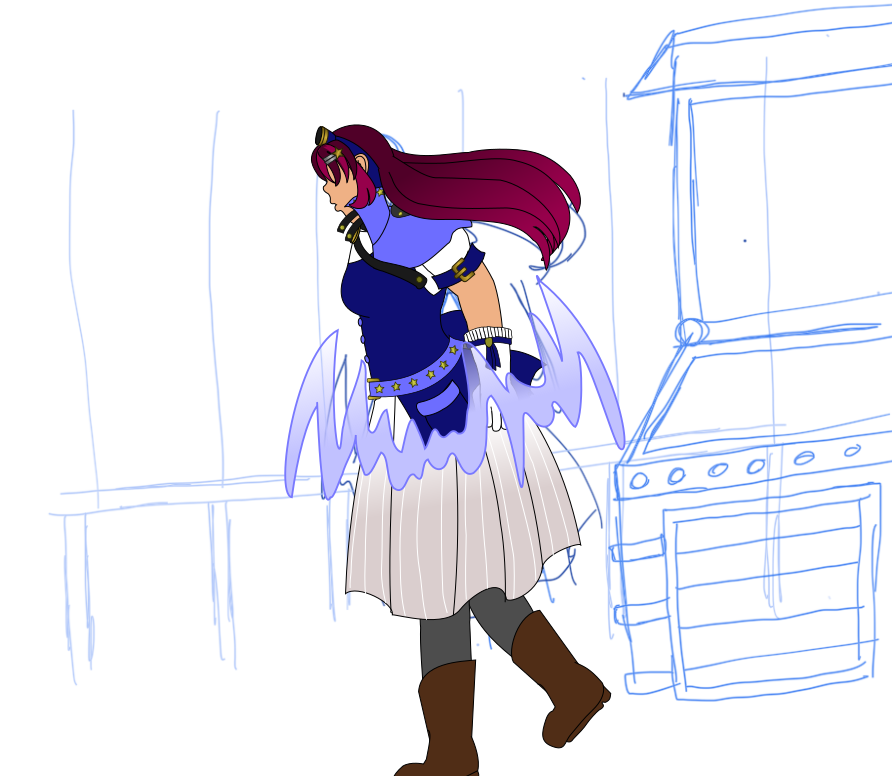
Renegade Liberty powering down just as she walked into the Magical Renegades headquarters. The interior of the headquarters was redesigned to look like a steampunk arcade!
Scenes in this episode will take place in the Magical Renegades headquarters. Three challenges are ahead:
This WIP is about the first challenge and I may get to the others in the next ones. My update schedule is slower than usual with these challenging episodes, and me spending more time than I needed to for a reference image, but I wanted to keep you informed with WIPs.
Redesigning the exterior of the Magical Renegades HQ to look like an arcade building was a challenge. Redesigning the interior look like a steampunk arcade was going to be another longer one, but it could be fun!
Let's get the arcade machine in the room out of the way. It's been the most difficult thing about this episode. I pondered where to place details, and how long it'd take to model them. It gets tedious, but it was another opportunity to put my 3D modeling skills to use.
Ever since I found steampunk, I wanted to design! The first works I saw in the steampunk subculture centered around fashion photoshoots and photos of hardware modification. Making these required skills and resources I didn't have, but I wanted to create. That's where my interest in drawing outfits and steampunk hardware came from. The DIY ethos of this subculture drew me to it as much as the beauty of the designs I saw. Finding an interest could do so much to make one of the parts of drawing that's often dreaded a lot to be more fun. I used to dread drawing architecture, but now I like designing it as much as I like designing characters! Gaining interests in steampunk and art history helped a lot with this!
Me many years ago: Ugh... I'd have to design architecture...
Me now: I *get* to design architecture!
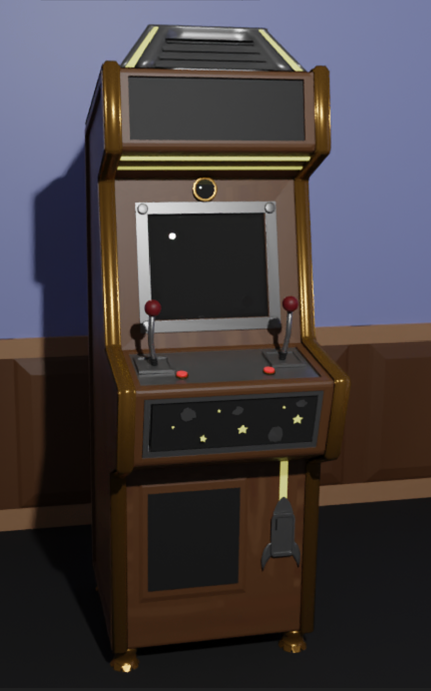
3D model of a steampunk arcade machine. This one is inspired by Asteroids or Space War!
Designing a steampunk arcade machine or two that would be in the background for a few panels still sounded tough, but I broke it down into steps. I took the extra steps 3D modeling it and the architecture to help with the perspective.
I looked at reference images for guidance for what a steampunk arcade machine could look like!
Steampunk arcade machines that have been built: They exist, and are a source of inspiration! I looked for common design elements across the images which helped with where to place design elements.
Modern arcade machines: Their shape was used as the base. In-universe, the Magical Renegades reverse-engineered arcade machines that were brought over, and used their design for the basis of their own.
Old coin-operated machines: They were a good reference because they contain design elements that the Magical Renegades members of the 1880's would've known. I started looking at slot machines when I looked more into what other coin-operated machines existed in that era. The metal top of the cabinet is based on a design element that was common on antique slot machines. The metal decoration that is, not the futuristic glowing lines! :P
While I was researching this, I found that vending machines for nearly everything would be historically accurate! Photos are from the 1920's through the 1960's, but mentions are made of vending machines from and before the 19th century!
"Vintage pictures of bizarre vending machines you never knew existed, 1920-1960" from Rare Historical PhotosI sketched the shape of a modern arcade machine, and tinkered with placing older and steampunk design elements on it. This sketch didn't need to be complete before I started modeling, nor did the details need to match up. They just helped as a starting point because I'm so used to working with 2D I need it to help me work on anything complex in 3D.
The base design of the cabinet was quick and easy to model. The cabinet without any details on it is just one shape. It can be made by creating a flat plane in the side view and extruding it sideways, or carving it from a single rectangular block with a careful use of loop cuts to mark which faces need to be inset, extruded or moved to form the cabinet shape.
I used the first technique, and it's familiar to me across programs! I've used it to model some other things in Blender (and Infini-D), though it's done a bit differently between them. Here's a comparison because I felt like firing up Infini-D again, and it seemed it could be fun to compare them!
After decades of advances in 3D modeling, isn't it helpful that some techniques stay mostly the same? To get to this view in Infini-D, go to Windows >> Layout. I don't know the differences between some of the options yet, but in the Cross Section window, I made the profile of the arcade cabinet. Unlike in Blender, objects default to a preset depth. It can be adjusted by selecting the rails on the side in the Path Right view, which can be opened from the menu.
Objects can be beveled by selecting Model >> Bevel in the standard mode, but when it wasn't active, I needed to return to the edit mode and round the corners.
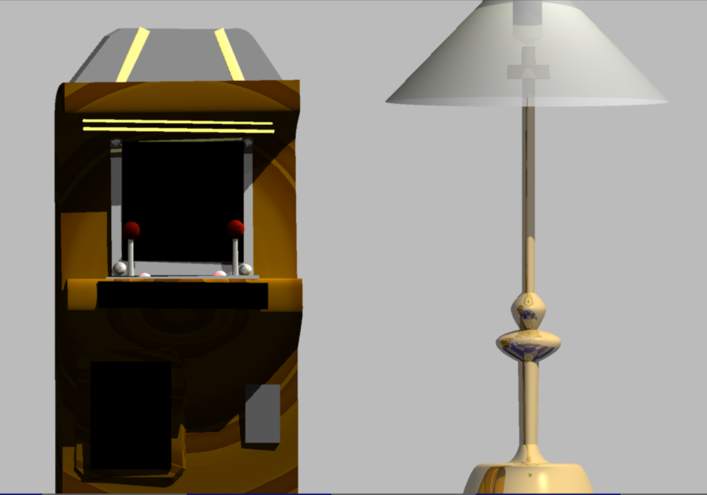
I spent a lot more time designing arcade cabinets as a background prop than I probably should have, but it was fun and I had something to write about to keep viewers updated!
Behind the scenes: Episode 24 and Travel Logs 3 WIPs
This is a WIP of chapter 3 of the Travel Logs alongside the 3D render of the background.
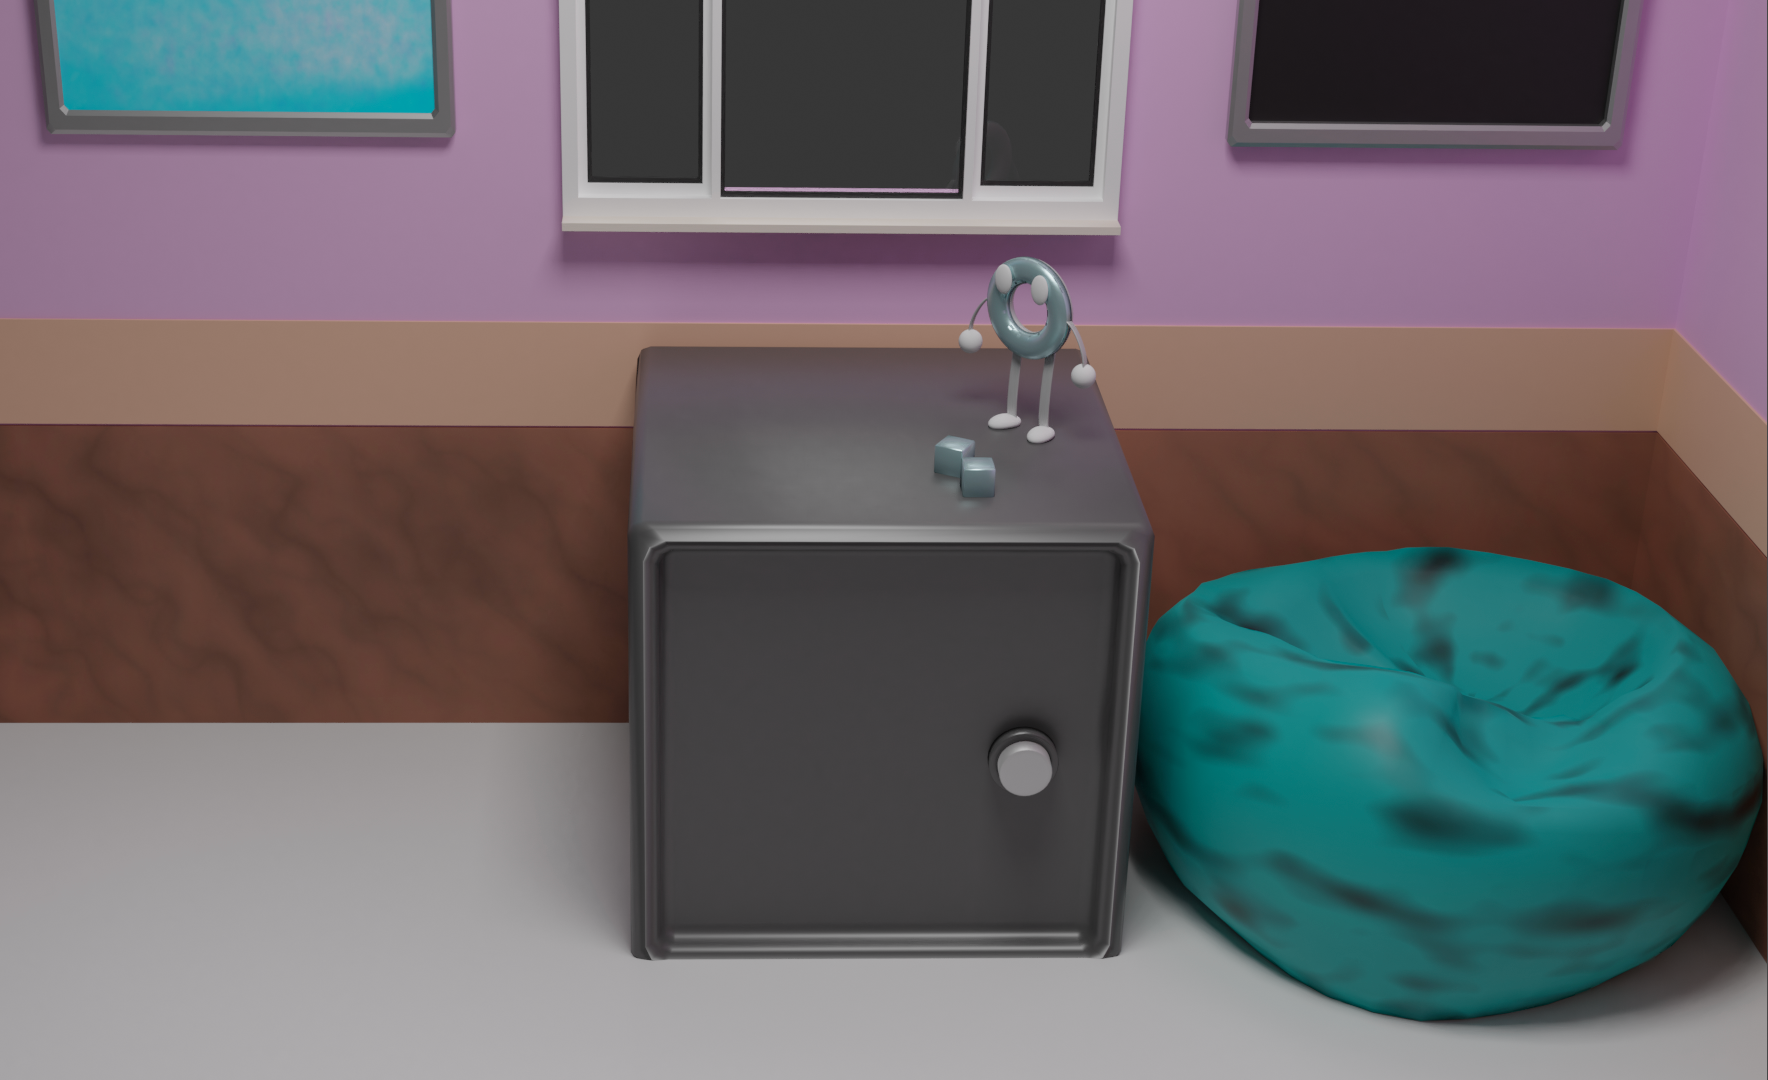
I used Blender to model the background and props to help with the perspective and lighting. Putting in textures sinks extra time into them when the 3D will just be vectored over, but it helps practice modeling and texturing for later 3D works!
The action figure is of a joke character that's a famous video game character in-universe!
After posting that WIP side by side with the original render below, I noticed that the Blender model of his is... off-model :')
That'll be corrected in the final version.
His name is Ferris the Donut Thief, and I created him for a joke OC challenge last year! XD
I intend for him to be available either under a CC-BY or CC0 license.
The challenge was to think up and draw a joke OC in a few seconds, but it spun off into another potential idea! I 3D modeled him to show off part of the pun in his name and concept. His design reminded me of 90's video game mascots so I imagined Ferris could've been the star of a retro platformer game!
Designs of some of the most iconic videogame characters came from working with hardware limitations, or showing off the capabilities of the hardware they debuted on. The hypothetical idea I had for a game would harken back to the mid- to late 90's era of 3D gaming. A character with a metallic design would easily show off the hardware's capabilities to render reflections in cutscenes, if not real-time gameplay.
I'd want to recapture the feelings of wonder of seeing a 3D game for the first time.

Another WIP of episode 24 of Anathema to Commonsense. These panels show Renegade Eminence Danger and Renegade Liberty teleporting back to the Magical Renegades headquarters, which got a redesign in the new timeline!
The only other time the headquarters were seen was in episode 2, in the second timeline as a plain brick building. It was redesigned to look like an arcade to keep it hiding in plain sight to curious people that stumble across it, and draw in some revenue. It might not be enough to cover the costs of the redesign, but Christina and Avogadro led the efforts to reverse engineer technology from "the future" because they're fascinated with it. This is more for the art and science! XD
Behind the scenes: Episode 24
This is an adaptation of a post from Record Compendium.The first of a behind the scenes production about the extra steps of episode 24. The Behind the Scenes category isn't new here, but it's new on Record Compendium for a post category about the production process! It's in place to separate these non-lore posts from the rest of the other posts.
Since this episode will take a lot longer to complete for the amount of panels that need to be drawn instead of just being revamped, I'll be posting periodic updates about the process, which could be compiled into an article later.
I'm planning to focus a lot more on written material this year that I'll clear out these ideas that were stuck on the back burner. It'll feel good to get them done.
"...I'm not sure if I could do those (art summaries) without cheating for some of the months because the episodes are still adaptations of comic pages. It'll be a while before the episodes would be completely new!" -2021 in Review
So much for that! XD
A team effort to stop those enemies caused collateral damage? This wasn't commented on-panel!
This scene from the previous comic needed to be expanded on because Renegade Liberty stayed long enough to see the king's and queen's reaction to finding that their yard was destroyed in the battle in episode 23.
In the comic, she suddenly disappeared just as Eminence Danger announced that she was going to defect and form a new group, and offered for Liberty to join it. This was going to be treated as a mystery, because Liberty's whereabouts were unknown since then. A later chapter was going to show Susana's whereabouts and disillusionment in the new timeline. The fame she accrued as Susana and as Renegade Liberty could've gotten to her. :-(
Liberty suddenly disappearing didn't make sense in the comic because she didn't have the ability to teleport. Eminence Danger and Midnight Conductor do because they're time travelers.
From having Liberty stay long enough to see the king and queen, I needed an explanation for why she needed to leave early. Her weapon was about to run out of power, and if it completely ran out, she'd revert back to her normal form in front of them. While I jotted down a script for this new scene, I needed to consider more details for the next scene:
The details that I expanded on spilled into episode 25, which will be entirely new!